RS3100007 | STEP 4 | |
| ||
| Connect drain hose to drain | |
Rev. | standpipe | |
adapter | ||
| ||
0 | (avoid | |
| ||
| seal) |
36"
(min)
beaded
STANDPIPE
60" max 36" min
beaded
TUB
beaded
WALL UNIT
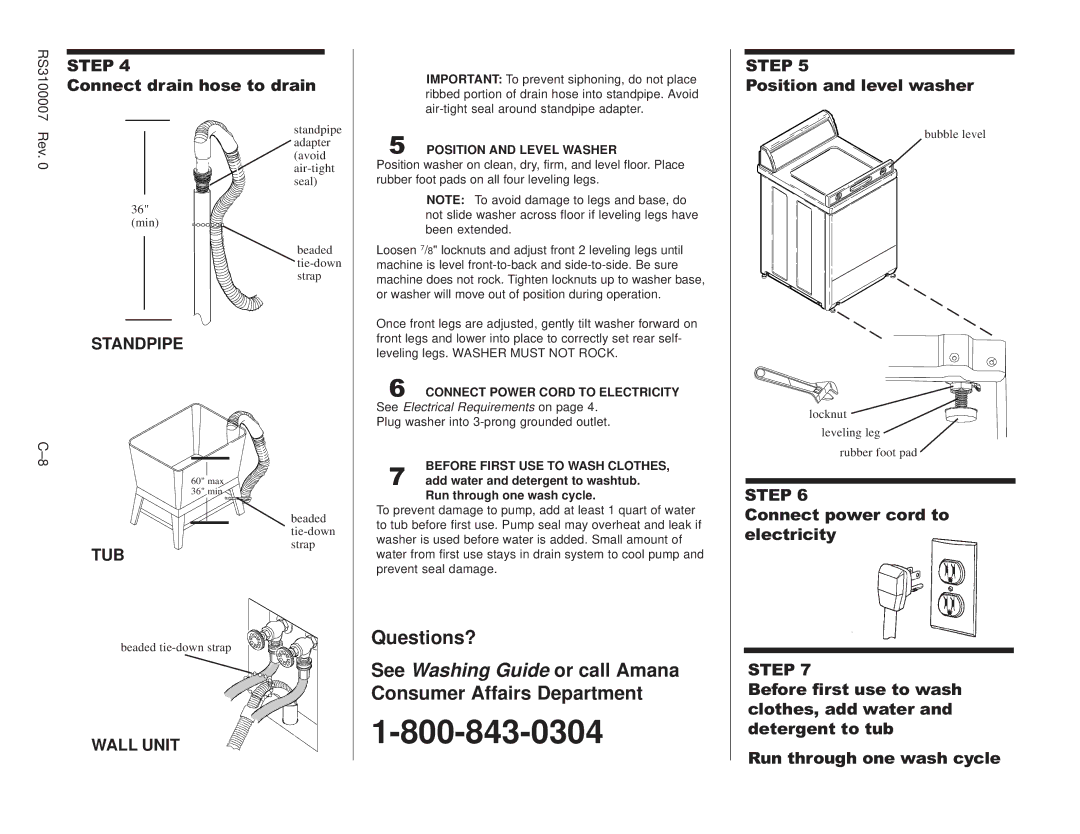
IMPORTANT: To prevent siphoning, do not place ribbed portion of drain hose into standpipe. Avoid
5POSITION AND LEVEL WASHER
Position washer on clean, dry, firm, and level floor. Place rubber foot pads on all four leveling legs.
NOTE: To avoid damage to legs and base, do not slide washer across floor if leveling legs have been extended.
Loosen 7/8" locknuts and adjust front 2 leveling legs until machine is level
Once front legs are adjusted, gently tilt washer forward on front legs and lower into place to correctly set rear self- leveling legs. WASHER MUST NOT ROCK.
6CONNECT POWER CORD TO ELECTRICITY See Electrical Requirements on page 4.
Plug washer into 3-prong grounded outlet.
7add water and detergent to washtub. Run through one wash cycle.BEFORE FIRST USE TO WASH CLOTHES,
To prevent damage to pump, add at least 1 quart of water to tub before first use. Pump seal may overheat and leak if washer is used before water is added. Small amount of water from first use stays in drain system to cool pump and prevent seal damage.
Questions?
See Washing Guide or call Amana Consumer Affairs Department
STEP 5
Position and level washer
bubble level
locknut
leveling leg
rubber foot pad
STEP 6
Connect power cord to electricity
STEP 7
Before first use to wash clothes, add water and detergent to tub
Run through one wash cycle
