Disassembly Procedures
!WARNING
To avoid risk of electrical shock, personal injury, or death, disconnect power to unit before servicing.
Service Access Panel
NOTE: Screws located at bottom edge of service access panel do not have to be removed as the holes in service access panel are slotted on most models. Earlier models require removal of bottom screws.
NOTE: Top edge of service access panel is held in place by two spring clips located on bottom flange of front panel.
1.Insert putty knife between service access panel top and bottom edge of front panel (approximately three inches in on each side).
2.Push in on putty knife and at the same time pull top edge of service access panel away from front of washer. Repeat for opposite side.
3.Lift service access panel upward off screws and set panel aside.
4.Reverse procedure to reassemble.
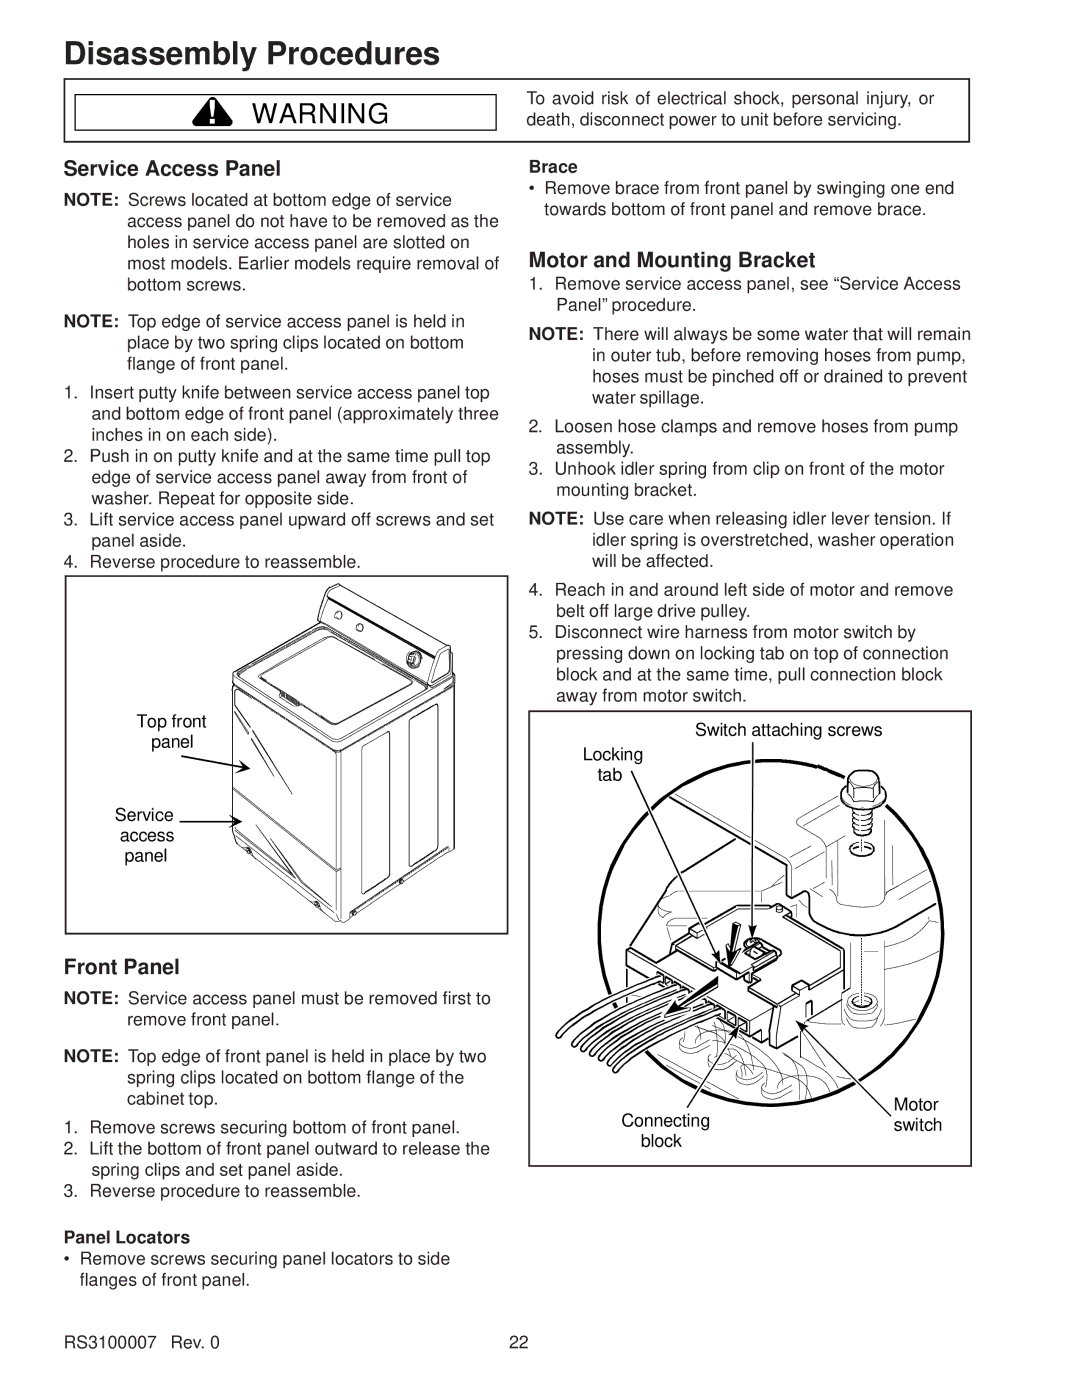
Top front panel
Service access panel
Front Panel
NOTE: Service access panel must be removed first to remove front panel.
NOTE: Top edge of front panel is held in place by two spring clips located on bottom flange of the cabinet top.
1.Remove screws securing bottom of front panel.
2.Lift the bottom of front panel outward to release the spring clips and set panel aside.
3.Reverse procedure to reassemble.
Panel Locators
•Remove screws securing panel locators to side flanges of front panel.
Brace
•Remove brace from front panel by swinging one end towards bottom of front panel and remove brace.
Motor and Mounting Bracket
1.Remove service access panel, see “Service Access Panel” procedure.
NOTE: There will always be some water that will remain in outer tub, before removing hoses from pump, hoses must be pinched off or drained to prevent water spillage.
2.Loosen hose clamps and remove hoses from pump assembly.
3.Unhook idler spring from clip on front of the motor mounting bracket.
NOTE: Use care when releasing idler lever tension. If idler spring is overstretched, washer operation will be affected.
4.Reach in and around left side of motor and remove belt off large drive pulley.
5.Disconnect wire harness from motor switch by pressing down on locking tab on top of connection block and at the same time, pull connection block away from motor switch.
Switch attaching screws | |
Locking |
|
tab |
|
Connecting | Motor |
switch | |
block |
|
RS3100007 Rev. 0 | 22 |