Disassembly Procedures
!WARNING
To avoid risk of electrical shock, personal injury, or death, disconnect power to unit before servicing.
NOTE: When reference is made to directions (right or left) in this manual, it is from operator’s position facing front of washer.
NOTE: To avoid damaging or scratching the surface a soft cloth should be placed over the top of the unit.
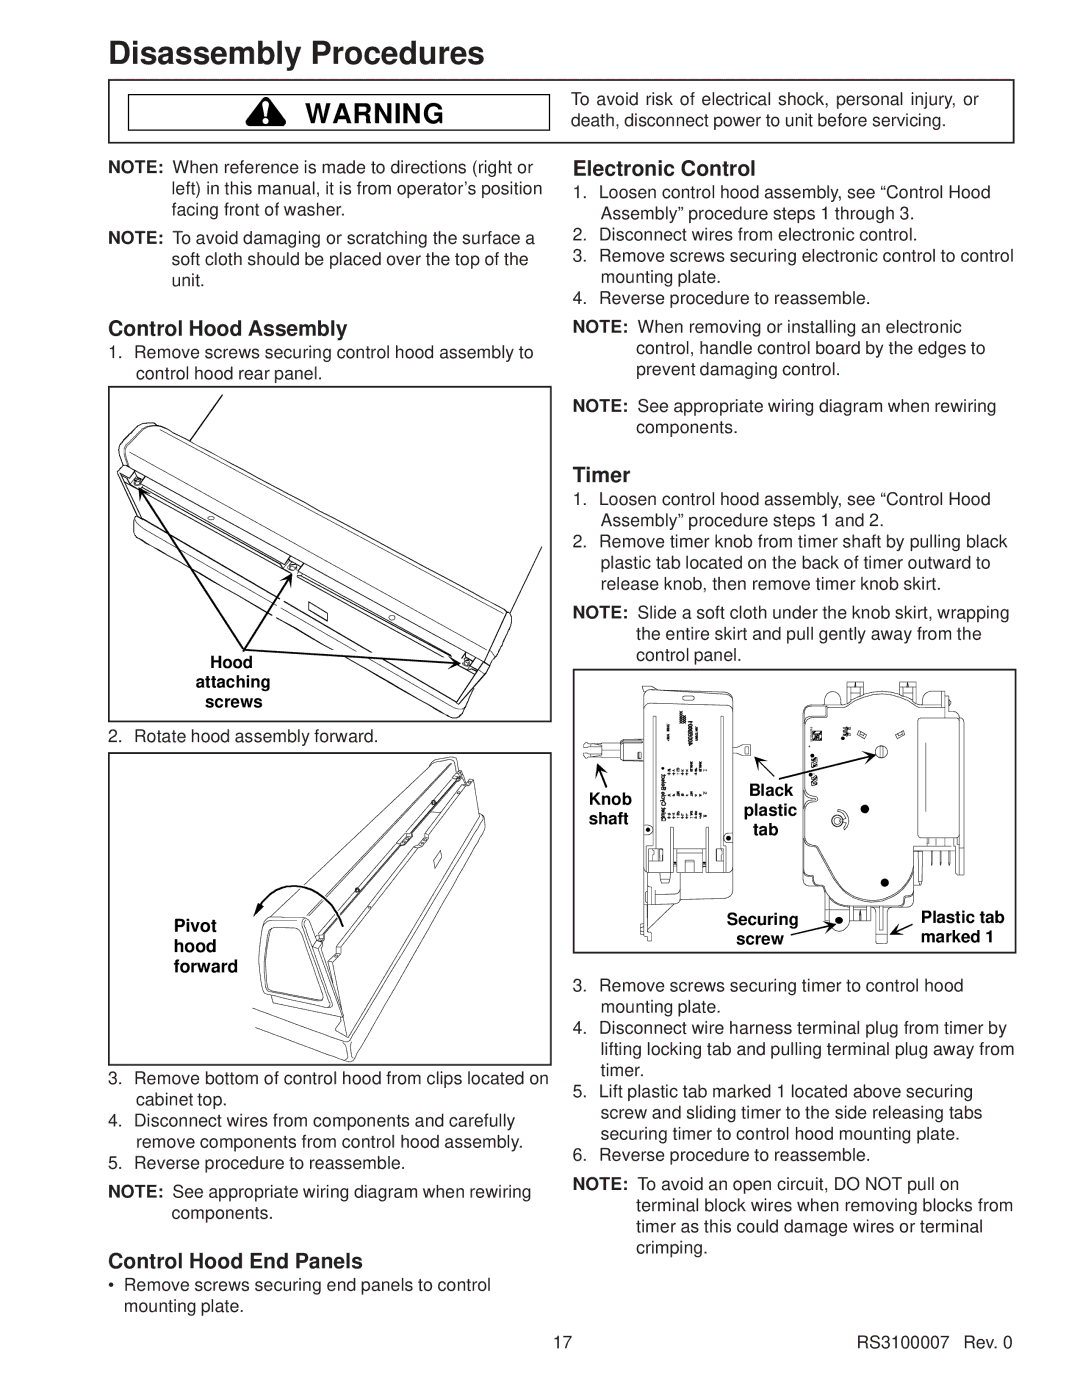
Control Hood Assembly
1.Remove screws securing control hood assembly to control hood rear panel.
Hood |
attaching |
screws |
2. Rotate hood assembly forward.
Pivot hood forward
3.Remove bottom of control hood from clips located on cabinet top.
4.Disconnect wires from components and carefully remove components from control hood assembly.
5.Reverse procedure to reassemble.
NOTE: See appropriate wiring diagram when rewiring components.
Control Hood End Panels
•Remove screws securing end panels to control mounting plate.
Electronic Control
1.Loosen control hood assembly, see “Control Hood Assembly” procedure steps 1 through 3.
2.Disconnect wires from electronic control.
3.Remove screws securing electronic control to control mounting plate.
4.Reverse procedure to reassemble.
NOTE: When removing or installing an electronic control, handle control board by the edges to prevent damaging control.
NOTE: See appropriate wiring diagram when rewiring components.
Timer
1.Loosen control hood assembly, see “Control Hood Assembly” procedure steps 1 and 2.
2.Remove timer knob from timer shaft by pulling black plastic tab located on the back of timer outward to release knob, then remove timer knob skirt.
NOTE: Slide a soft cloth under the knob skirt, wrapping the entire skirt and pull gently away from the control panel.
| EMERSON | R |
| R |
|
| C R |
|
Knob | Black |
|
plastic |
| |
shaft |
| |
tab |
| |
|
| |
| Securing | Plastic tab |
| screw | marked 1 |
3.Remove screws securing timer to control hood mounting plate.
4.Disconnect wire harness terminal plug from timer by lifting locking tab and pulling terminal plug away from timer.
5.Lift plastic tab marked 1 located above securing screw and sliding timer to the side releasing tabs securing timer to control hood mounting plate.
6.Reverse procedure to reassemble.
NOTE: To avoid an open circuit, DO NOT pull on terminal block wires when removing blocks from timer as this could damage wires or terminal crimping.
17 | RS3100007 Rev. 0 |