Rack Assembly
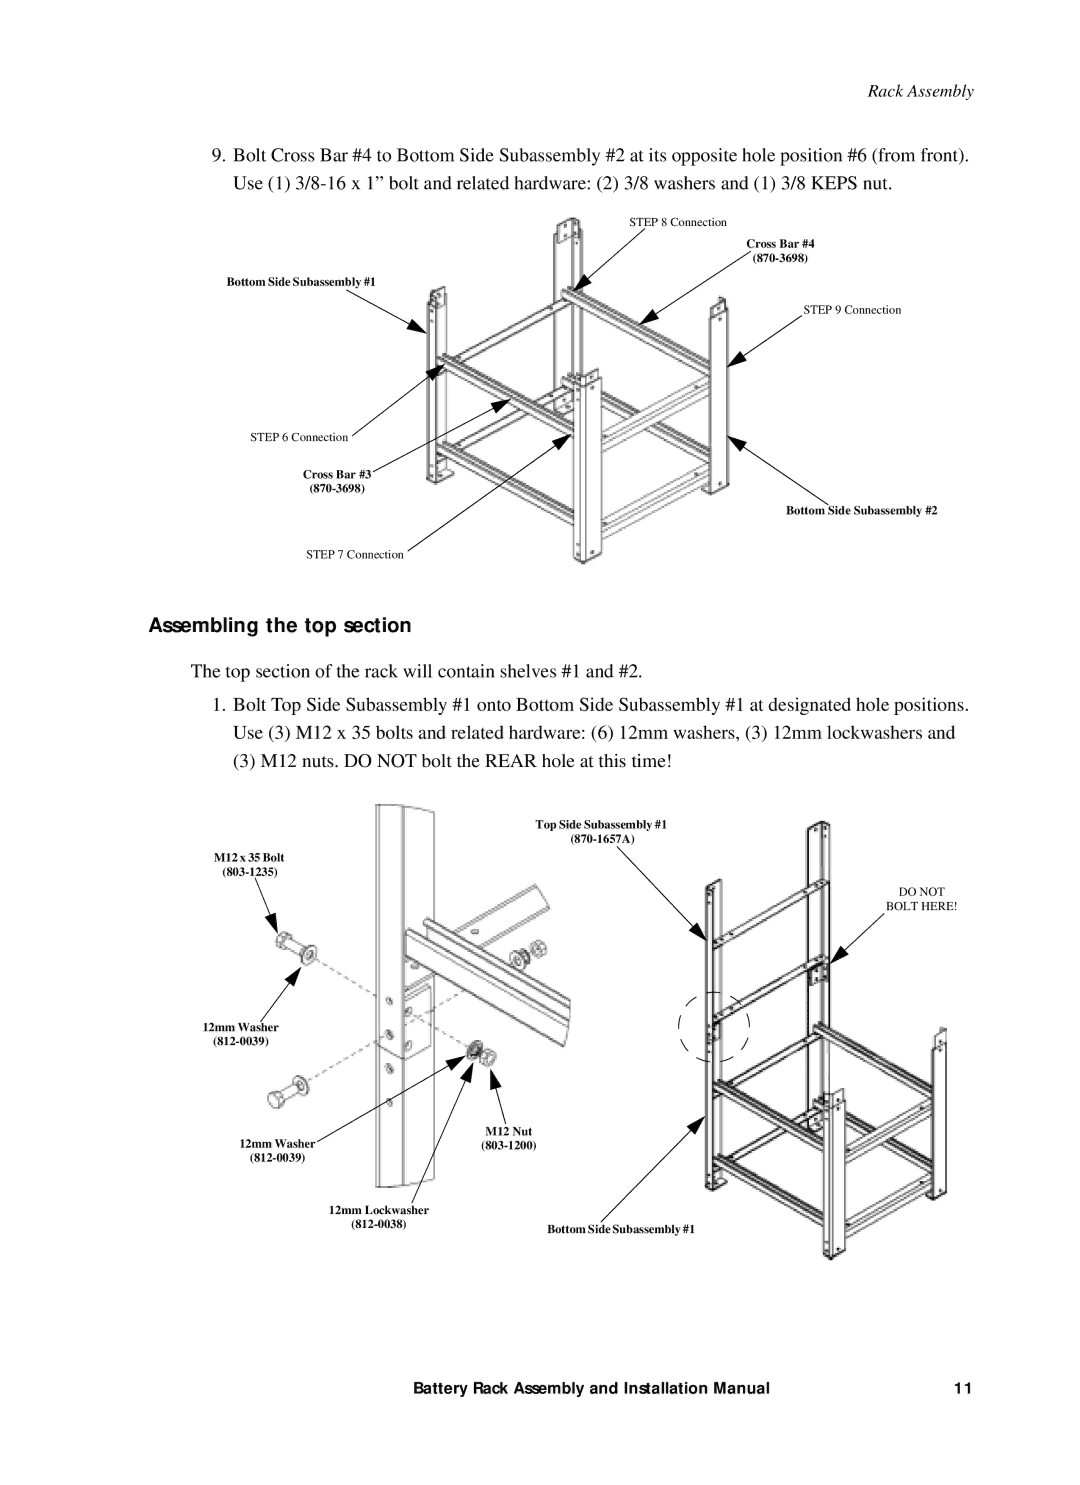
9.Bolt Cross Bar #4 to Bottom Side Subassembly #2 at its opposite hole position #6 (from front). Use (1)
STEP 8 Connection
Cross Bar #4
Bottom Side Subassembly #1
STEP 9 Connection
STEP 6 Connection
Cross Bar #3
Bottom Side Subassembly #2
STEP 7 Connection
Assembling the top section
The top section of the rack will contain shelves #1 and #2.
1.Bolt Top Side Subassembly #1 onto Bottom Side Subassembly #1 at designated hole positions. Use (3) M12 x 35 bolts and related hardware: (6) 12mm washers, (3) 12mm lockwashers and
(3) M12 nuts. DO NOT bolt the REAR hole at this time!
Top Side Subassembly #1
M12 x 35 Bolt
DO NOT
BOLT HERE!
12mm Washer
M12 Nut
12mm Washer(803-1200)
12mm Lockwasher |
|
Bottom Side Subassembly #1 | |
|
Battery Rack Assembly and Installation Manual | 11 |