Rack Assembly
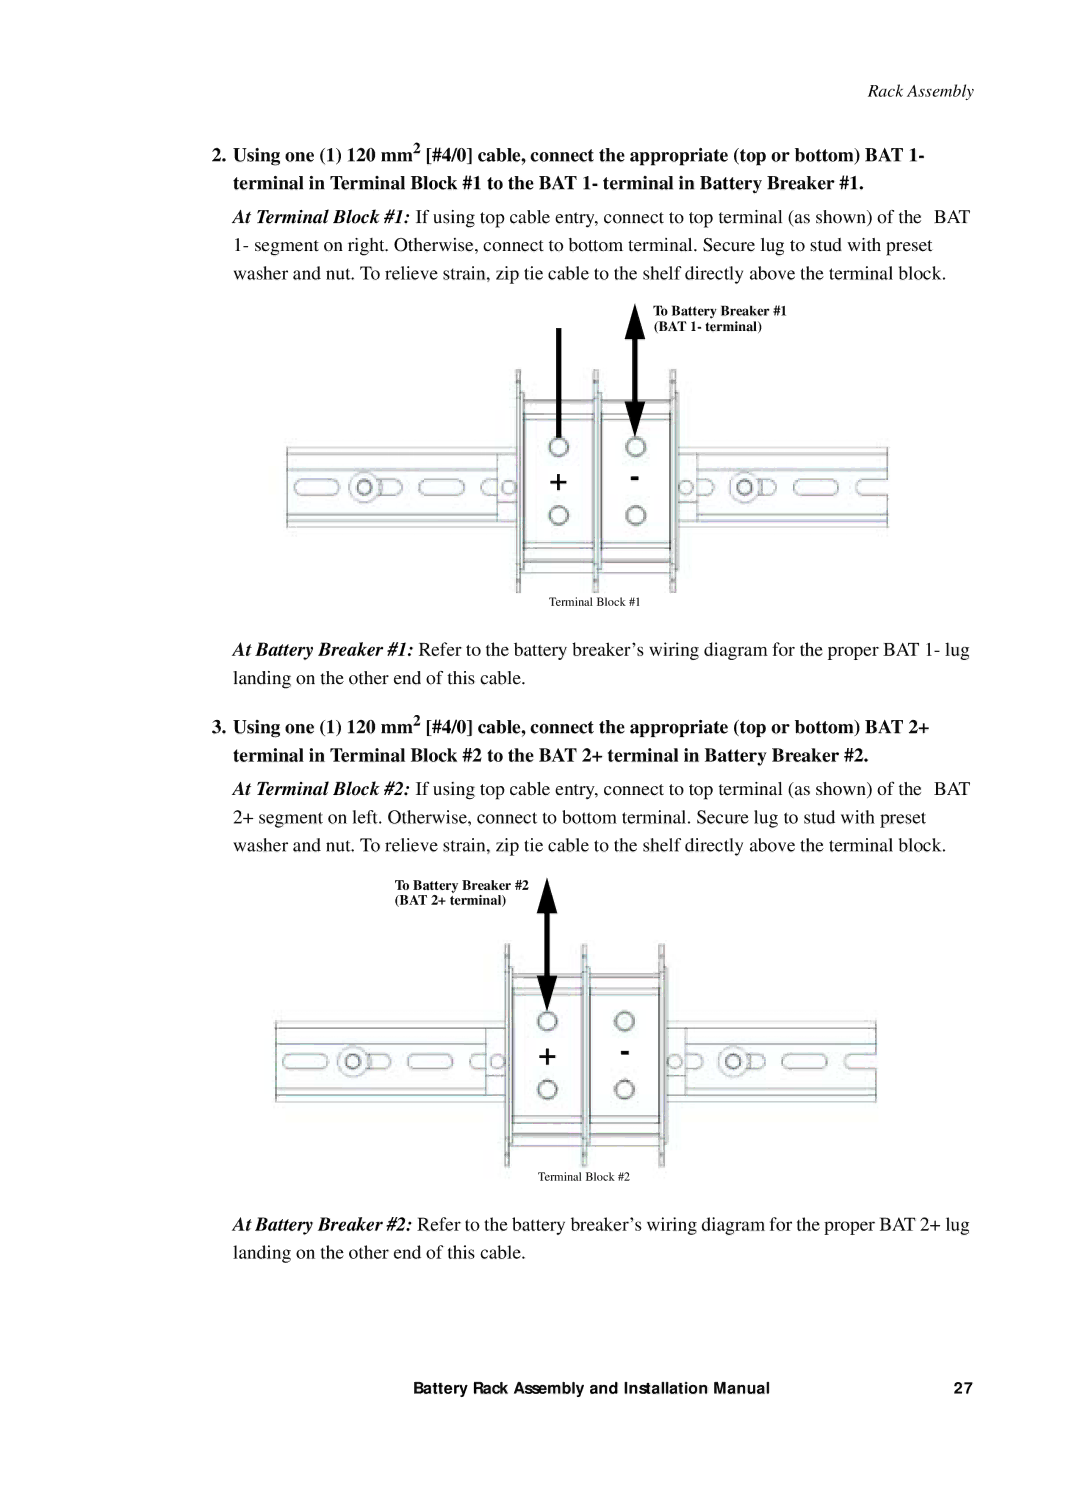
2.Using one (1) 120 mm2 [#4/0] cable, connect the appropriate (top or bottom) BAT 1- terminal in Terminal Block #1 to the BAT 1- terminal in Battery Breaker #1.
At Terminal Block #1: If using top cable entry, connect to top terminal (as shown) of the BAT 1- segment on right. Otherwise, connect to bottom terminal. Secure lug to stud with preset washer and nut. To relieve strain, zip tie cable to the shelf directly above the terminal block.
To Battery Breaker #1 (BAT 1- terminal)
+-
Terminal Block #1
At Battery Breaker #1: Refer to the battery breaker’s wiring diagram for the proper BAT 1- lug landing on the other end of this cable.
3.Using one (1) 120 mm2 [#4/0] cable, connect the appropriate (top or bottom) BAT 2+ terminal in Terminal Block #2 to the BAT 2+ terminal in Battery Breaker #2.
At Terminal Block #2: If using top cable entry, connect to top terminal (as shown) of the BAT 2+ segment on left. Otherwise, connect to bottom terminal. Secure lug to stud with preset washer and nut. To relieve strain, zip tie cable to the shelf directly above the terminal block.
To Battery Breaker #2 (BAT 2+ terminal)
+-
Terminal Block #2
At Battery Breaker #2: Refer to the battery breaker’s wiring diagram for the proper BAT 2+ lug landing on the other end of this cable.
Battery Rack Assembly and Installation Manual | 27 |