Rack Assembly
Positioning rails on shelves
Apply your Battery Type (Power or Fiamm) to the Rail Spacing Matrix below to determine initial positioning of rails. Take into consideration that this information represents “suggested” starting points for placing rails. Make adjustments as necessary.
Battery | Wiring | Rails/Shelf | Left Corner Post | Space Between | Center Space | |||
Type | Style | to 1st Rail | Facing Rails | |||||
|
|
|
|
|
|
|
|
|
|
|
| mm | in | mm | in | mm | in |
|
|
|
|
|
|
|
|
|
Power | E | 4 | 50 | 2.00 | 345 | 13.50 | 235 | 9.25 |
Fiamm | E | 4 | 50 | 2.00 | 405 | 16.00 | 110 | 4.25 |
|
|
|
|
|
|
|
|
|
Addressing the bottom shelf
To maintain structural integrity, batteries are loaded from
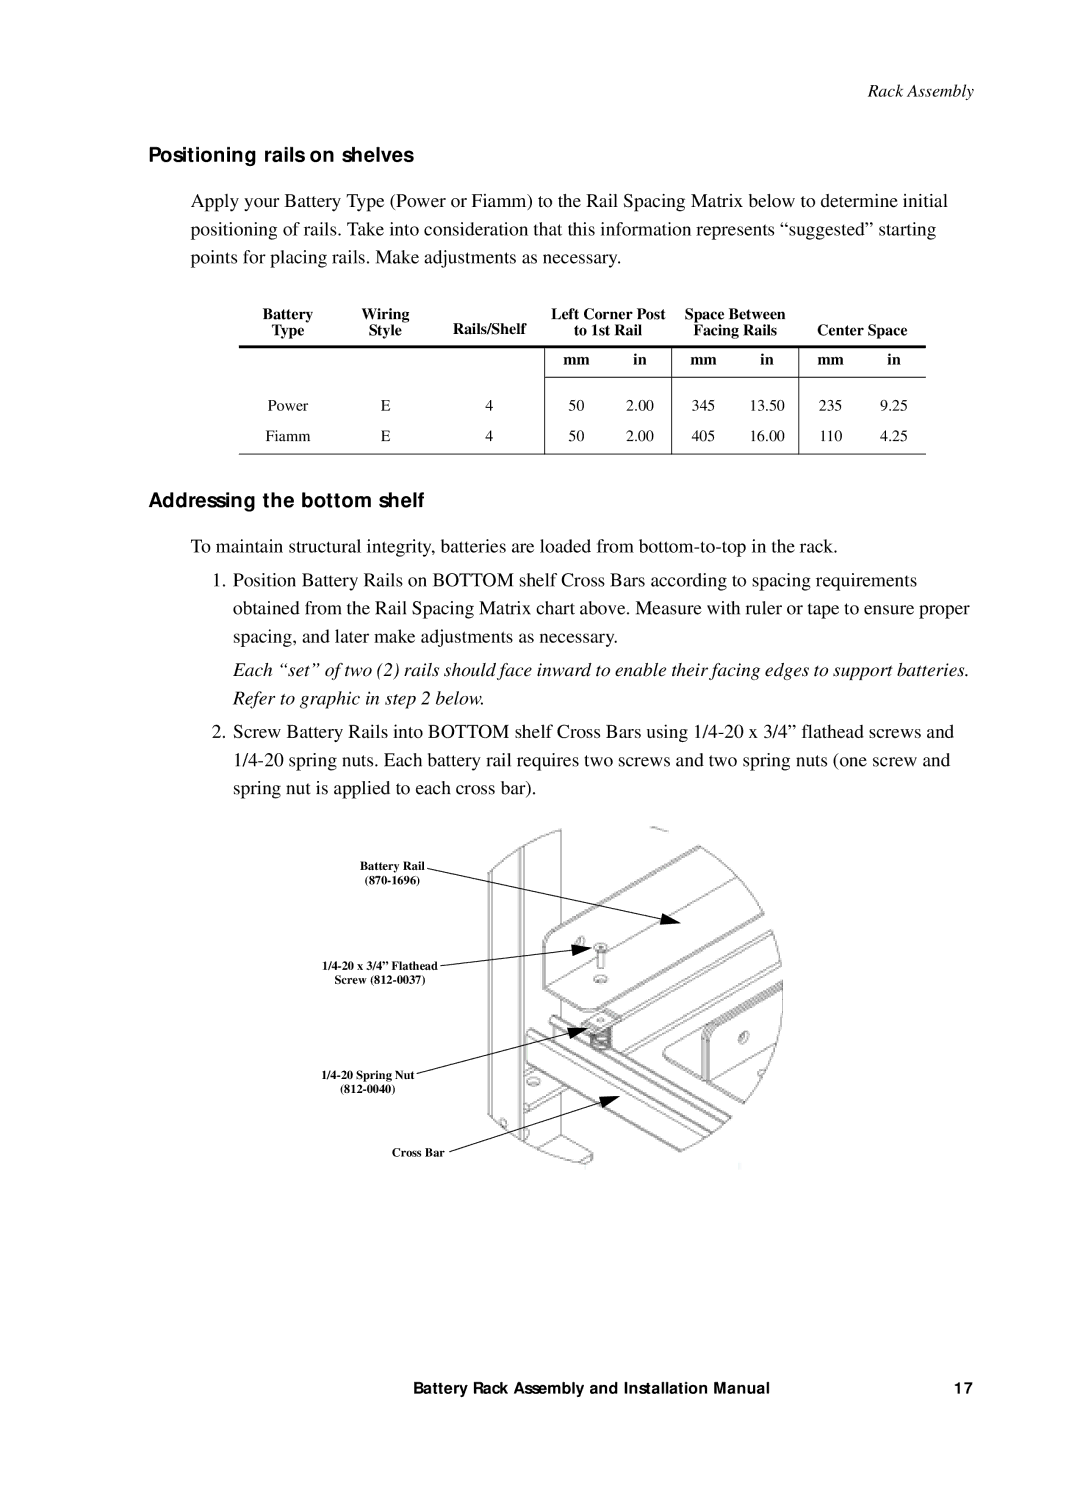
1.Position Battery Rails on BOTTOM shelf Cross Bars according to spacing requirements obtained from the Rail Spacing Matrix chart above. Measure with ruler or tape to ensure proper spacing, and later make adjustments as necessary.
Each “set” of two (2) rails should face inward to enable their facing edges to support batteries. Refer to graphic in step 2 below.
2.Screw Battery Rails into BOTTOM shelf Cross Bars using
Battery Rail
![]()
Screw
Cross Bar
Battery Rack Assembly and Installation Manual | 17 |