Rack Assembly
Anchoring the rack (optional)
For added stability, any or all of the racks can optionally be bolted to a concrete floor.
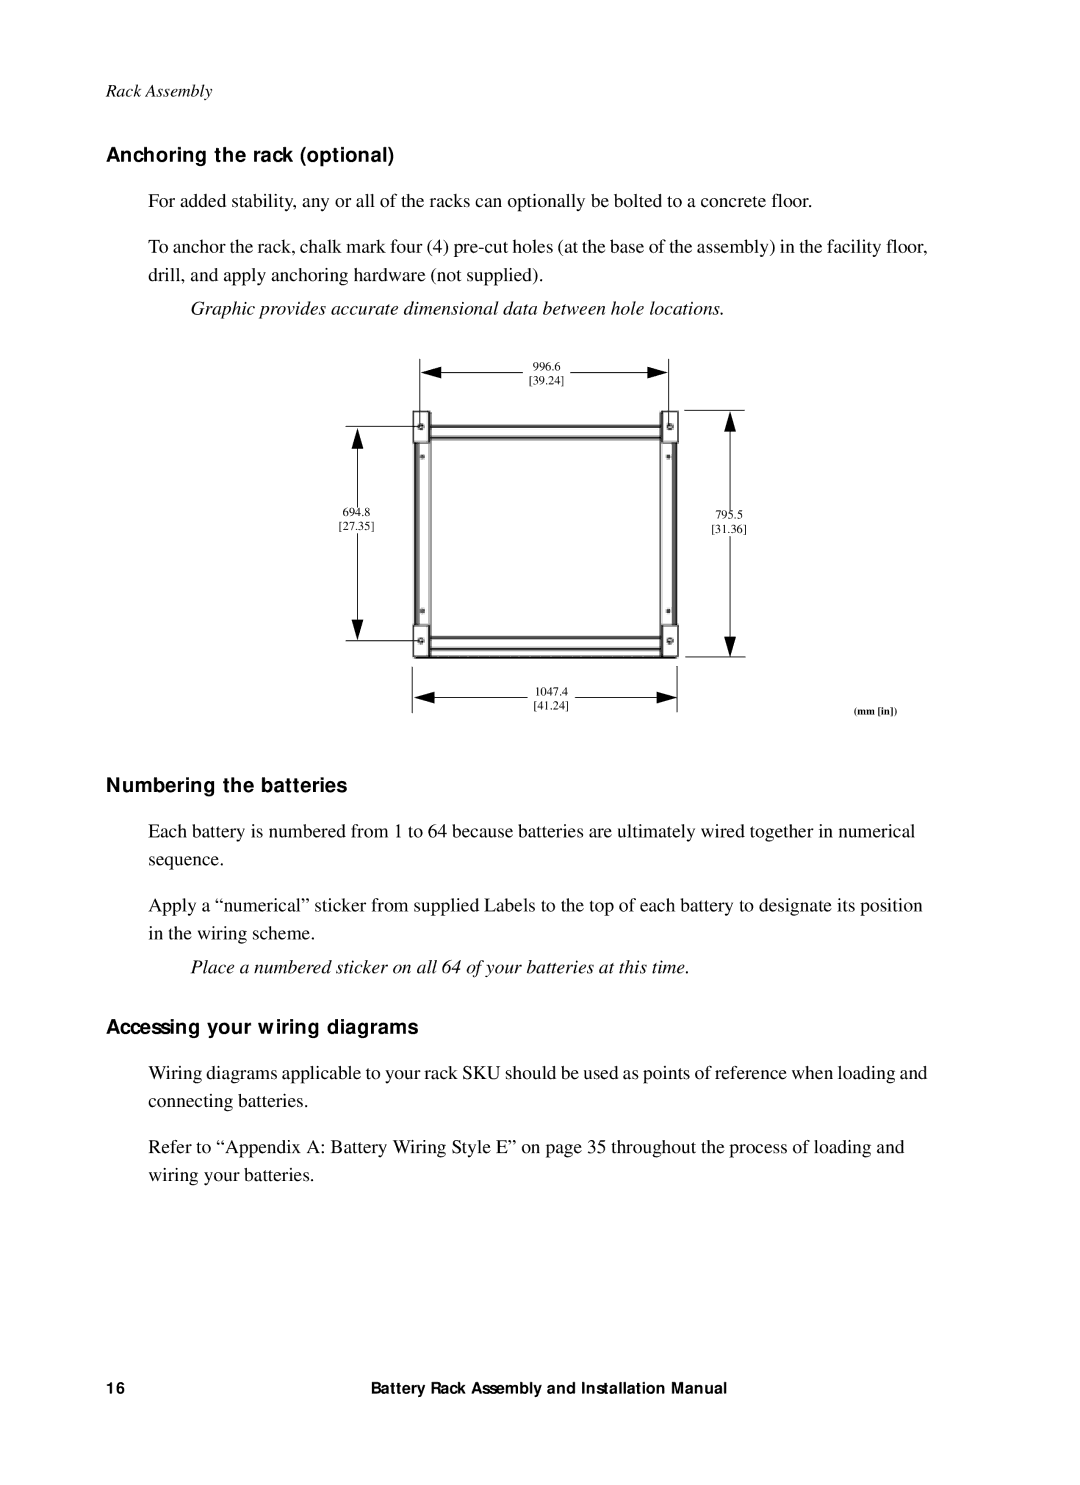
To anchor the rack, chalk mark four (4)
Graphic provides accurate dimensional data between hole locations.
996.6
[39.24]
694.8
[27.35]
1047.4
[41.24]
795.5
[31.36]
(mm [in])
Numbering the batteries
Each battery is numbered from 1 to 64 because batteries are ultimately wired together in numerical sequence.
Apply a “numerical” sticker from supplied Labels to the top of each battery to designate its position in the wiring scheme.
Place a numbered sticker on all 64 of your batteries at this time.
Accessing your wiring diagrams
Wiring diagrams applicable to your rack SKU should be used as points of reference when loading and connecting batteries.
Refer to “Appendix A: Battery Wiring Style E” on page 35 throughout the process of loading and wiring your batteries.
16 | Battery Rack Assembly and Installation Manual |