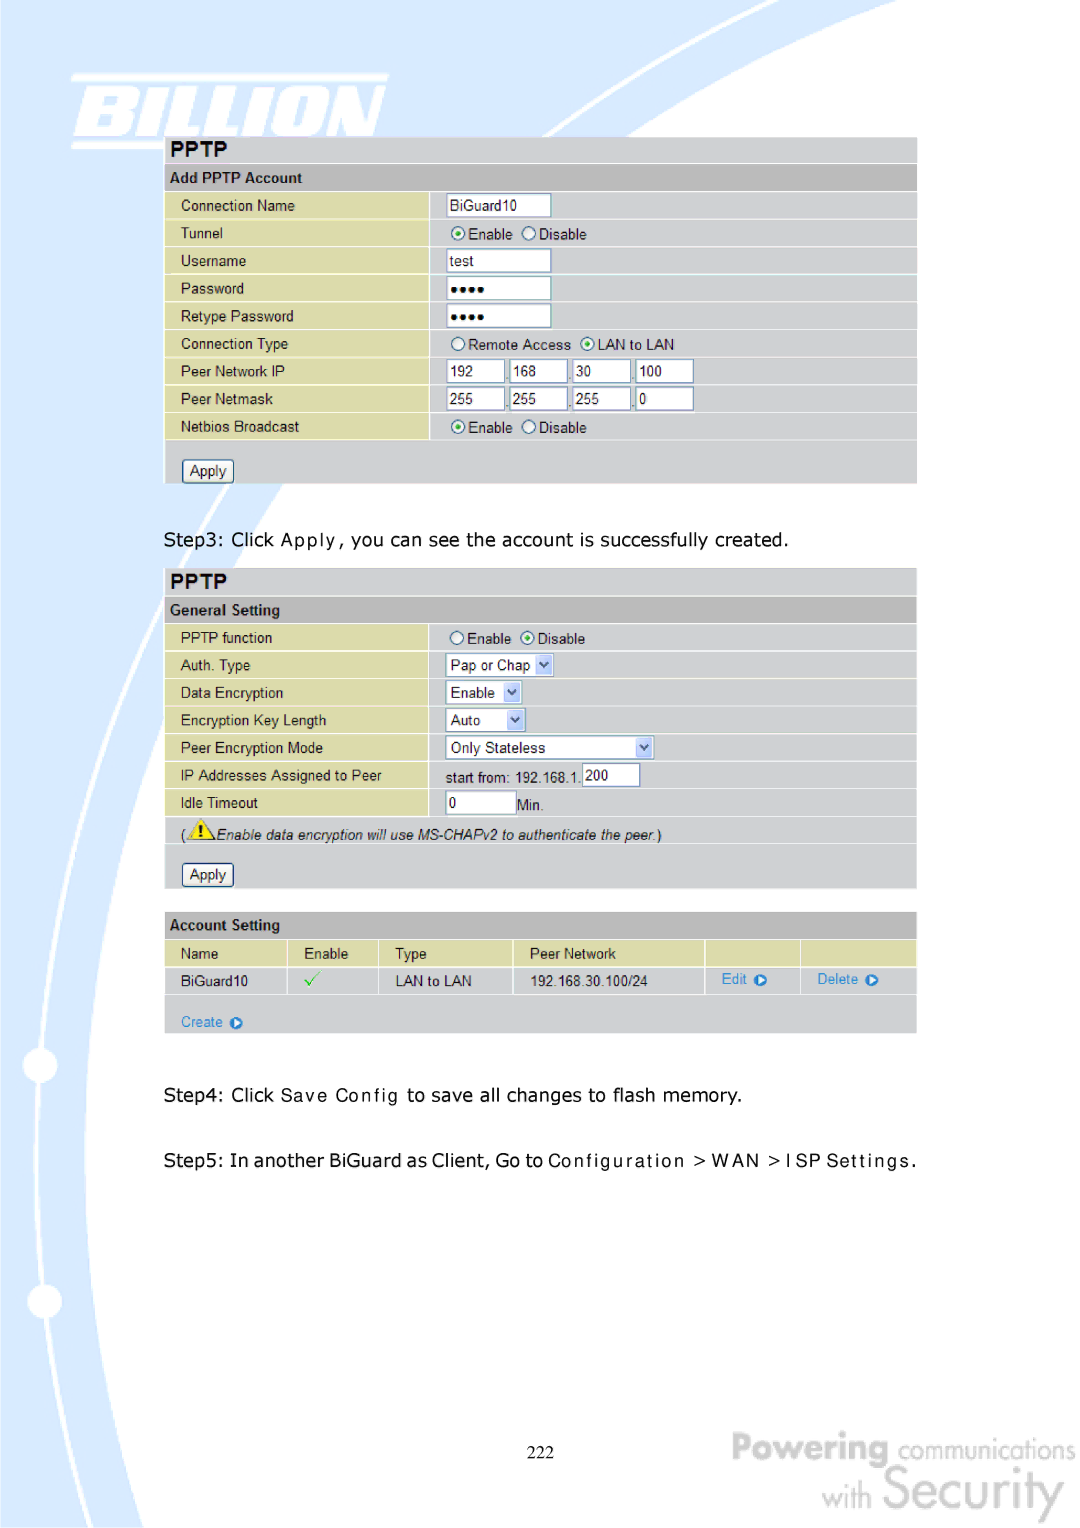
Step3: Click Apply, you can see the account is successfully created.
Step4: Click Save Config to save all changes to flash memory.
Step5: In another BiGuard as Client, Go to Configuration > WAN > ISP Settings.
Step3: Click Apply, you can see the account is successfully created.
Step4: Click Save Config to save all changes to flash memory.
Step5: In another BiGuard as Client, Go to Configuration > WAN > ISP Settings.