We want to configure communication ports, so click on the Ports button.
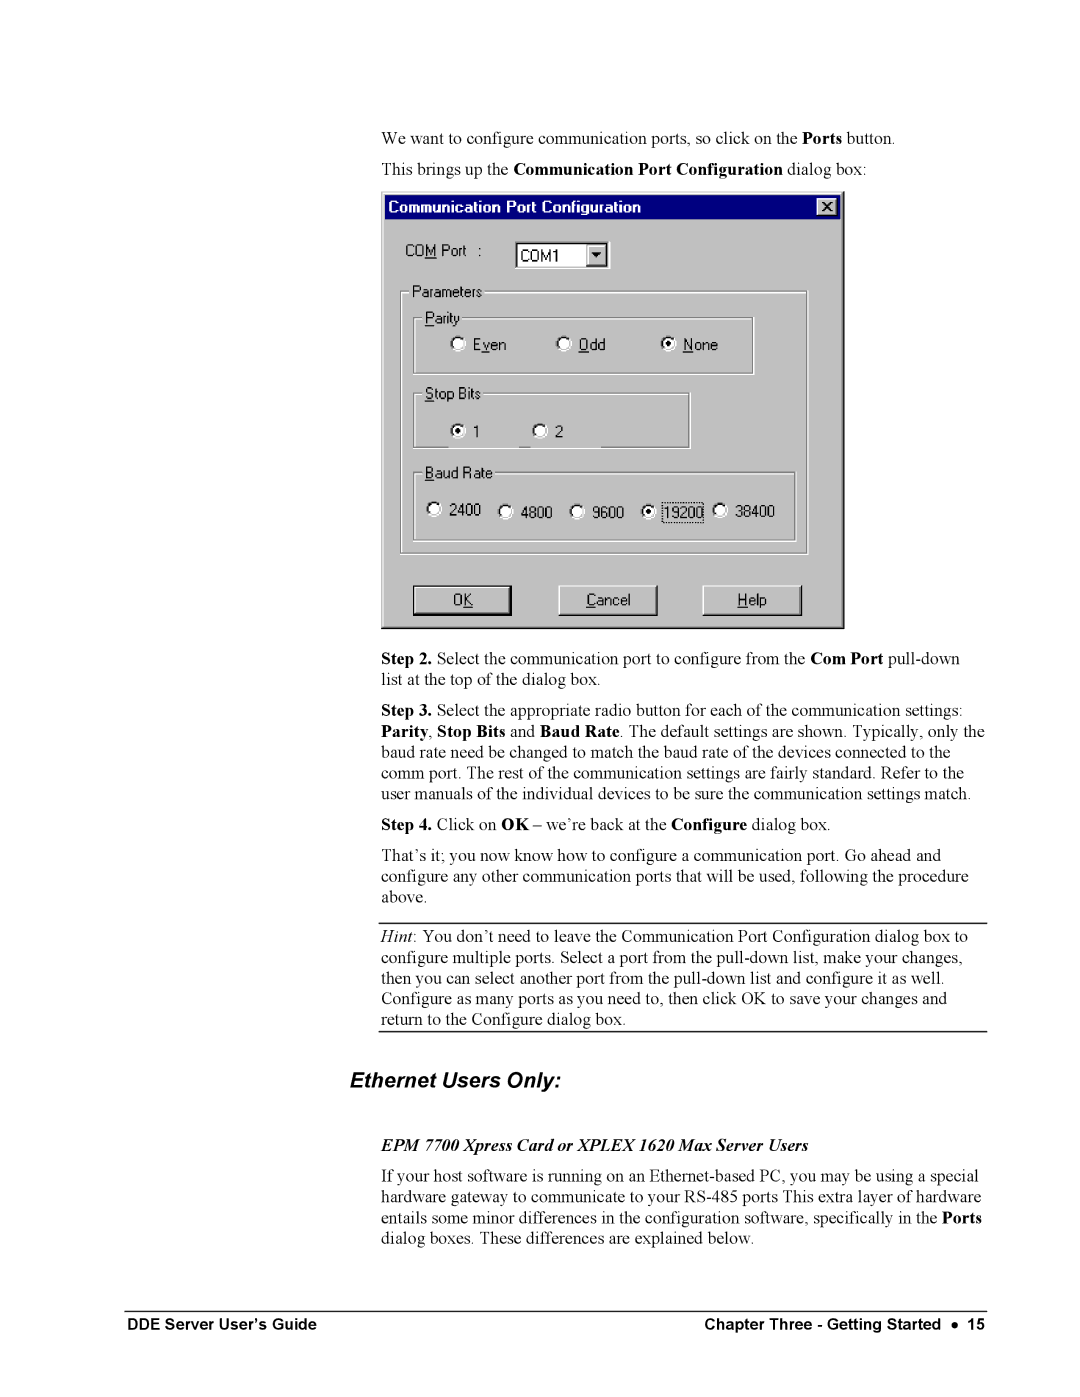
This brings up the Communication Port Configuration dialog box:
Step 2. Select the communication port to configure from the Com Port
Step 3. Select the appropriate radio button for each of the communication settings: Parity, Stop Bits and Baud Rate. The default settings are shown. Typically, only the baud rate need be changed to match the baud rate of the devices connected to the comm port. The rest of the communication settings are fairly standard. Refer to the user manuals of the individual devices to be sure the communication settings match.
Step 4. Click on OK – we’re back at the Configure dialog box.
That’s it; you now know how to configure a communication port. Go ahead and configure any other communication ports that will be used, following the procedure above.
Hint: You don’t need to leave the Communication Port Configuration dialog box to configure multiple ports. Select a port from the
Configure as many ports as you need to, then click OK to save your changes and return to the Configure dialog box.
Ethernet Users Only:
EPM 7700 Xpress Card or XPLEX 1620 Max Server Users
If your host software is running on an
DDE Server User’s Guide | Chapter Three - Getting Started • 15 |
