Section 7 | Application Guide | DriveRack | ™ |
| |||
|
|
|
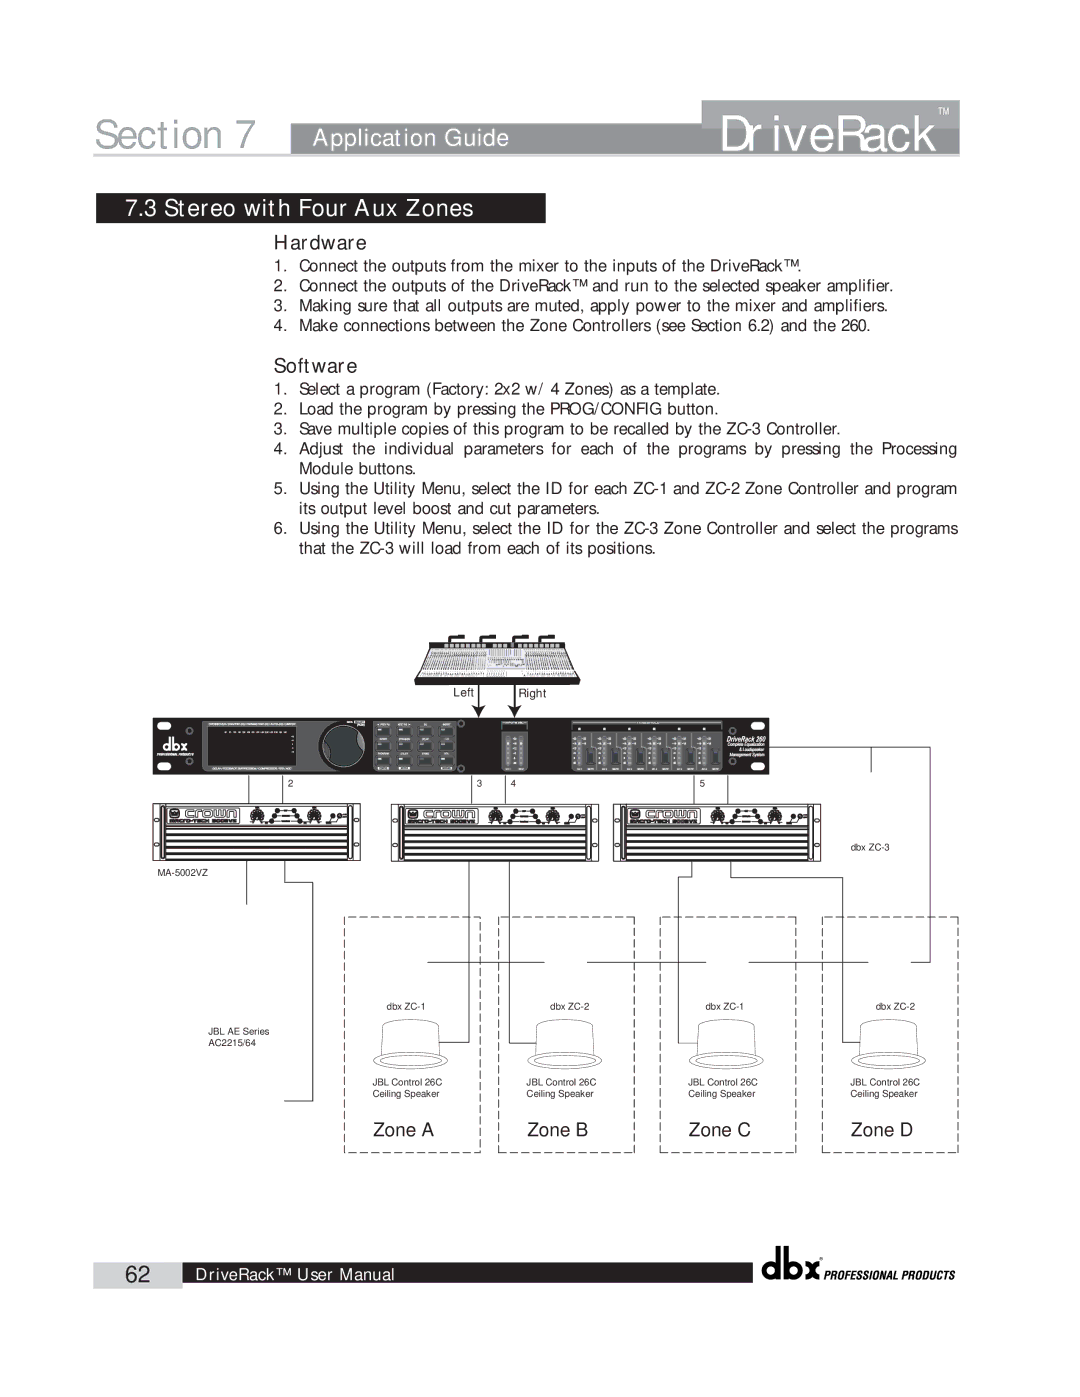
7.3 Stereo with Four Aux Zones
Hardware
1.Connect the outputs from the mixer to the inputs of the DriveRack™.
2.Connect the outputs of the DriveRack™ and run to the selected speaker amplifier.
3.Making sure that all outputs are muted, apply power to the mixer and amplifiers.
4.Make connections between the Zone Controllers (see Section 6.2) and the 260.
Software
1.Select a program (Factory: 2x2 w/ 4 Zones) as a template.
2.Load the program by pressing the PROG/CONFIG button.
3.Save multiple copies of this program to be recalled by the
4.Adjust the individual parameters for each of the programs by pressing the Processing Module buttons.
5.Using the Utility Menu, select the ID for each
6.Using the Utility Menu, select the ID for the
Left |
| Right |
|
|
|
|
|
|
2 | 3 | 4 | 5 |
dbx
JBL AE Series
AC2215/64
dbx
JBL Control 26C Ceiling Speaker
Zone A
dbx
JBL Control 26C Ceiling Speaker
Zone B
dbx
JBL Control 26C Ceiling Speaker
Zone C
dbx
JBL Control 26C Ceiling Speaker
Zone D
®
62 | DriveRack™ User Manual |
|
|
