DriveRack™ | Appendix A | |
|
|
|
| A.9 Gain Level Jumpers |
|
CAUTION: These servicing instructions are for use by qualified service personnel only. To reduce the risk of electric shock, do not perform any servicing other than that contained in the operating instructions unless you are qualified to do so. Refer all servicing to qualified service personnel. Disconnect mains power before servicing.
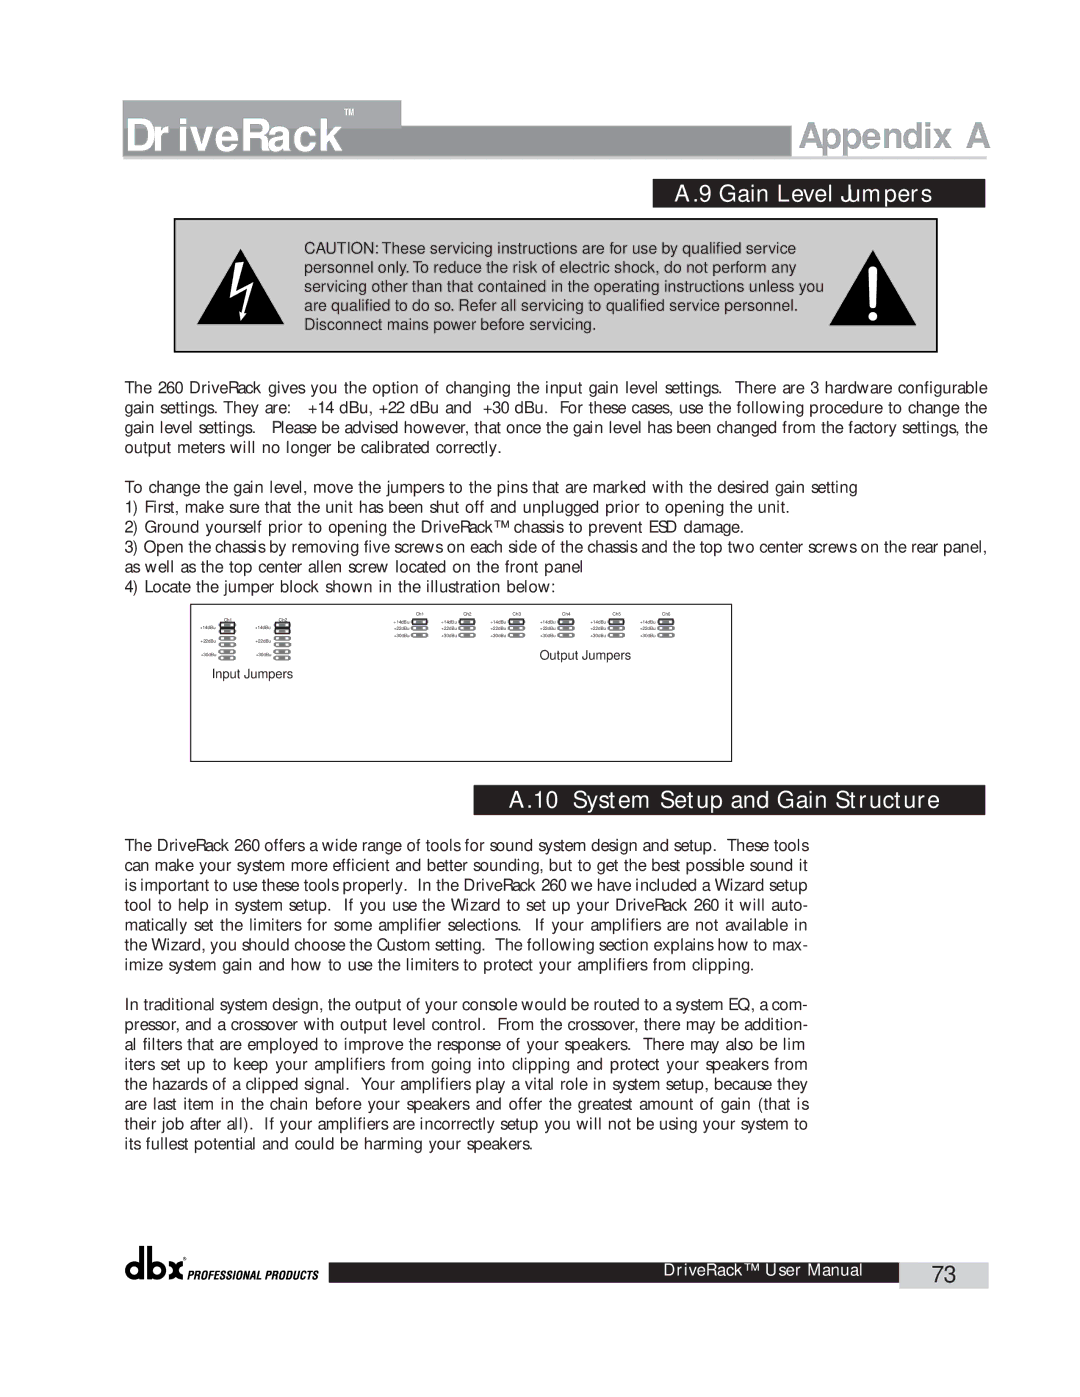
The 260 DriveRack gives you the option of changing the input gain level settings. There are 3 hardware configurable gain settings. They are: +14 dBu, +22 dBu and +30 dBu. For these cases, use the following procedure to change the gain level settings. Please be advised however, that once the gain level has been changed from the factory settings, the output meters will no longer be calibrated correctly.
To change the gain level, move the jumpers to the pins that are marked with the desired gain setting
1)First, make sure that the unit has been shut off and unplugged prior to opening the unit.
2)Ground yourself prior to opening the DriveRack™ chassis to prevent ESD damage.
3)Open the chassis by removing five screws on each side of the chassis and the top two center screws on the rear panel, as well as the top center allen screw located on the front panel
4)Locate the jumper block shown in the illustration below:
|
|
|
|
| Ch1 |
| Ch2 |
| Ch3 |
| Ch4 |
| Ch5 |
| Ch6 |
+14dBu | Ch1 | +14dBu | Ch2 | +14dBu |
| +14dBu |
| +14dBu |
| +14dBu |
| +14dBu |
| +14dBu |
|
|
| +22dBu | +22dBu | +22dBu | +22dBu | +22dBu | +22dBu | ||||||||
+22dBu | +22dBu |
| +30dBu | +30dBu | +30dBu | +30dBu | +30dBu | +30dBu | |||||||
|
|
|
|
|
|
|
|
|
|
|
|
| |||
+30dBu | +30dBu | Output Jumpers |
Input Jumpers
A.10 System Setup and Gain Structure
The DriveRack 260 offers a wide range of tools for sound system design and setup. These tools can make your system more efficient and better sounding, but to get the best possible sound it is important to use these tools properly. In the DriveRack 260 we have included a Wizard setup tool to help in system setup. If you use the Wizard to set up your DriveRack 260 it will auto- matically set the limiters for some amplifier selections. If your amplifiers are not available in the Wizard, you should choose the Custom setting. The following section explains how to max- imize system gain and how to use the limiters to protect your amplifiers from clipping.
In traditional system design, the output of your console would be routed to a system EQ, a com- pressor, and a crossover with output level control. From the crossover, there may be addition- al filters that are employed to improve the response of your speakers. There may also be lim iters set up to keep your amplifiers from going into clipping and protect your speakers from the hazards of a clipped signal. Your amplifiers play a vital role in system setup, because they are last item in the chain before your speakers and offer the greatest amount of gain (that is their job after all). If your amplifiers are incorrectly setup you will not be using your system to its fullest potential and could be harming your speakers.
®
DriveRack™ User Manual | 73 |
|
|