Installing System Board Options: Dell OptiPlex GX1
3.Locate the
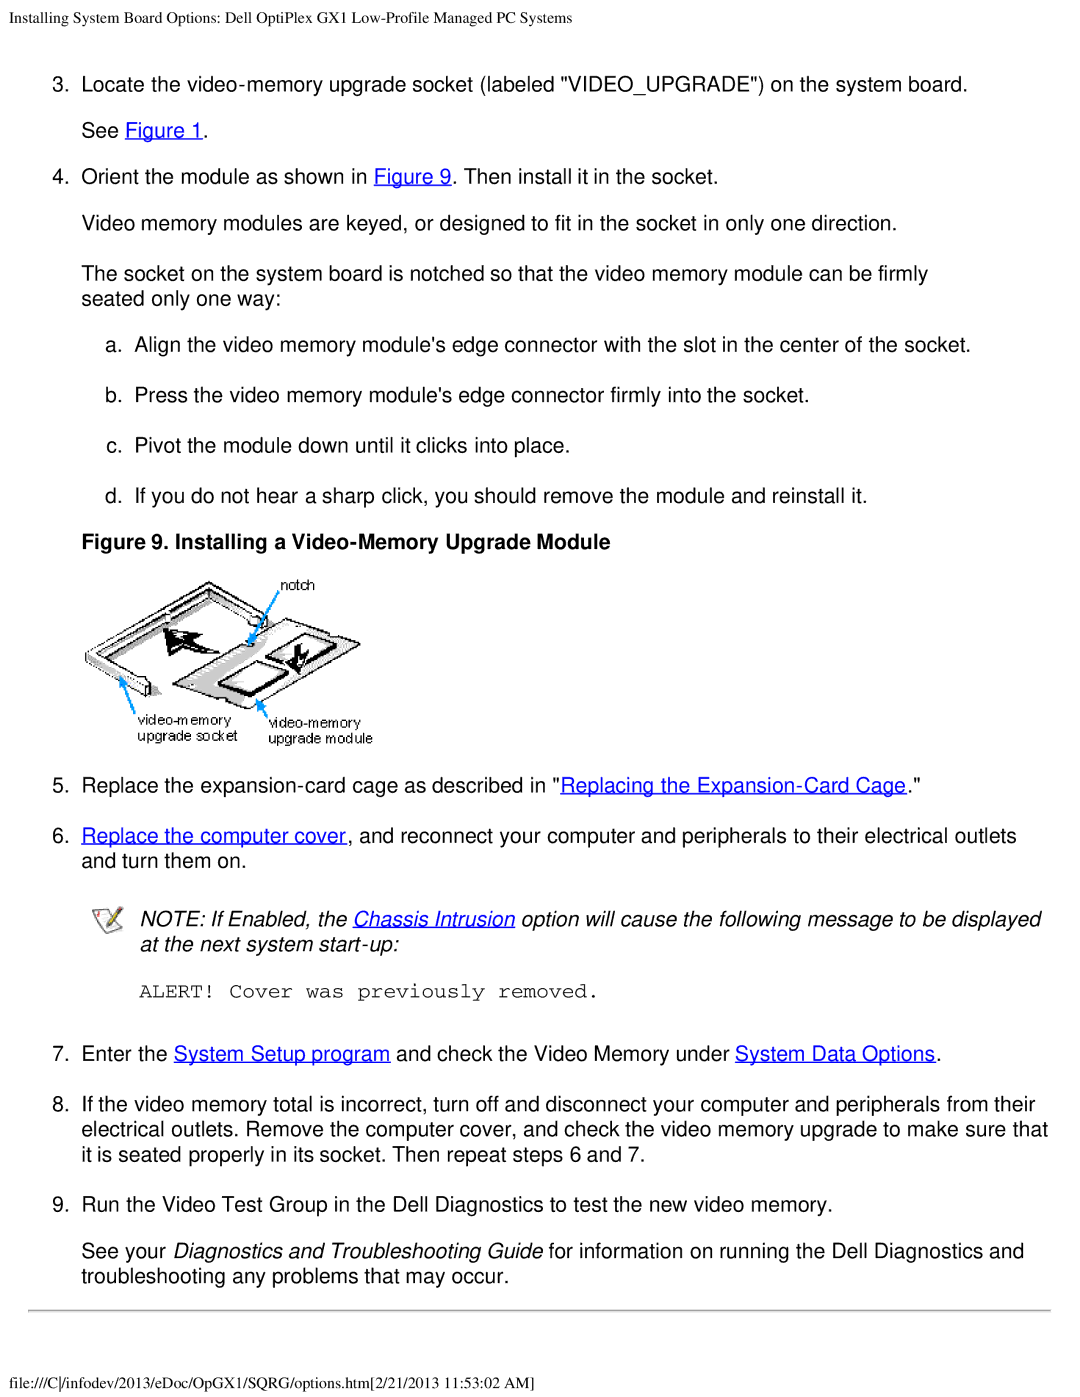
4.Orient the module as shown in Figure 9. Then install it in the socket.
Video memory modules are keyed, or designed to fit in the socket in only one direction.
The socket on the system board is notched so that the video memory module can be firmly seated only one way:
a.Align the video memory module's edge connector with the slot in the center of the socket.
b.Press the video memory module's edge connector firmly into the socket.
c.Pivot the module down until it clicks into place.
d.If you do not hear a sharp click, you should remove the module and reinstall it.
Figure 9. Installing a Video-Memory Upgrade Module
5.Replace the
6.Replace the computer cover, and reconnect your computer and peripherals to their electrical outlets and turn them on.
NOTE: If Enabled, the Chassis Intrusion option will cause the following message to be displayed at the next system
ALERT! Cover was previously removed.
7.Enter the System Setup program and check the Video Memory under System Data Options.
8.If the video memory total is incorrect, turn off and disconnect your computer and peripherals from their electrical outlets. Remove the computer cover, and check the video memory upgrade to make sure that it is seated properly in its socket. Then repeat steps 6 and 7.
9.Run the Video Test Group in the Dell Diagnostics to test the new video memory.
See your Diagnostics and Troubleshooting Guide for information on running the Dell Diagnostics and troubleshooting any problems that may occur.
file:///C/infodev/2013/eDoc/OpGX1/SQRG/options.htm[2/21/2013 11:53:02 AM]