Introduction: Dell OptiPlex GX1
*Pressing or holding the power button to shut down the system may result in data loss. Use the power button to shut down the system only if the operating system is not responding.
Table 4 shows power button functions for Microsoft Windows NT operating systems.
Table 4. Power Button Behavior Under Microsoft Windows NT (With Dell AutoShutdown Loaded)
|
| Results |
Action | System Turned On | System Turned Off |
Press power button | System shuts down | Boots and system turns on |
Hold power button for 6 seconds* | System turns off immediately | Boots and system turns on |
*Pressing or holding the power button to shut down the system may result in data loss. Use the power button to shut down the system only if the operating system is not responding.
If the system does not turn off when you press the power button, the system may be hung. Press and hold the power button until the system turns off completely (this process may take several seconds). Alternatively, press the reset button to reset the system and reboot. If the system is hung and both buttons fail to function properly, unplug the AC power cable from the computer, wait for it to completely stop running, plug in the AC power cable, and if it the system does not restart, press the power button to restart the system.
Using the Optional Stand for Vertical Orientation
Dell offers an optional stand that you can attach to the computer for a mini tower (vertical) orientation. Although you can attach (and remove) the stand at any time with a minimum of system disruption, it is easiest to attach before you set up your computer and connect the
Attach the stand as follows:
1.Turn the computer onto its right side, so that the drive bays are at the bottom.
2.Fit the stand onto what was the left side of the computer.
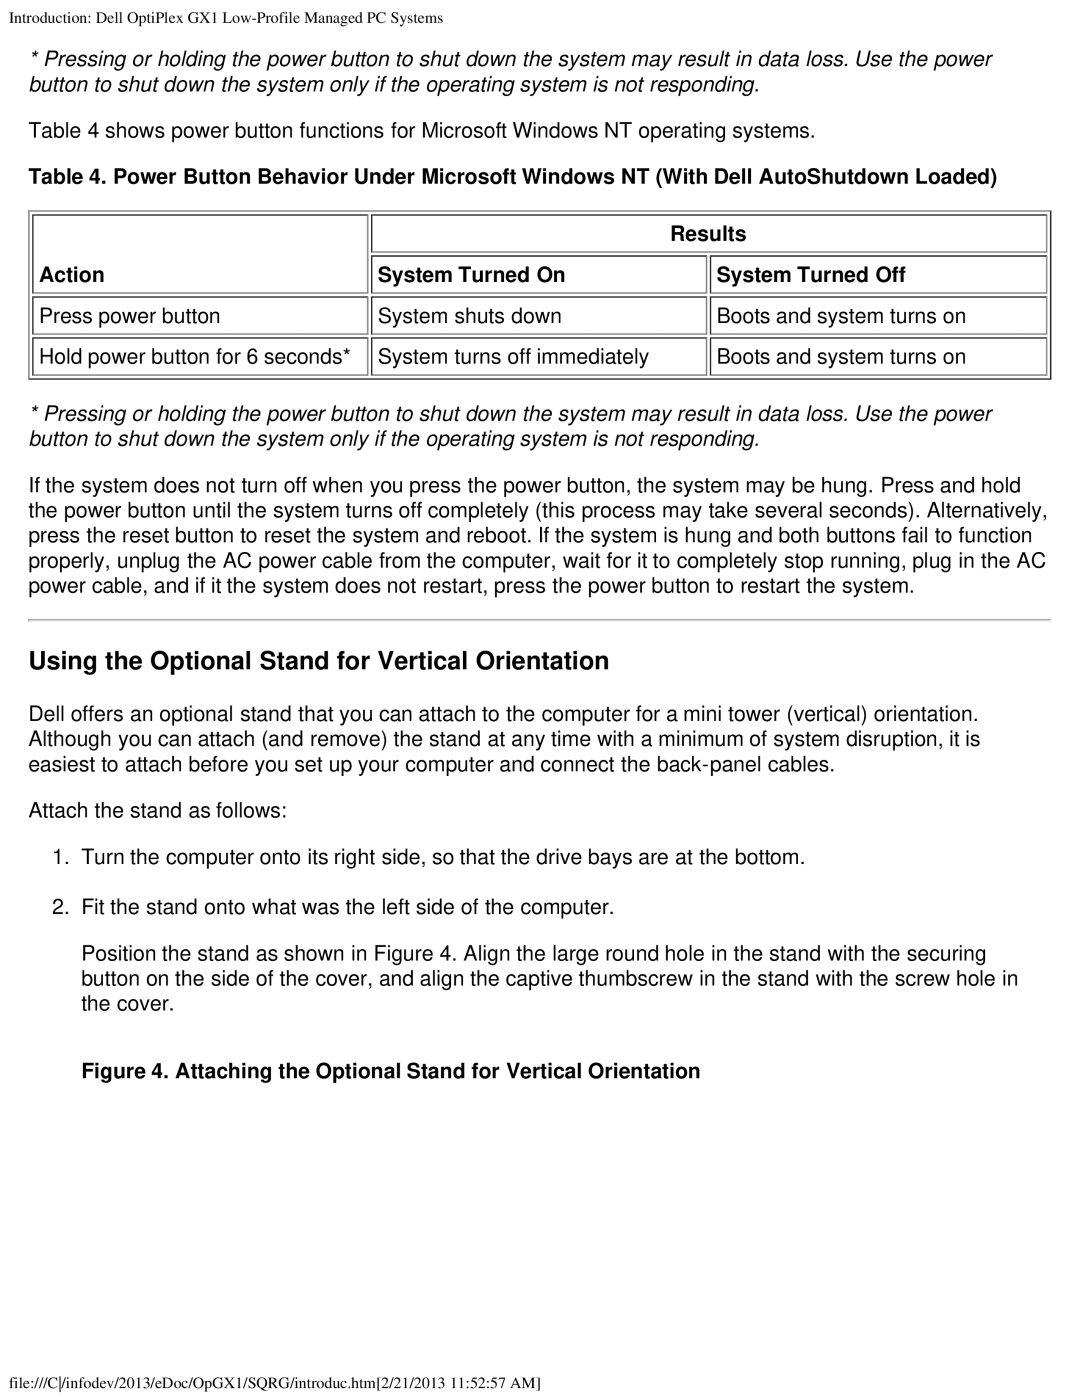
Position the stand as shown in Figure 4. Align the large round hole in the stand with the securing button on the side of the cover, and align the captive thumbscrew in the stand with the screw hole in the cover.
Figure 4. Attaching the Optional Stand for Vertical Orientation
file:///C/infodev/2013/eDoc/OpGX1/SQRG/introduc.htm[2/21/2013 11:52:57 AM]