Working Inside Your Computer: Dell OptiPlex GX1
SERIALn | Serial port connectors |
SLOT1 | Pentium® II processor SEC cartridge connector |
TAPI | Telephony connector |
USB | USB connectors |
VIDEO_UPGRADE |
*For information on ISA and PCI connectors, see "Expansion Cards."
NOTE: For the full name of an abbreviation or acronym used in this table, see the Glossary in your online System User's Guide.
Removing and Replacing the Expansion-Card Cage
Your Dell computer has a removable
Removing the Expansion-Card Cage
Use the following procedure to remove the
CAUTION: Before you remove the computer cover, see "Safety First — For You and Your Computer."
1.Remove the computer cover as instructed in "Removing the Computer Cover."
2.Check any cables connected to expansion cards through the
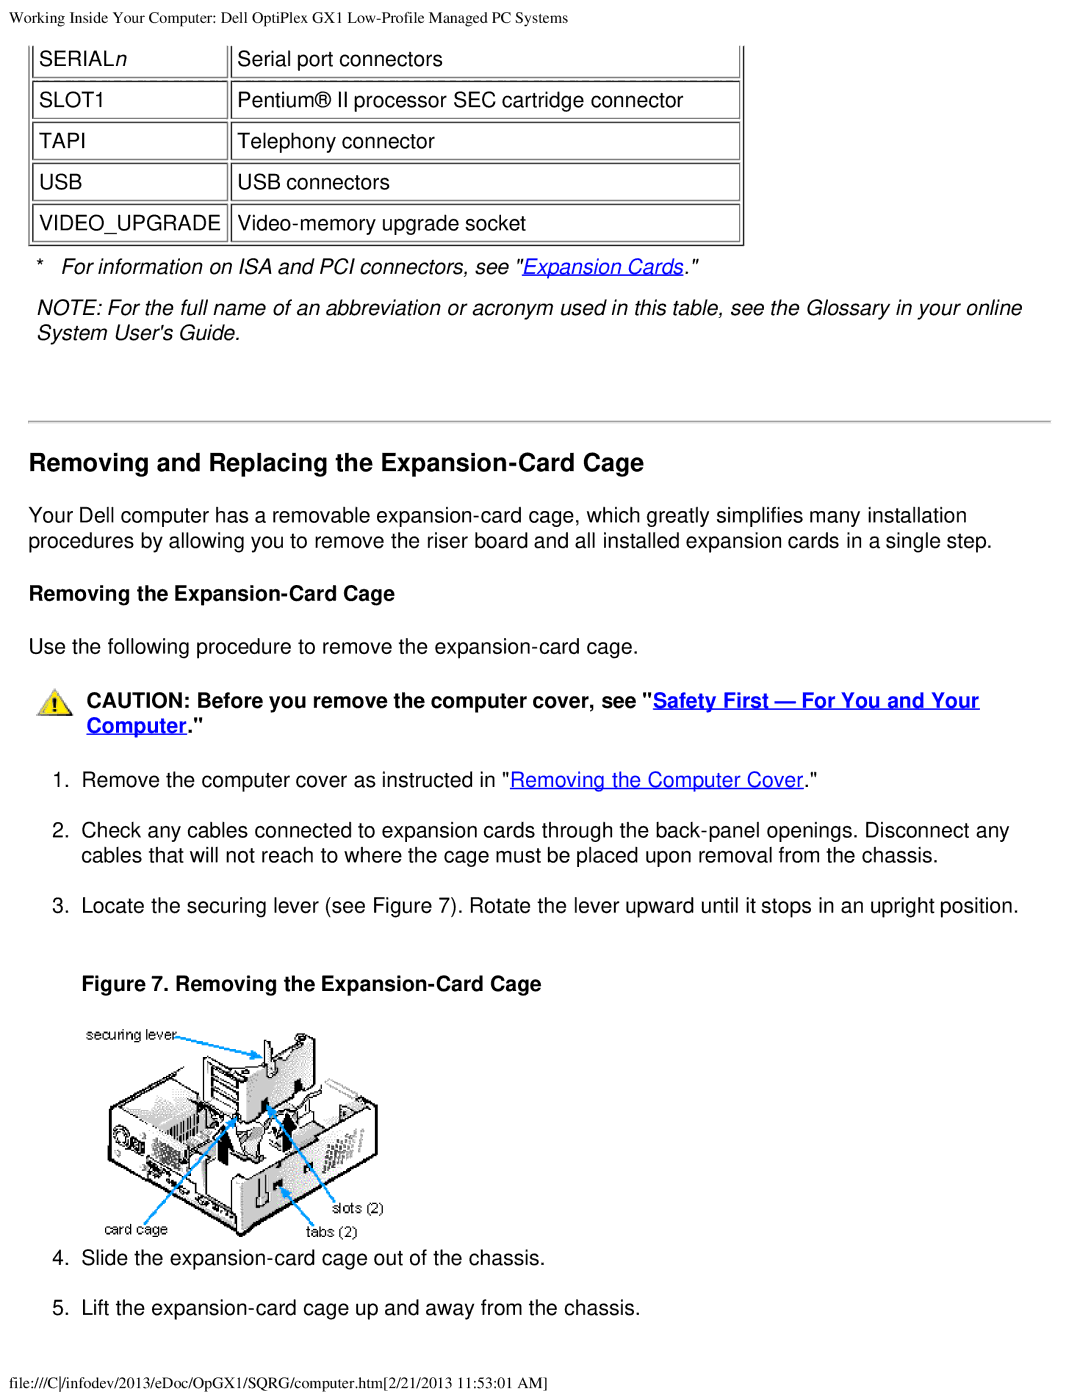
3.Locate the securing lever (see Figure 7). Rotate the lever upward until it stops in an upright position.
Figure 7. Removing the Expansion-Card Cage
4.Slide the
5.Lift the
file:///C/infodev/2013/eDoc/OpGX1/SQRG/computer.htm[2/21/2013 11:53:01 AM]