Maintenance
Cleaning and replacing the air filter
The air filter unit of this projector consists of a filter cover, two kinds of filters, and a filter frame. The new double large filters system is expected to function longer. However, please check and clean it periodically to keep ventilation needed for normal operation of the projector.
When the indicators or a message prompts you to clean the air filter, comply with it as soon as possible. Replace the filters when they are damaged or too soiled. To prepare new filters, make contact with your dealer and tell the following type number.
Type number : UX37191 (Filter set)
When you replace the lamp, please replace the air filter. An air filter of specified type will come together with a replacement lamp for this projector.
1. Turn the projector off, and unplug the power cord. Allow the projector to sufficiently cool down.
2.
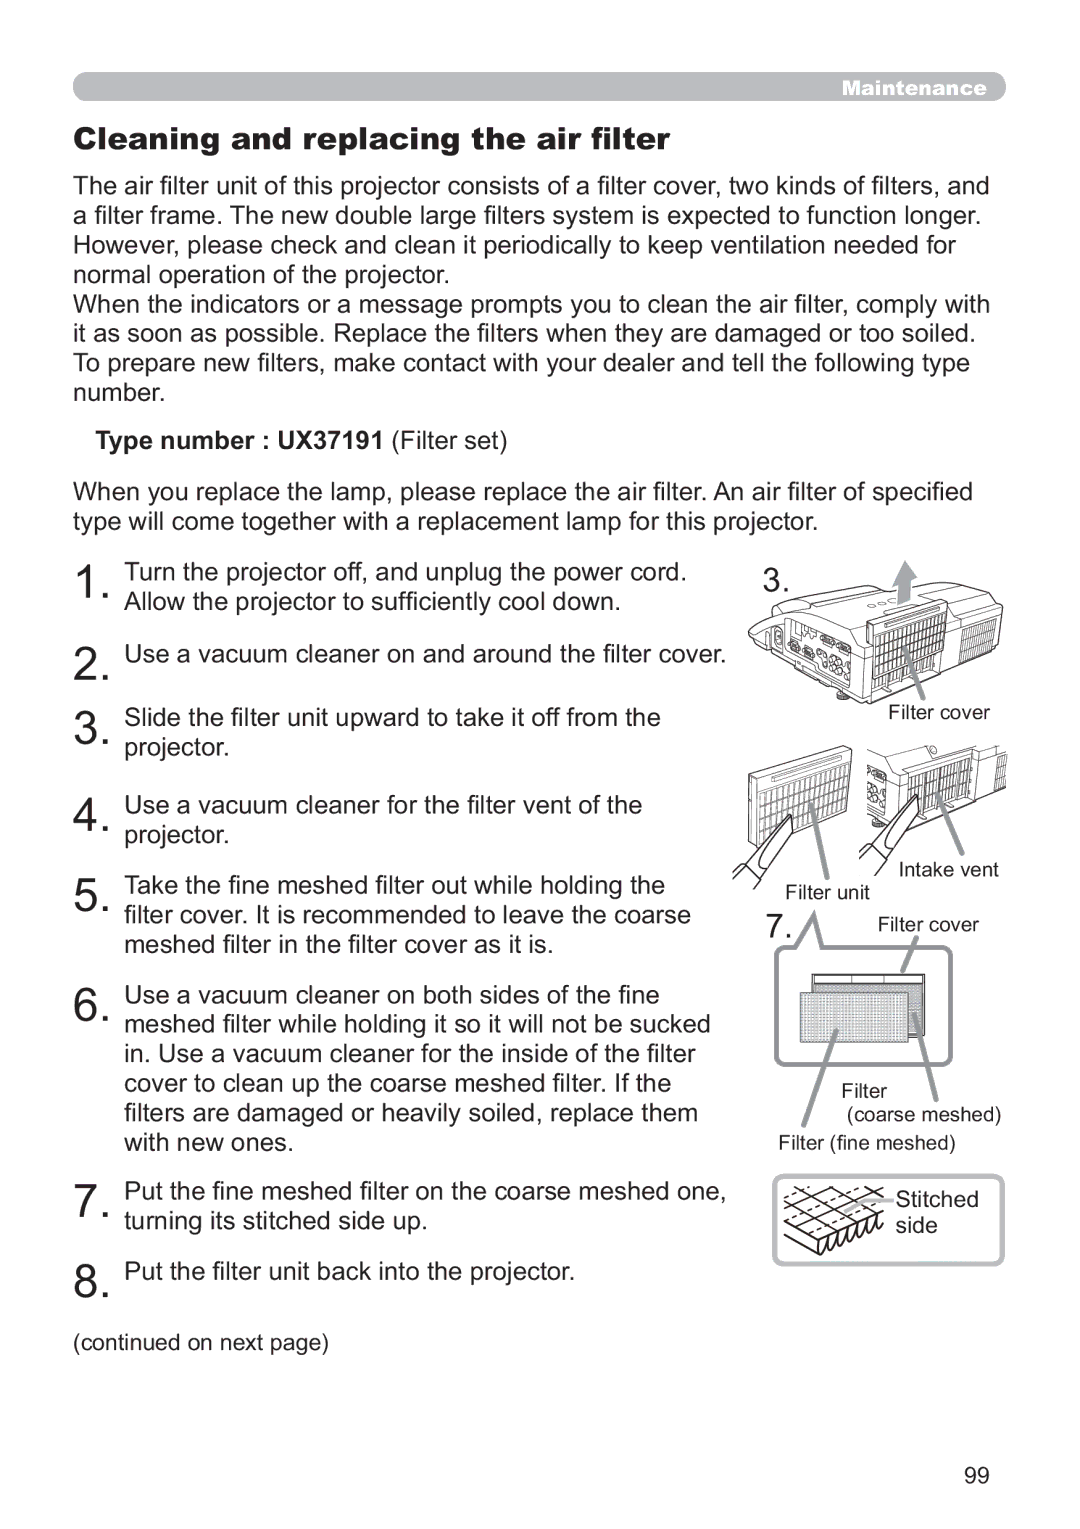
3. Slide the filter unit upward to take it off from the projector.
4. Use a vacuum cleaner for the filter vent of the projector.
5. Take the fine meshed filter out while holding the filter cover. It is recommended to leave the coarse meshed filter in the filter cover as it is.
6. Use a vacuum cleaner on both sides of the fine meshed filter while holding it so it will not be sucked in. Use a vacuum cleaner for the inside of the filter cover to clean up the coarse meshed filter. If the filters are damaged or heavily soiled, replace them with new ones.
7. Put the fine meshed filter on the coarse meshed one, turning its stitched side up.
8. Put the filter unit back into the projector.
3.
Filter cover
![]() Intake vent Filter unit
Intake vent Filter unit
7. | Filter cover |
Filter
(coarse meshed)
Filter (fine meshed)

 Stitched
  side
side
(continued on next page)
99