Setting up
Connecting with your devices (continued)
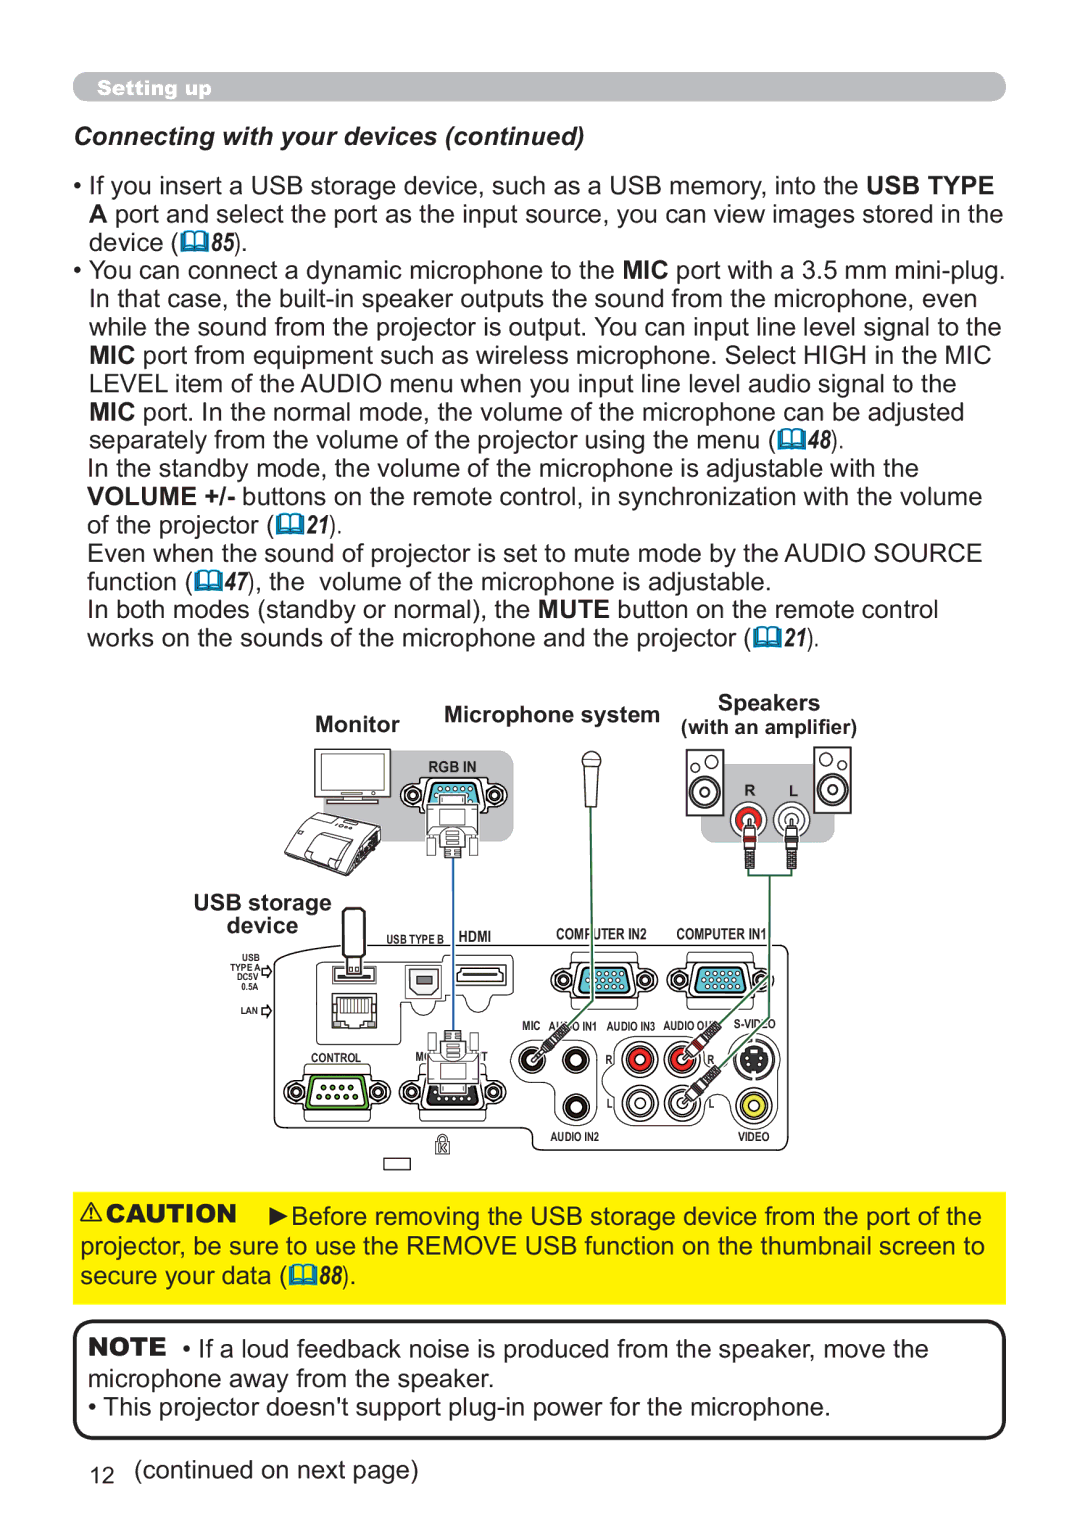
•If you insert a USB storage device, such as a USB memory, into the USB TYPE
A port and select the port as the input source, you can view images stored in the device (85).
•You can connect a dynamic microphone to the MIC port with a 3.5 mm
MIC port. In the normal mode, the volume of the microphone can be adjusted separately from the volume of the projector using the menu (48).
In the standby mode, the volume of the microphone is adjustable with the
VOLUME +/- buttons on the remote control, in synchronization with the volume of the projector (21).
Even when the sound of projector is set to mute mode by the AUDIO SOURCE function (47), the volume of the microphone is adjustable.
In both modes (standby or normal), the MUTE button on the remote control works on the sounds of the microphone and the projector (21).
Monitor | Microphone system | Speakers |
(with an amplifier) | ||
| RGB IN |
|
|
| R L |
USB storage
device
USB TYPE B HDMI | COMPUTER IN2 | COMPUTER IN1 |
USB
TYPE A
DC5V ![]()
0.5A
LAN ![]()
CONTROL
MIC AUDIO IN1 AUDIO IN3 | AUDIO OUT |
R | R |
L | L |
AUDIO IN2 | VIDEO |
![]() CAUTION ►Before removing the USB storage device from the port of the projector, be sure to use the REMOVE USB function on the thumbnail screen to secure your data (88).
CAUTION ►Before removing the USB storage device from the port of the projector, be sure to use the REMOVE USB function on the thumbnail screen to secure your data (88).
NOTE • If a loud feedback noise is produced from the speaker, move the microphone away from the speaker.
• This projector doesn't support
12(continued on next page)