Installation
Install cables
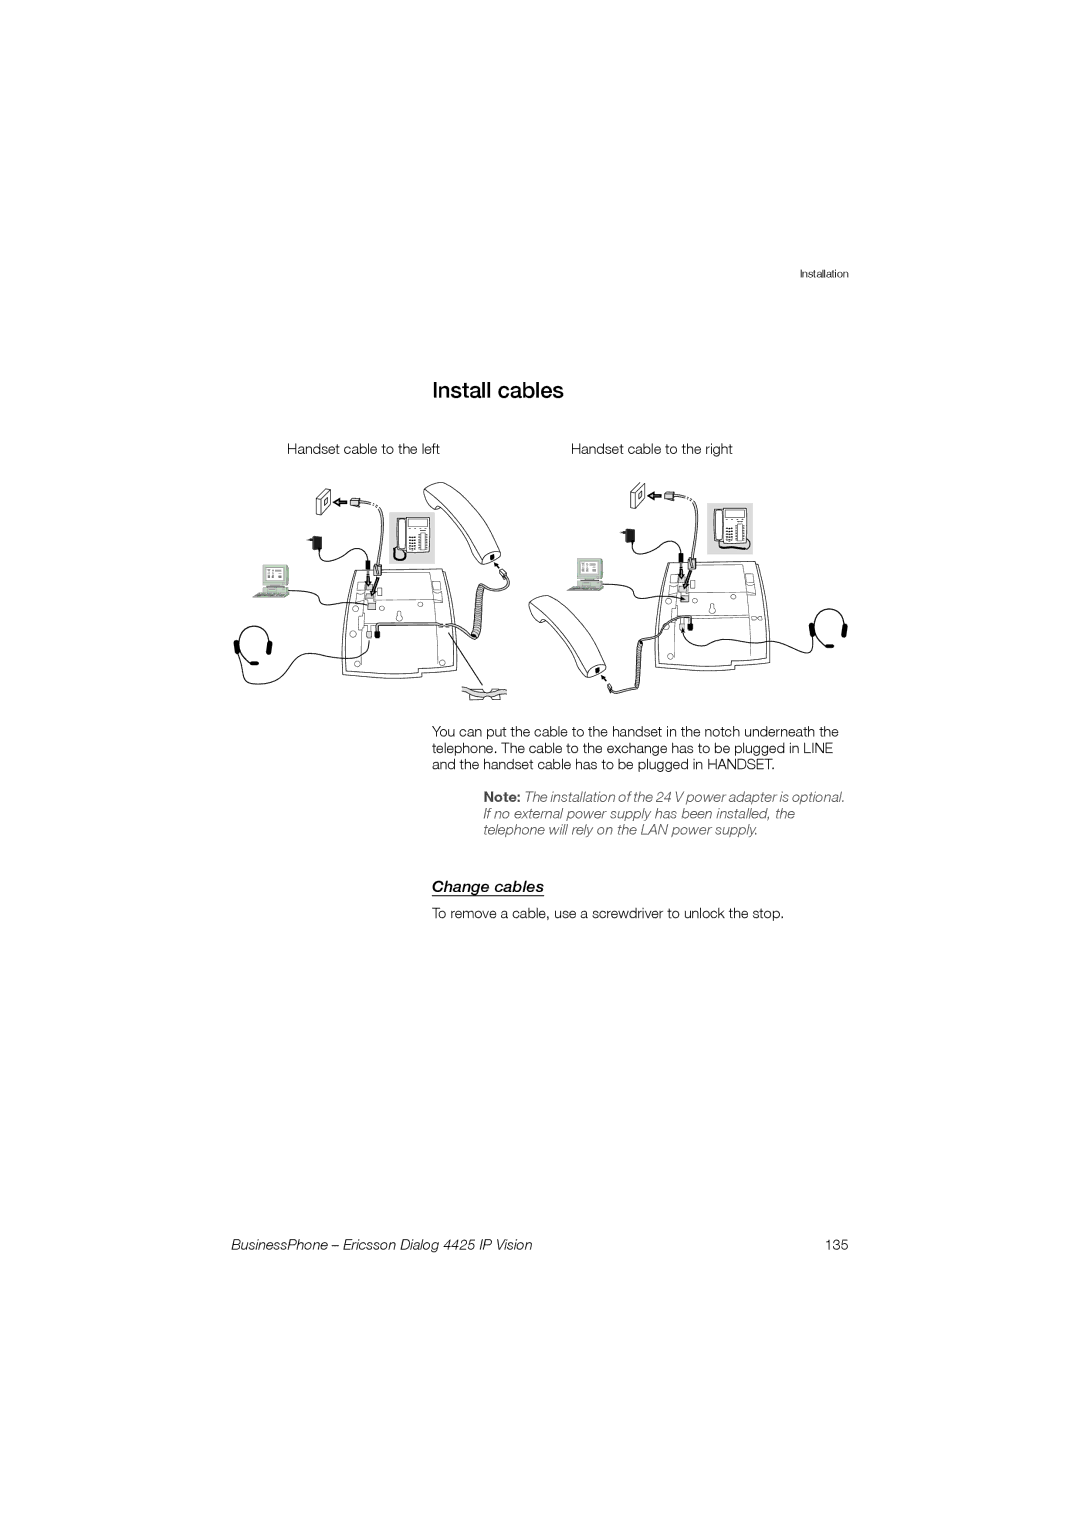
Handset cable to the left | Handset cable to the right | ||||||||||||||||||
|
|
|
|
|
|
|
|
|
|
|
|
|
|
|
|
|
|
|
|
|
|
|
|
|
|
|
|
|
|
|
|
|
|
|
|
|
|
|
|
|
|
|
|
|
|
|
|
|
|
|
|
|
|
|
|
|
|
|
|
|
|
|
|
|
|
|
|
|
|
|
|
|
|
|
|
|
|
|
|
|
|
|
|
|
|
|
|
|
|
|
|
|
|
|
|
|
|
|
|
|
|
|
|
|
|
|
|
|
|
|
|
|
|
|
|
|
|
|
|
|
|
|
|
|
|
|
|
|
|
|
|
|
|
|
|
|
|
|
|
|
|
|
|
|
|
|
|
|
|
|
|
|
|
|
|
|
|
|
|
You can put the cable to the handset in the notch underneath the telephone. The cable to the exchange has to be plugged in LINE and the handset cable has to be plugged in HANDSET.
Note: The installation of the 24 V power adapter is optional. If no external power supply has been installed, the telephone will rely on the LAN power supply.
Change cables
To remove a cable, use a screwdriver to unlock the stop.
BusinessPhone – Ericsson Dialog 4425 IP Vision | 135 |
