EPHD04+ HDcctv DVR
7.3 Remote Live View
1
2
3
4
5
6
7
|
|
| Figure |
|
|
|
|
No. | Name |
| Description |
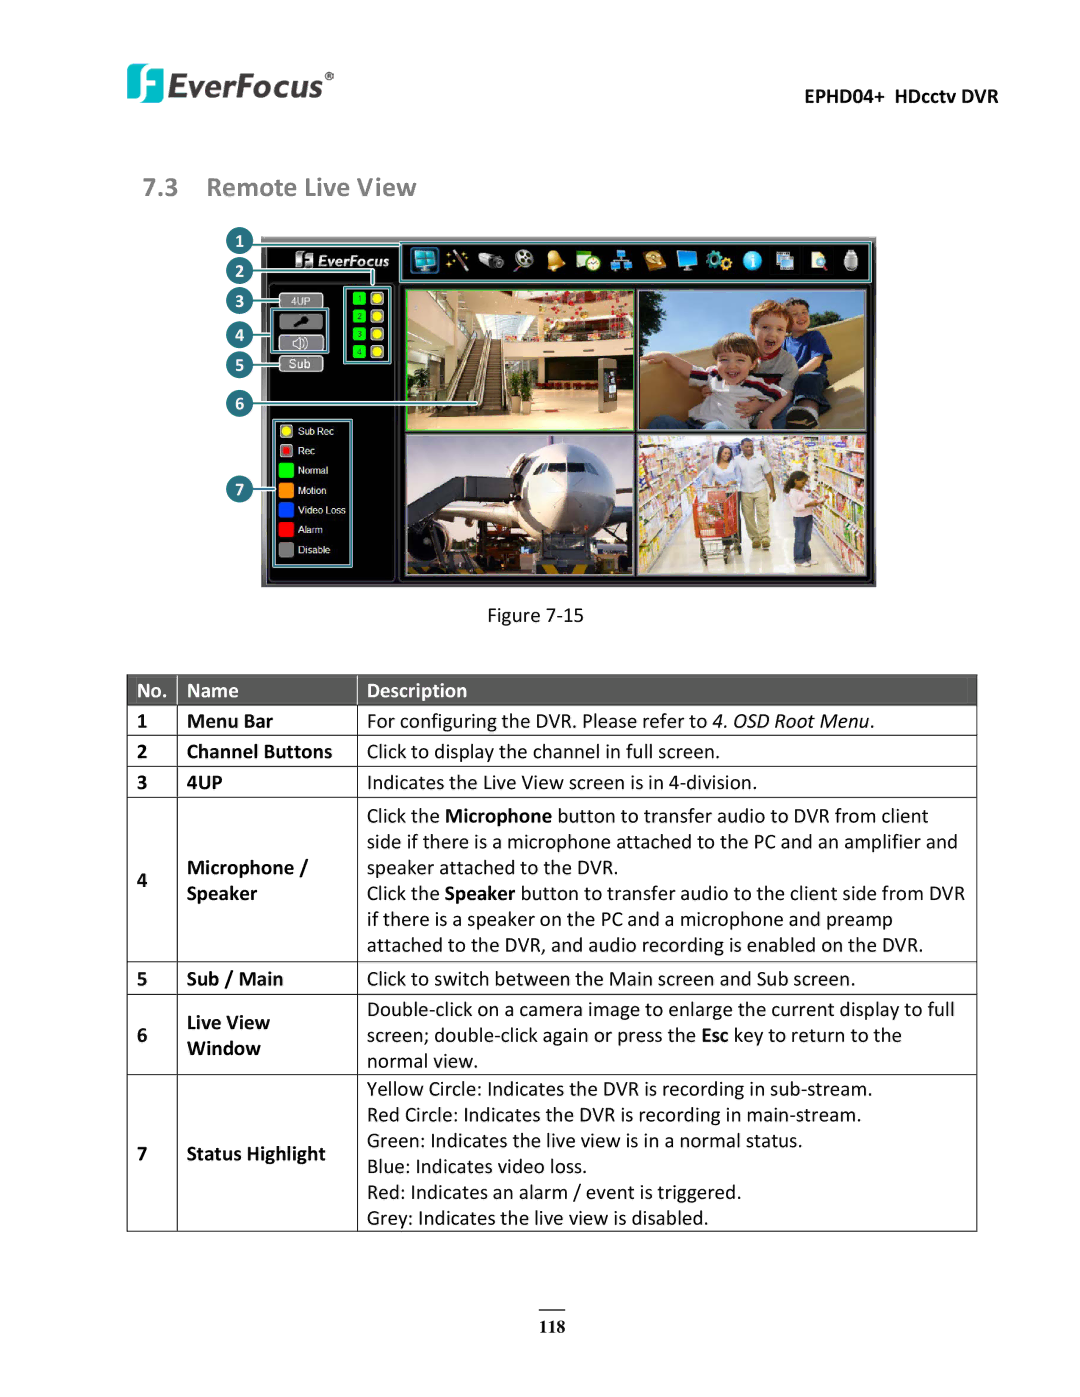
1 | Menu Bar |
| For configuring the DVR. Please refer to 4. OSD Root Menu. |
|
|
|
|
2 | Channel Buttons |
| Click to display the channel in full screen. |
|
|
|
|
3 | 4UP |
| Indicates the Live View screen is in |
|
|
|
|
|
|
| Click the Microphone button to transfer audio to DVR from client |
|
|
| side if there is a microphone attached to the PC and an amplifier and |
4 | Microphone / |
| speaker attached to the DVR. |
Speaker |
| Click the Speaker button to transfer audio to the client side from DVR | |
|
| ||
|
|
| if there is a speaker on the PC and a microphone and preamp |
|
|
| attached to the DVR, and audio recording is enabled on the DVR. |
|
|
|
|
5 | Sub / Main |
| Click to switch between the Main screen and Sub screen. |
|
|
|
|
| Live View |
| |
6 |
| screen; | |
Window |
| ||
|
| normal view. | |
|
|
| |
|
|
|
|
|
|
| Yellow Circle: Indicates the DVR is recording in |
|
|
| Red Circle: Indicates the DVR is recording in |
7 | Status Highlight |
| Green: Indicates the live view is in a normal status. |
| Blue: Indicates video loss. | ||
|
|
| |
|
|
| Red: Indicates an alarm / event is triggered. |
|
|
| Grey: Indicates the live view is disabled. |
118