EPHD04+ HDcctv DVR
6.3 Record Settings
You can configure the basic recording settings on the hard disk. You can also configure the settings for Quick Playback.
6.3.1Record
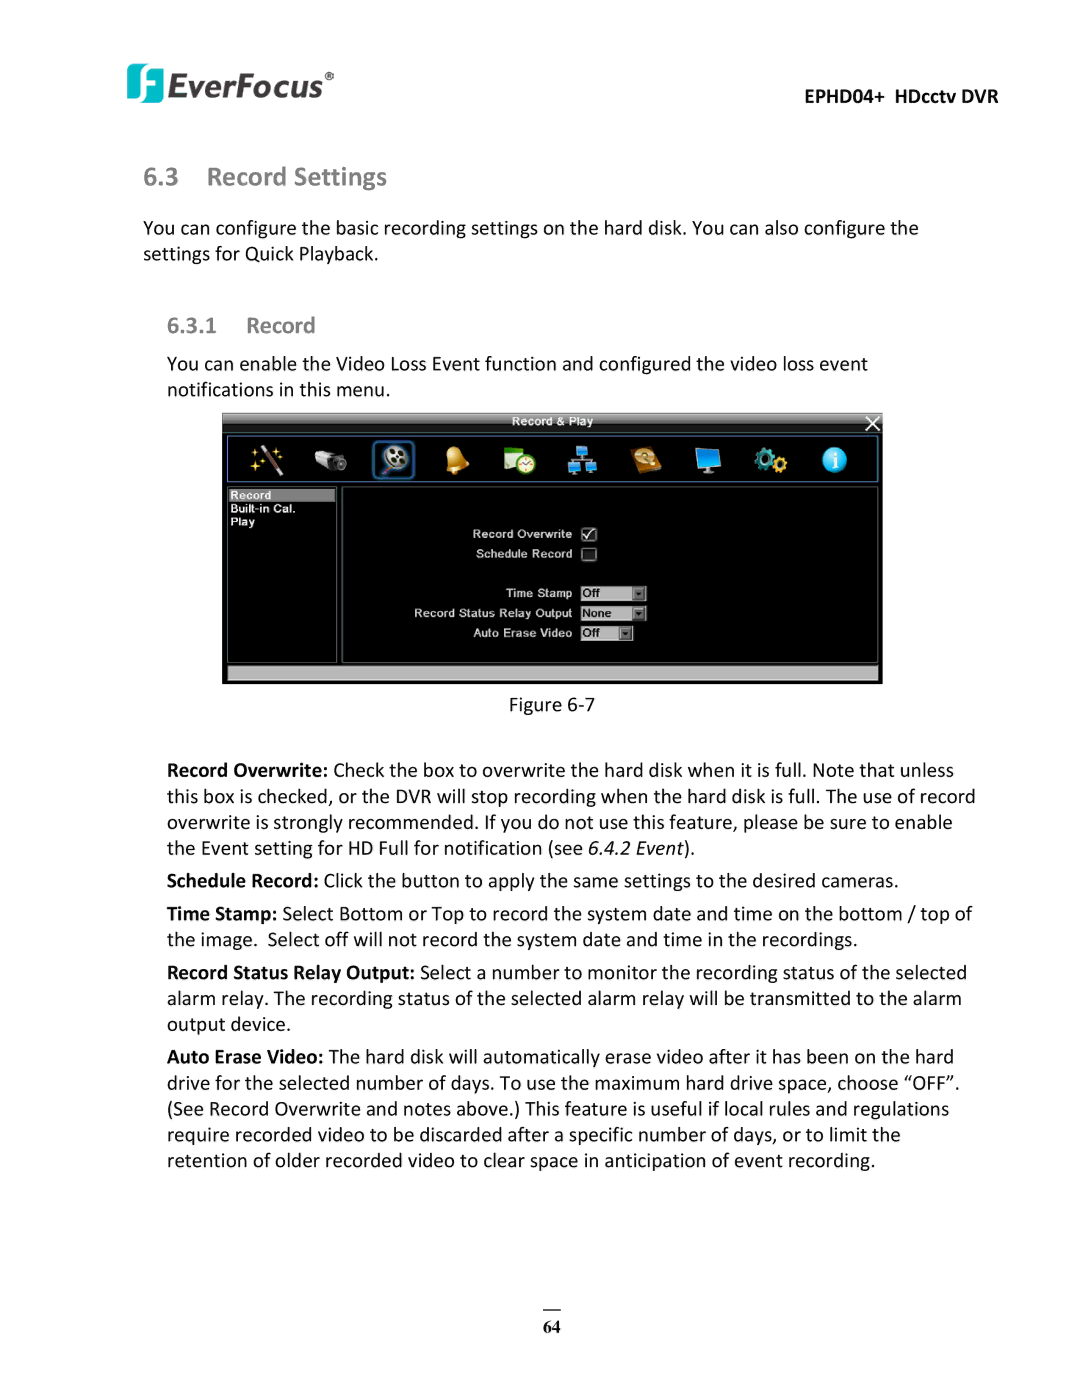
You can enable the Video Loss Event function and configured the video loss event notifications in this menu.
Figure
Record Overwrite: Check the box to overwrite the hard disk when it is full. Note that unless this box is checked, or the DVR will stop recording when the hard disk is full. The use of record overwrite is strongly recommended. If you do not use this feature, please be sure to enable the Event setting for HD Full for notification (see 6.4.2 Event).
Schedule Record: Click the button to apply the same settings to the desired cameras.
Time Stamp: Select Bottom or Top to record the system date and time on the bottom / top of the image. Select off will not record the system date and time in the recordings.
Record Status Relay Output: Select a number to monitor the recording status of the selected alarm relay. The recording status of the selected alarm relay will be transmitted to the alarm output device.
Auto Erase Video: The hard disk will automatically erase video after it has been on the hard drive for the selected number of days. To use the maximum hard drive space, choose “OFF”. (See Record Overwrite and notes above.) This feature is useful if local rules and regulations require recorded video to be discarded after a specific number of days, or to limit the retention of older recorded video to clear space in anticipation of event recording.
64