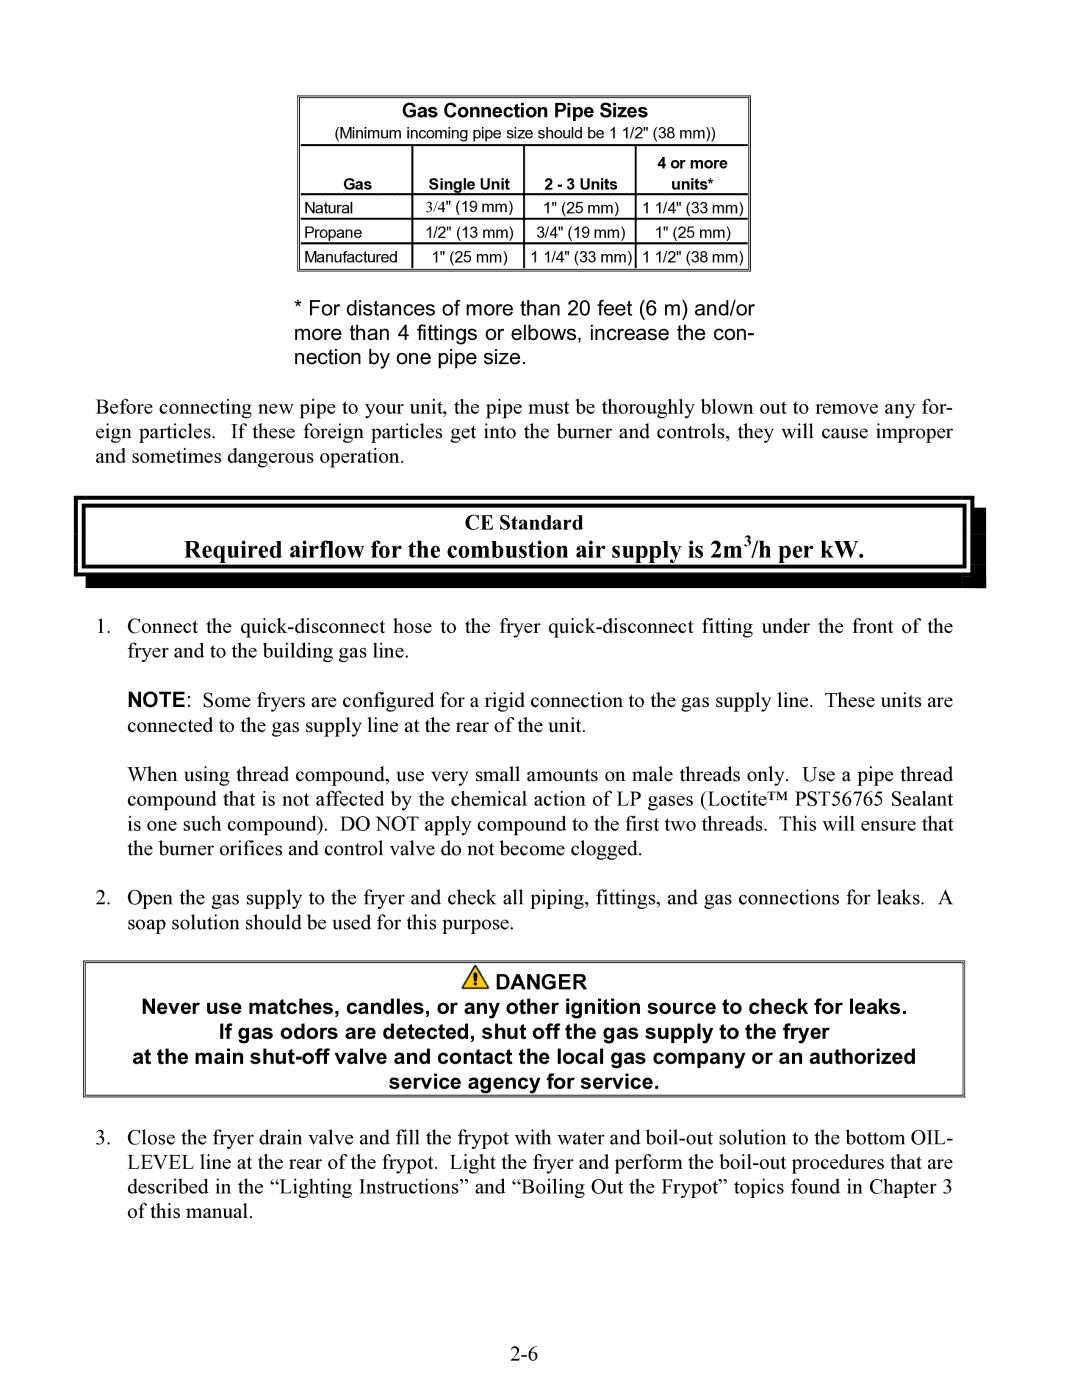
Gas Connection Pipe Sizes
(Minimum incoming pipe size should be 1 1/2" (38 mm))
|
|
|
| 4 or more |
Gas | Single Unit | 2 - 3 Units |
| units* |
Natural | 3/4" (19 mm) | 1" (25 mm) | 1 | 1/4" (33 mm) |
Propane | 1/2" (13 mm) | 3/4" (19 mm) |
| 1" (25 mm) |
Manufactured | 1" (25 mm) | 1 1/4" (33 mm) | 1 | 1/2" (38 mm) |
*For distances of more than 20 feet (6 m) and/or more than 4 fittings or elbows, increase the con- nection by one pipe size.
Before connecting new pipe to your unit, the pipe must be thoroughly blown out to remove any for- eign particles. If these foreign particles get into the burner and controls, they will cause improper and sometimes dangerous operation.
CE Standard
Required airflow for the combustion air supply is 2m3/h per kW.
1.Connect the
NOTE: Some fryers are configured for a rigid connection to the gas supply line. These units are connected to the gas supply line at the rear of the unit.
When using thread compound, use very small amounts on male threads only. Use a pipe thread compound that is not affected by the chemical action of LP gases (Loctite™ PST56765 Sealant is one such compound). DO NOT apply compound to the first two threads. This will ensure that the burner orifices and control valve do not become clogged.
2.Open the gas supply to the fryer and check all piping, fittings, and gas connections for leaks. A soap solution should be used for this purpose.
![]() DANGER
DANGER
Never use matches, candles, or any other ignition source to check for leaks.
If gas odors are detected, shut off the gas supply to the fryer
at the main
service agency for service.
3.Close the fryer drain valve and fill the frypot with water and