Installation of Water Wizard™,
continued
To Media |
|
Pressure Gauge | Factory |
| |
| Installed |
Sump Drain |
|
Manual Supply Valve |
|
Roof Line |
| Supply Solenoid |
| |
| (normally closed) |
| |
| Supply Line Drain Solenoid | Field | |
Trap | Installed | ||
(normally open) |
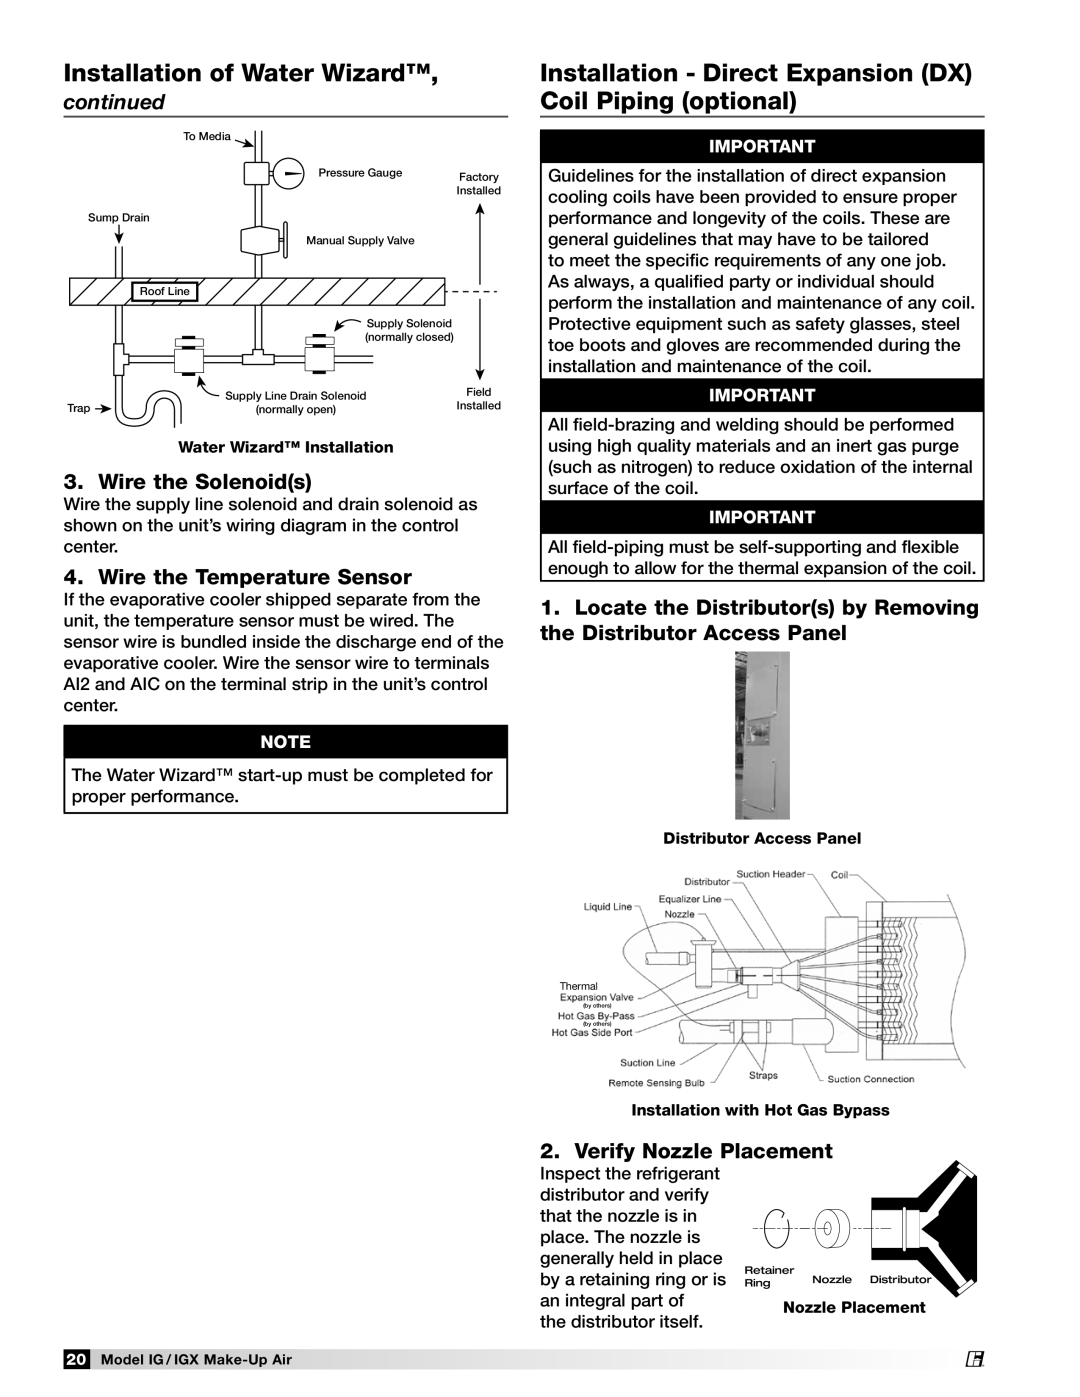
Water Wizard™ Installation
3. Wire the Solenoid(s)
Wire the supply line solenoid and drain solenoid as shown on the unit’s wiring diagram in the control center.
4. Wire the Temperature Sensor
If the evaporative cooler shipped separate from the unit, the temperature sensor must be wired. The sensor wire is bundled inside the discharge end of the evaporative cooler. Wire the sensor wire to terminals AI2 and AIC on the terminal strip in the unit’s control center.
Note
The Water Wizard™
Installation - Direct Expansion (DX) Coil Piping (optional)
Important
Guidelines for the installation of direct expansion cooling coils have been provided to ensure proper performance and longevity of the coils. These are general guidelines that may have to be tailored to meet the specific requirements of any one job. As always, a qualified party or individual should perform the installation and maintenance of any coil. Protective equipment such as safety glasses, steel toe boots and gloves are recommended during the installation and maintenance of the coil.
Important
All
Important
All
1.Locate the Distributor(s) by Removing the Distributor Access Panel
Distributor Access Panel
Thermal
(by others)
(by others)
Installation with Hot Gas Bypass
2. Verify Nozzle Placement
Inspect the refrigerant distributor and verify that the nozzle is in place. The nozzle is generally held in place by a retaining ring or is an integral part of the distributor itself.
Retainer | Nozzle Distributor |
Ring |
Nozzle Placement
20Model IG / IGX
®
