Presario 1400 Series
Model XL240, XL241, XL242, XL244, XL245, XL246, XL247, XL250, XL340, XL341, XL342, XL343, XL344, XL345, XL346, XL350, XL352, XL355, and XL356
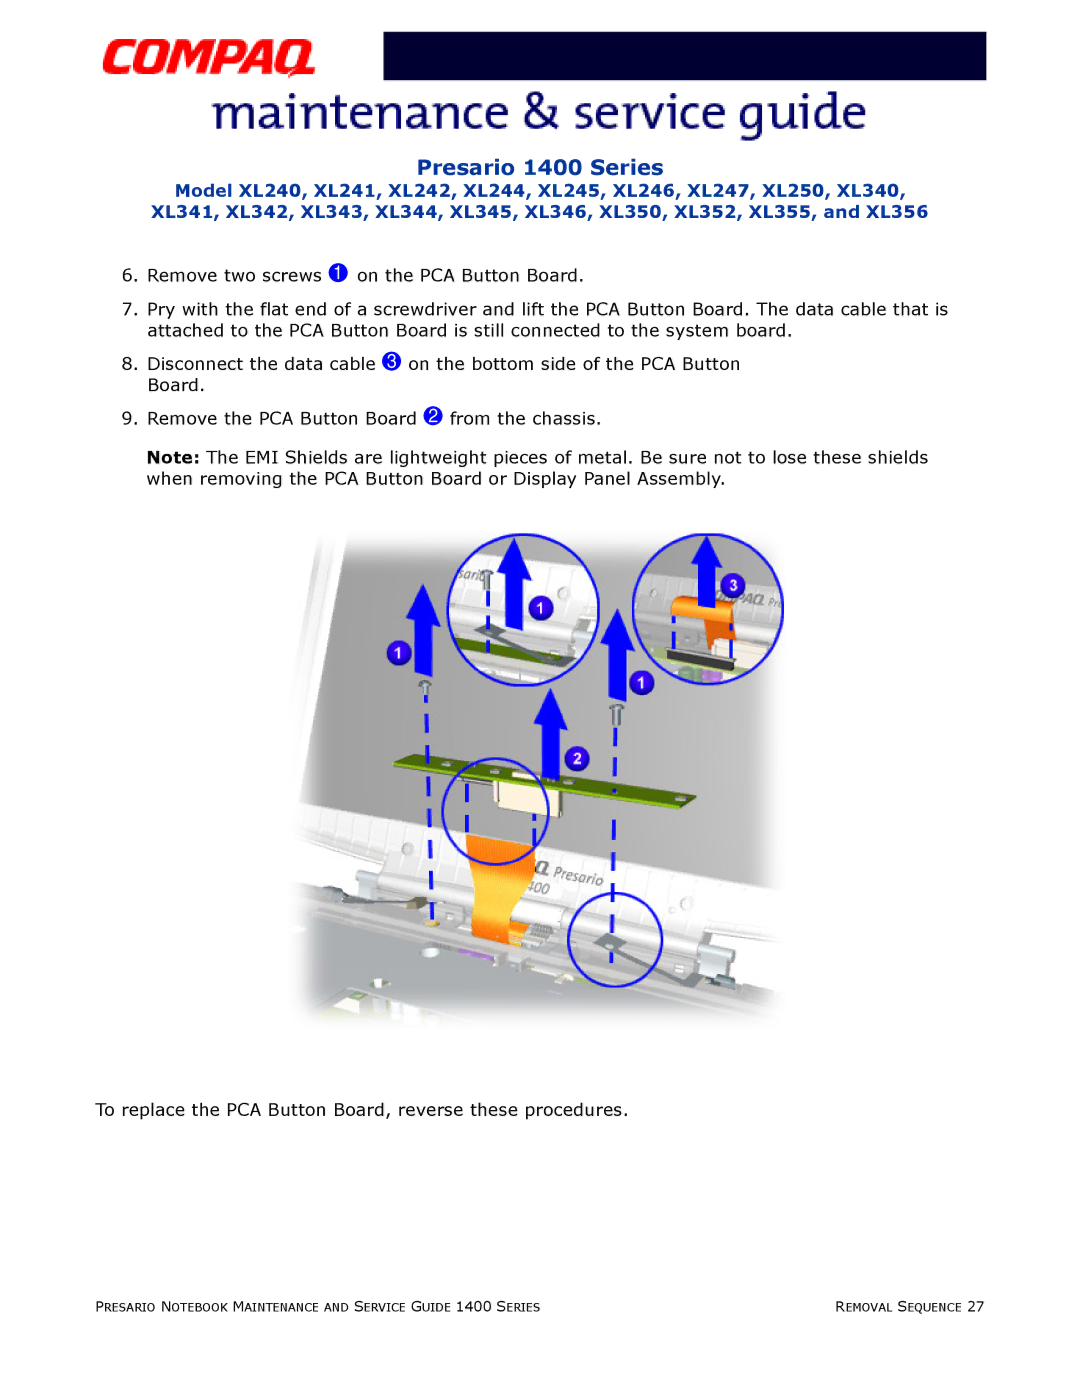
6.Remove two screws 1 on the PCA Button Board.
7.Pry with the flat end of a screwdriver and lift the PCA Button Board. The data cable that is attached to the PCA Button Board is still connected to the system board.
8.Disconnect the data cable 3 on the bottom side of the PCA Button Board.
9.Remove the PCA Button Board 2 from the chassis.
Note: The EMI Shields are lightweight pieces of metal. Be sure not to lose these shields when removing the PCA Button Board or Display Panel Assembly.
To replace the PCA Button Board, reverse these procedures.
PRESARIO NOTEBOOK MAINTENANCE AND SERVICE GUIDE 1400 SERIES | REMOVAL SEQUENCE 27 |