Presario 1400 Series
Model XL240, XL241, XL242, XL244, XL245, XL246, XL247, XL250, XL340, XL341, XL342, XL343, XL344, XL345, XL346, XL350, XL352, XL355, and XL356
Display Panel Assembly
To remove the display panel assembly, complete the following steps:
1.Prepare the Notebook for disassembly (pg 4).
2.Remove the cosmetic side covers (pg 7).
3.Remove the Internet Button Board cover (pg 23).
4.Remove the keyboard (pg 25).
5.Remove the PCA Button Board (pg 26).
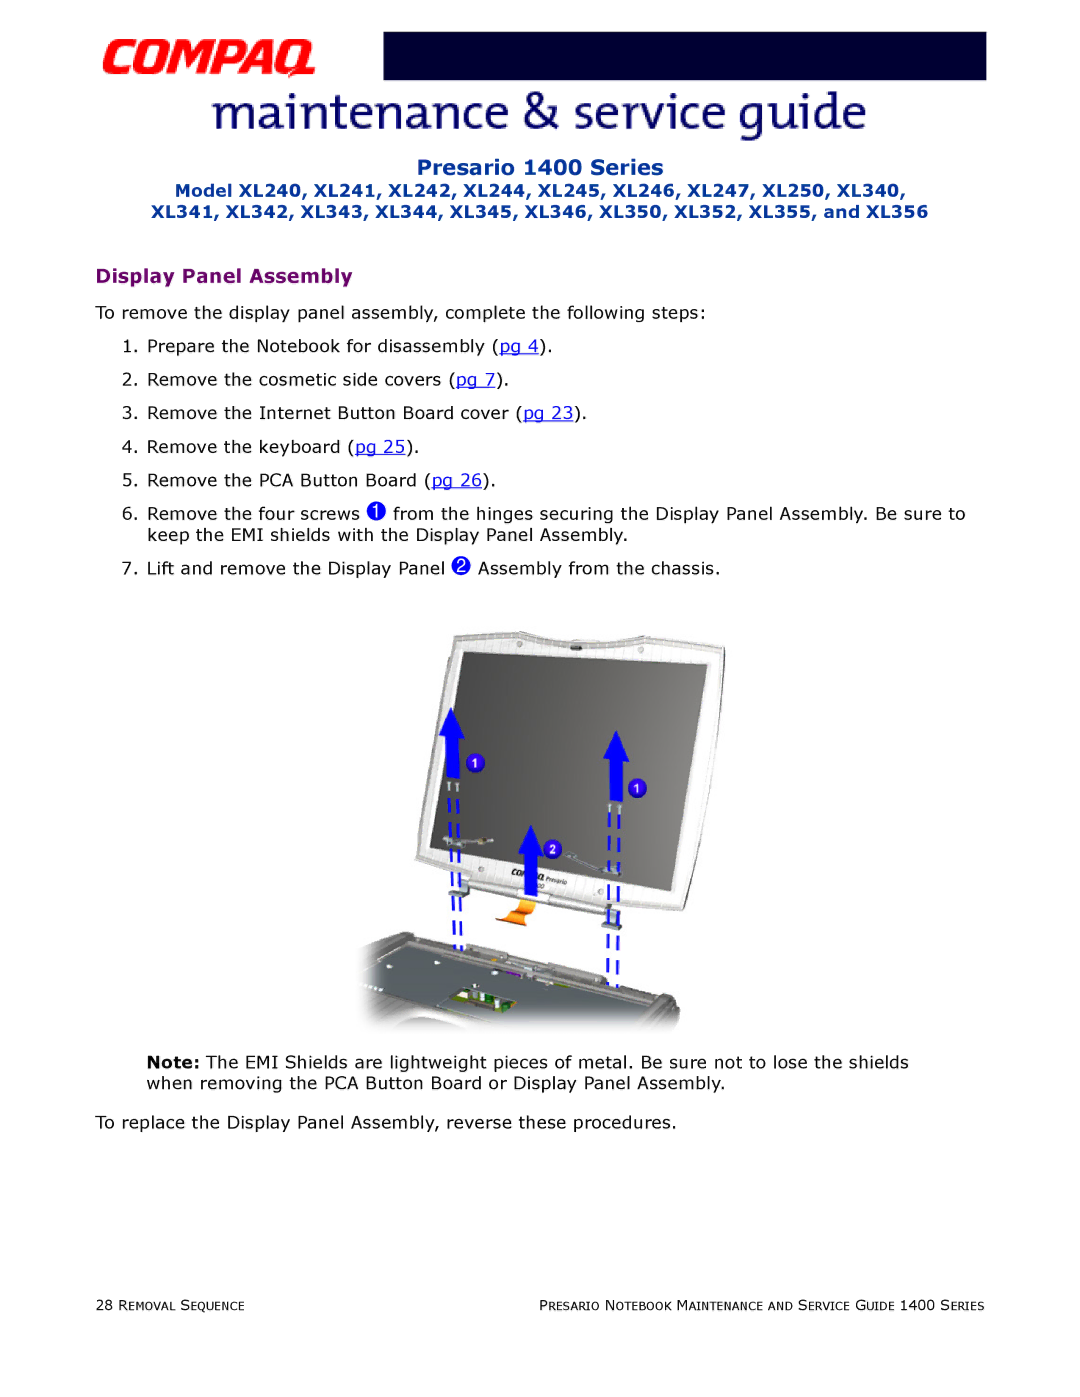
6.Remove the four screws 1 from the hinges securing the Display Panel Assembly. Be sure to keep the EMI shields with the Display Panel Assembly.
7.Lift and remove the Display Panel 2 Assembly from the chassis.
Note: The EMI Shields are lightweight pieces of metal. Be sure not to lose the shields when removing the PCA Button Board or Display Panel Assembly.
To replace the Display Panel Assembly, reverse these procedures.
28 REMOVAL SEQUENCE | PRESARIO NOTEBOOK MAINTENANCE AND SERVICE GUIDE 1400 SERIES |