Presario 1400 Series
Model XL240, XL241, XL242, XL244, XL245, XL246, XL247, XL250, XL340, XL341, XL342, XL343, XL344, XL345, XL346, XL350, XL352, XL355, and XL356
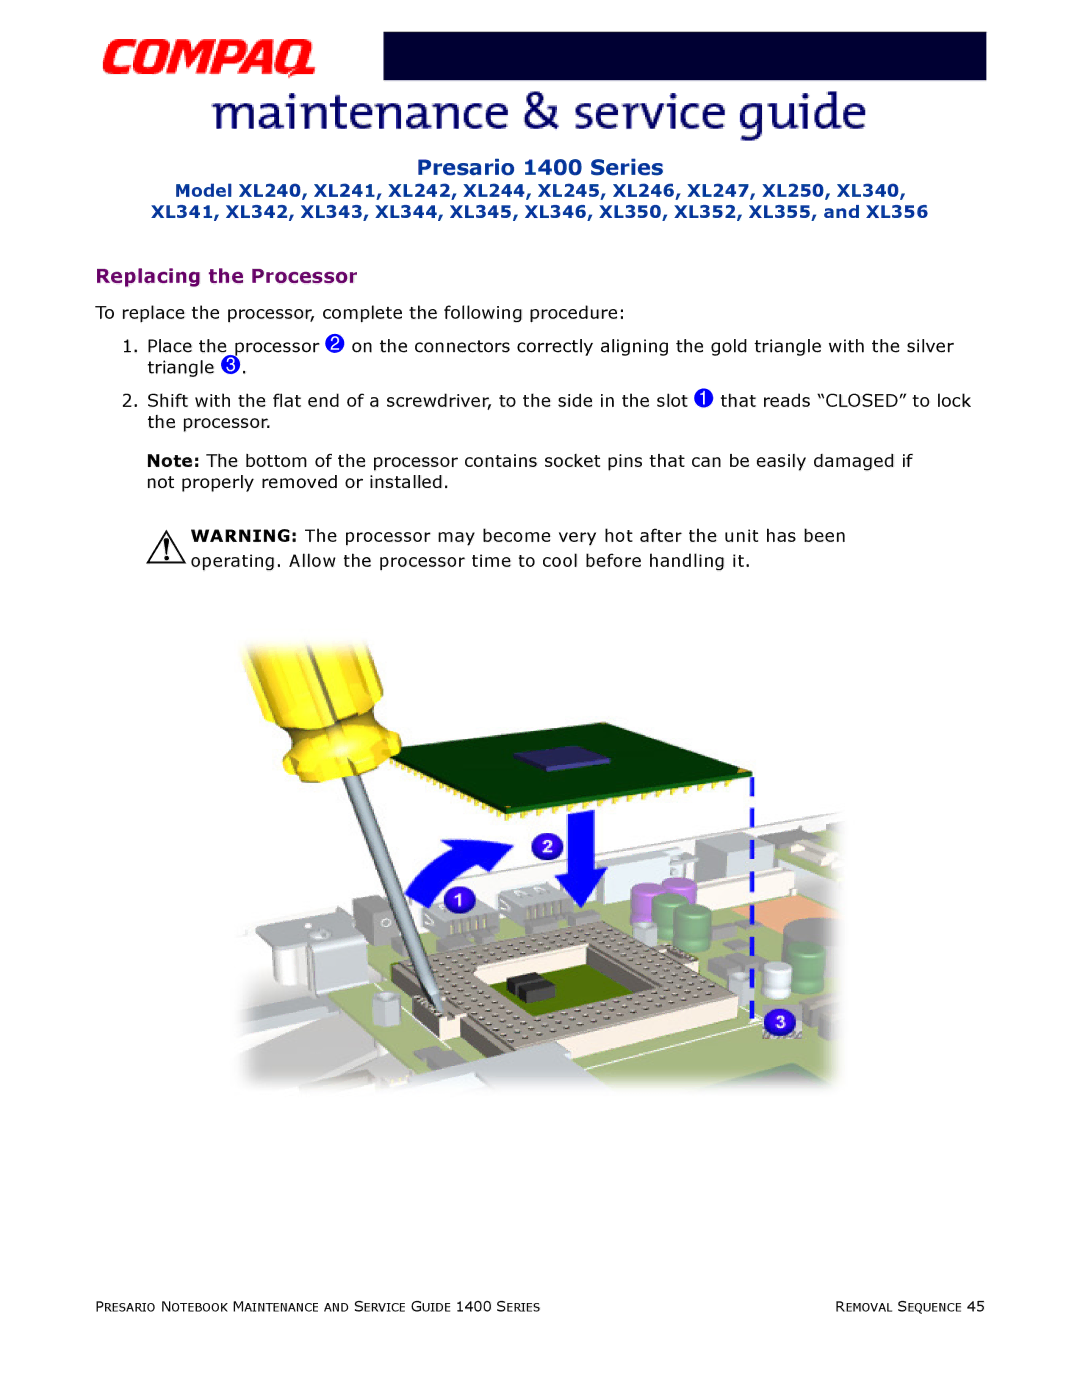
Replacing the Processor
To replace the processor, complete the following procedure:
1.Place the processor 2 on the connectors correctly aligning the gold triangle with the silver triangle 3.
2.Shift with the flat end of a screwdriver, to the side in the slot 1 that reads “CLOSED” to lock the processor.
Note: The bottom of the processor contains socket pins that can be easily damaged if not properly removed or installed.
ÅWARNING: The processor may become very hot after the unit has been operating. Allow the processor time to cool before handling it.
PRESARIO NOTEBOOK MAINTENANCE AND SERVICE GUIDE 1400 SERIES | REMOVAL SEQUENCE 45 |