HP 16532A - Service
6-9. Oscilloscope Module Removal and Replacement
The effects of ELECTROSTATIC DISCHARGE can damage electronic compo- nents. Use grounded wrist straps and mats when you are performing any kind of service on this module.
When you need to remove and replace a module, test the module first to determine the faulty part. If either of the trigger cables are faulty, remove the faulty cable and replace it with a new one. Refer to para- graph
Oscilloscope Module Removal Procedure:
Do not install, remove or replace the module in the instrument unless the instru- ment power is turned off.
1.Turn off the instrument power switch, unplug the power cord, and disconnect any input or output connections.
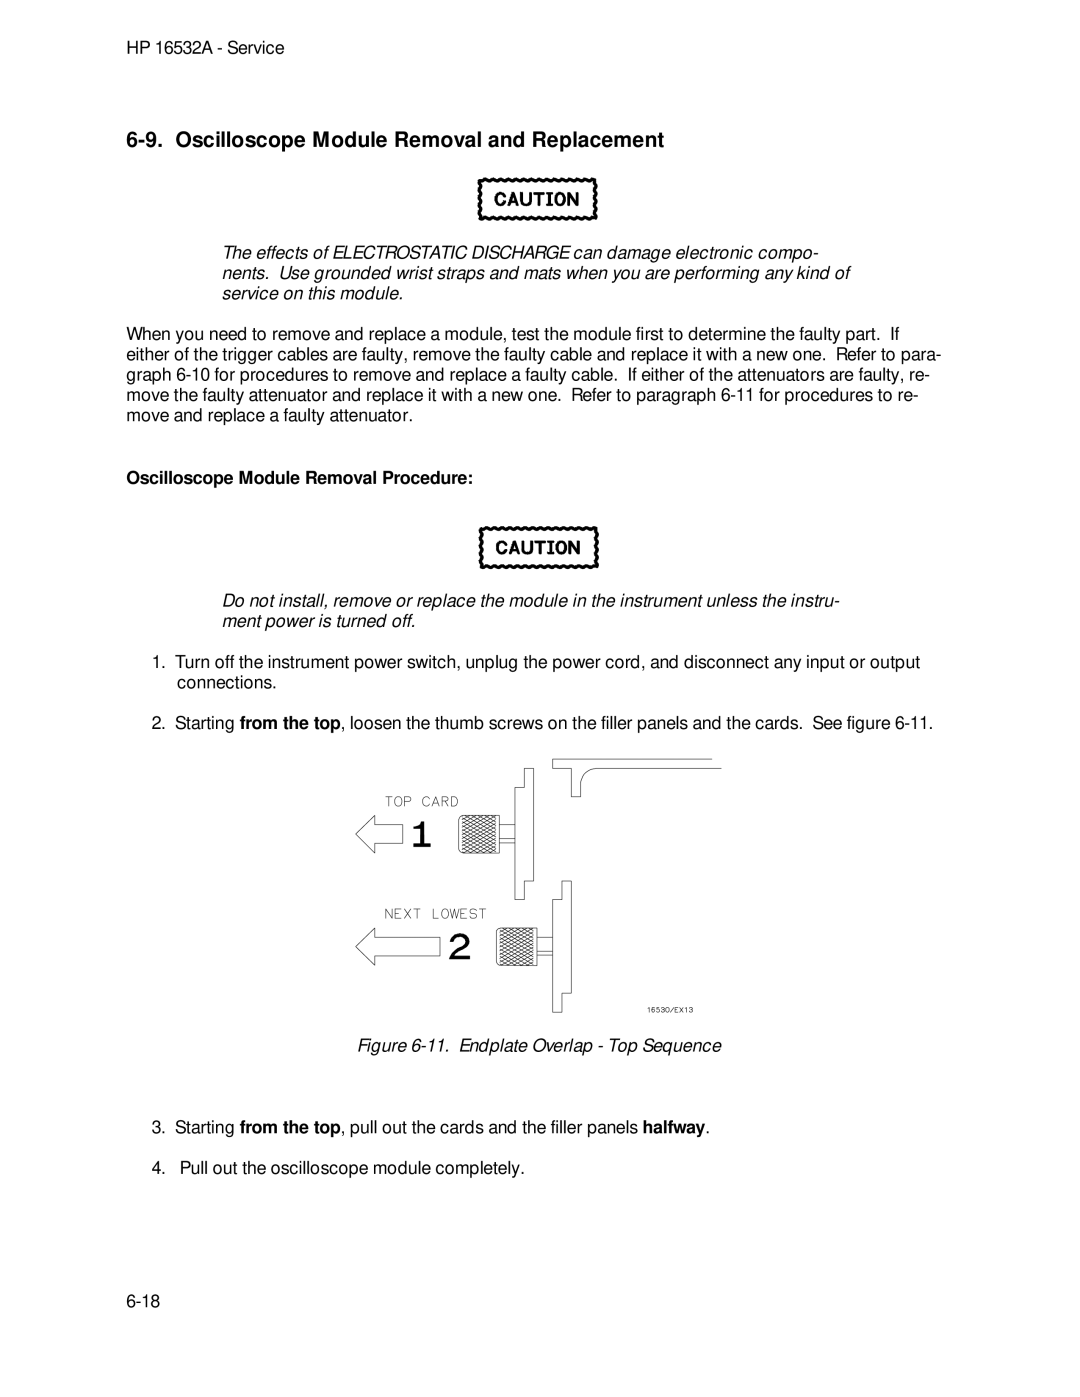
2.Starting from the top, loosen the thumb screws on the filler panels and the cards. See figure
Figure 6-11. Endplate Overlap - Top Sequence
3.Starting from the top, pull out the cards and the filler panels halfway.
4.Pull out the oscilloscope module completely.