system. To save the system, use option 21 on the Save menu. For more information about saving the entire system using option 21, refer to any of the following:
vThe chapter on saving your iSeries 400 server in the manual Backup and Recovery,
vThe Backup, recovery, and availability topic under Systems Management in the Information Center:
http://www.ibm.com/eserver/iseries/infocenter
To find the procedure for saving the entire system (using option 21) in the Information Center, do the following:
a.Click Systems Management
b.Click Backup, recovery, and availability
c.Click Backing up your server
d.Click Saving your server with the GO SAVE command
e.Click Saving your whole server with GO SAVE: Option 21
__ 5. Enter the command WRKDSKSTS OUTPUT (*PRINT) to get disk configuration and protection information. Use this printout to help analyze the disk unit configuration and protection.
If you want a different configuration after the upgrade, use this printout to plan for the desired configuration. Before you power down the system to perform the hardware upgrade, you must logically remove any disk unit that you will move during the upgrade.
__ 6. Use the Retrieve Configuration Source (RTVCFGSRC) command for the existing line, controller, and device descriptions. The configuration source is needed if any configuration objects must be manually changed or
DSPHDWRSC TYPE(*LWS) OUTPUT(*PRINT)
DSPHDWRSC TYPE(*STG) OUTPUT(*PRINT)
DSPHDWRSC TYPE(*CMN) OUTPUT(*PRINT)
DSPHDWRSC TYPE(*PRC) OUTPUT(*PRINT)
Make certain that the printouts are marked as to which partition they represent.
__ 7. Run the WRKHDWPRD command, option 4 to display and verify the information. Use F17 to print the information for the service representative.
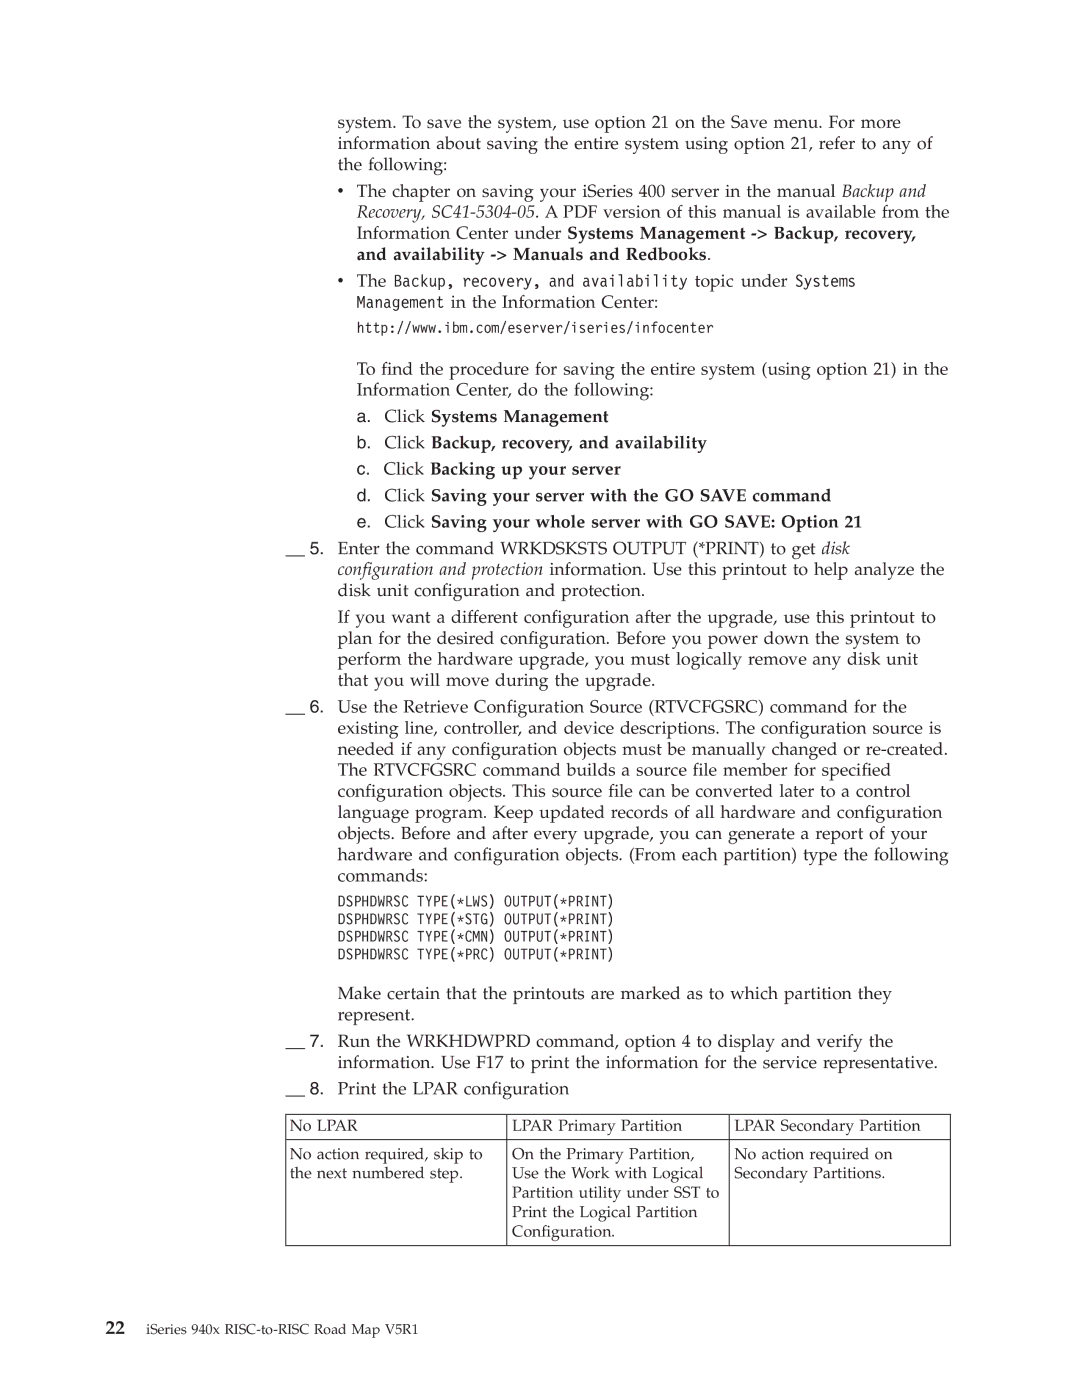
__ 8. Print the LPAR configuration
No LPAR | LPAR Primary Partition | LPAR Secondary Partition |
|
|
|
No action required, skip to | On the Primary Partition, | No action required on |
the next numbered step. | Use the Work with Logical | Secondary Partitions. |
| Partition utility under SST to |
|
| Print the Logical Partition |
|
| Configuration. |
|
|
|
|