Supplies information
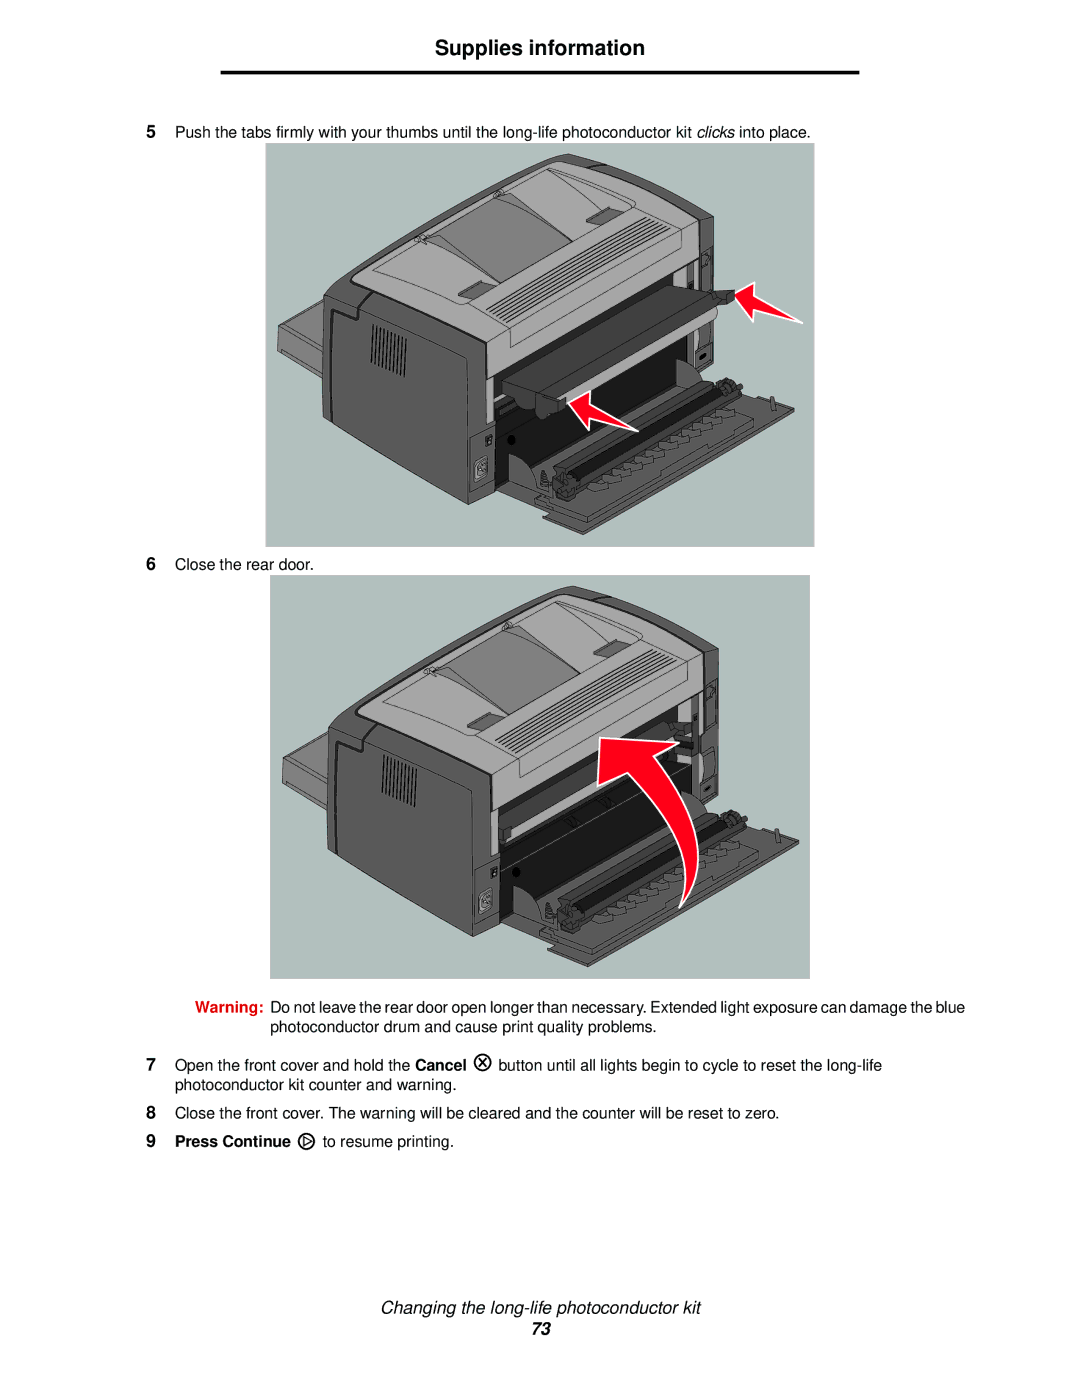
5Push the tabs firmly with your thumbs until the
6Close the rear door.
Warning: Do not leave the rear door open longer than necessary. Extended light exposure can damage the blue photoconductor drum and cause print quality problems.
7Open the front cover and hold the Cancel ![]() button until all lights begin to cycle to reset the
button until all lights begin to cycle to reset the
8Close the front cover. The warning will be cleared and the counter will be reset to zero.
9Press Continue ![]() to resume printing.
to resume printing.
Changing the
73