Notes:
•An adapter may be necessary if your flash drive does not fit directly into the port.
•The printer reads only one media device at a time. If you insert more than one media device, you will be asked to select which one you wish to use and remove the other one.
2Wait for the printer to read the flash drive.
Connecting a PictBridge-enabled digital camera
PictBridge is a technology available in most digital cameras that lets you print directly from your digital camera without using a computer. You can connect a
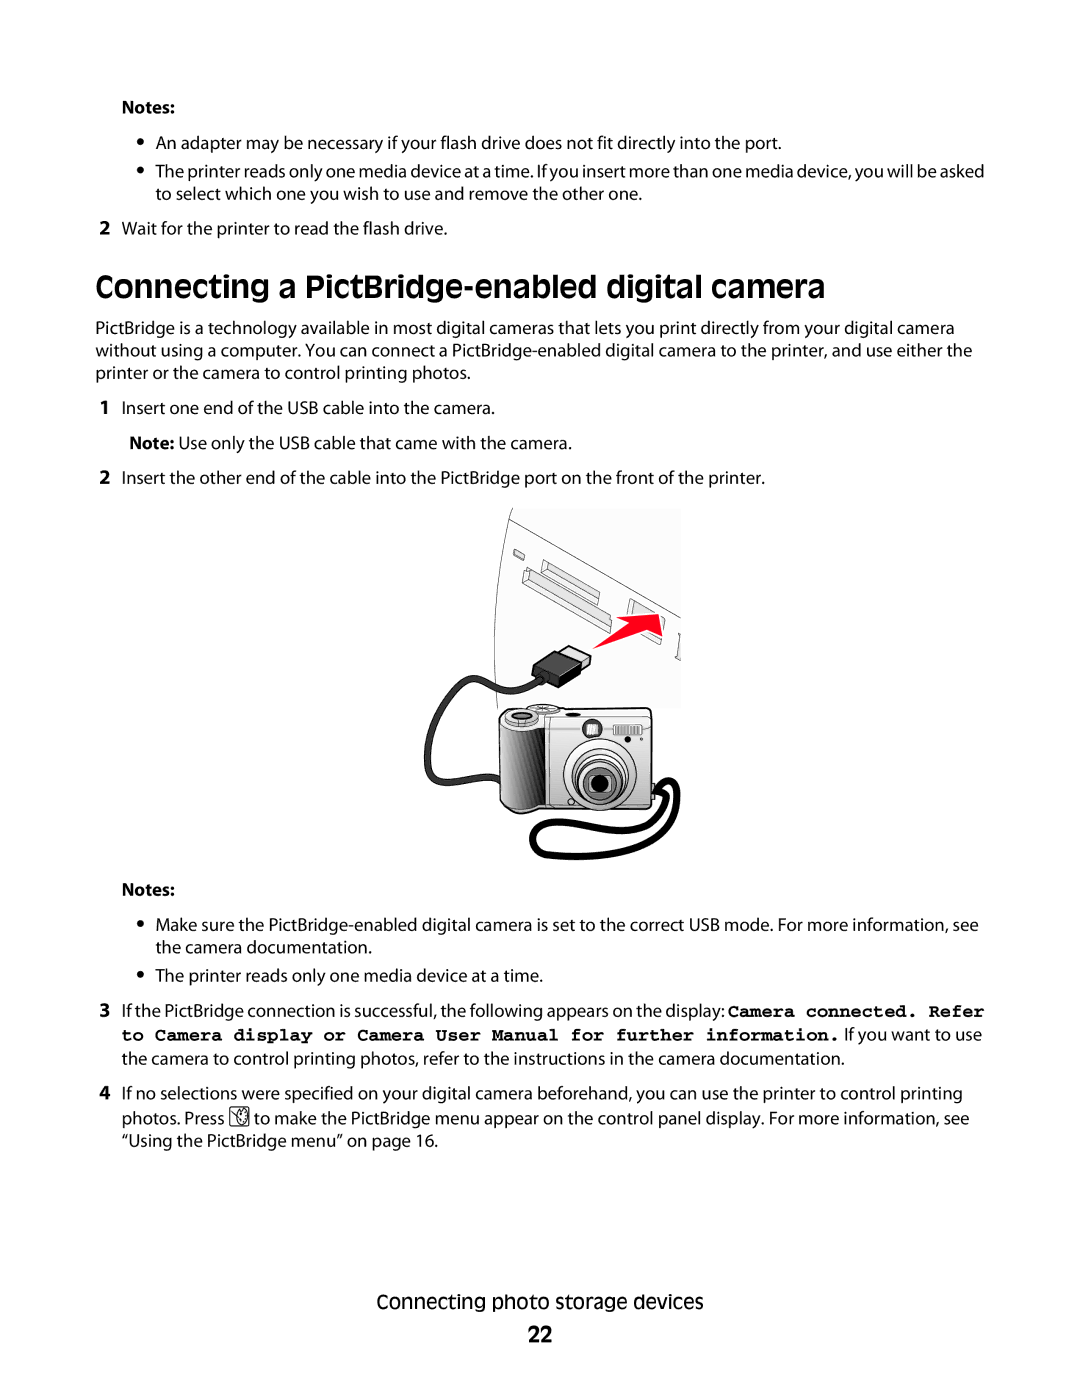
1Insert one end of the USB cable into the camera.
Note: Use only the USB cable that came with the camera.
2Insert the other end of the cable into the PictBridge port on the front of the printer.
Notes:
•Make sure the
•The printer reads only one media device at a time.
3If the PictBridge connection is successful, the following appears on the display: Camera connected. Refer to Camera display or Camera User Manual for further information. If you want to use the camera to control printing photos, refer to the instructions in the camera documentation.
4If no selections were specified on your digital camera beforehand, you can use the printer to control printing photos. Press ![]() to make the PictBridge menu appear on the control panel display. For more information, see “Using the PictBridge menu” on page 16.
to make the PictBridge menu appear on the control panel display. For more information, see “Using the PictBridge menu” on page 16.
Connecting photo storage devices
22