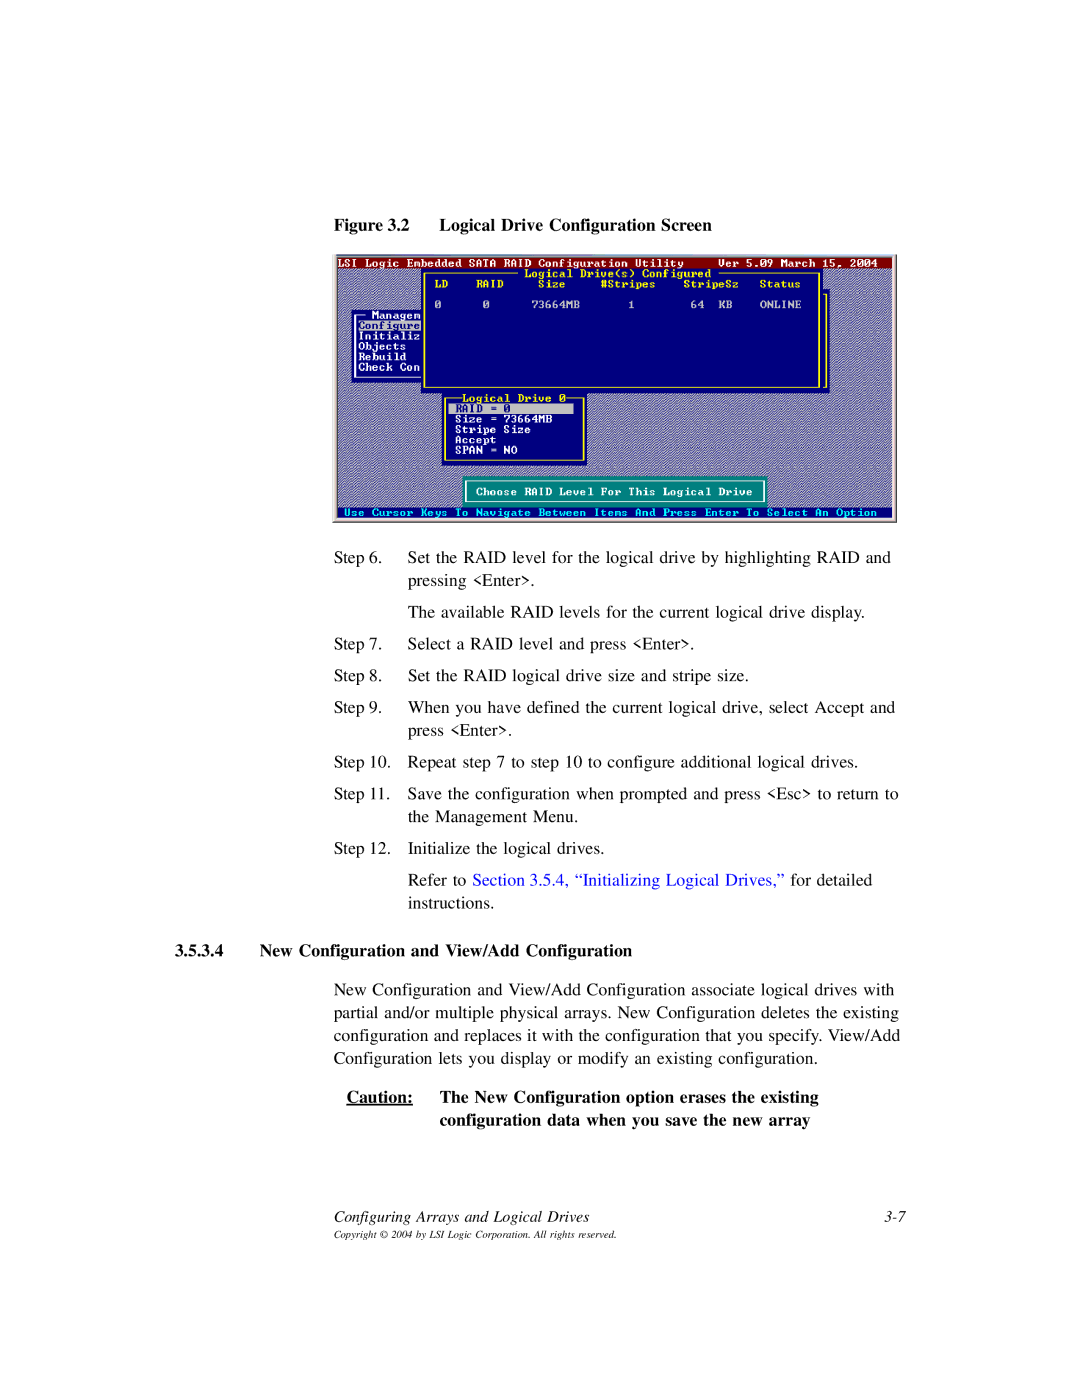
Figure 3.2 Logical Drive Configuration Screen
Step 6. Set the RAID level for the logical drive by highlighting RAID and pressing <Enter>.
The available RAID levels for the current logical drive display.
Step 7. Select a RAID level and press <Enter>.
Step 8. Set the RAID logical drive size and stripe size.
Step 9. When you have defined the current logical drive, select Accept and press <Enter>.
Step 10. Repeat step 7 to step 10 to configure additional logical drives.
Step 11. Save the configuration when prompted and press <Esc> to return to the Management Menu.
Step 12. Initialize the logical drives.
Refer to Section 3.5.4, “Initializing Logical Drives,” for detailed instructions.
3.5.3.4New Configuration and View/Add Configuration
New Configuration and View/Add Configuration associate logical drives with partial and/or multiple physical arrays. New Configuration deletes the existing configuration and replaces it with the configuration that you specify. View/Add Configuration lets you display or modify an existing configuration.
Caution: The New Configuration option erases the existing configuration data when you save the new array
Configuring Arrays and Logical Drives |