Printer Panel 1
7. Calibrating the Printer
7.1Loading Test Paper
Load test pattern paper that can be used with
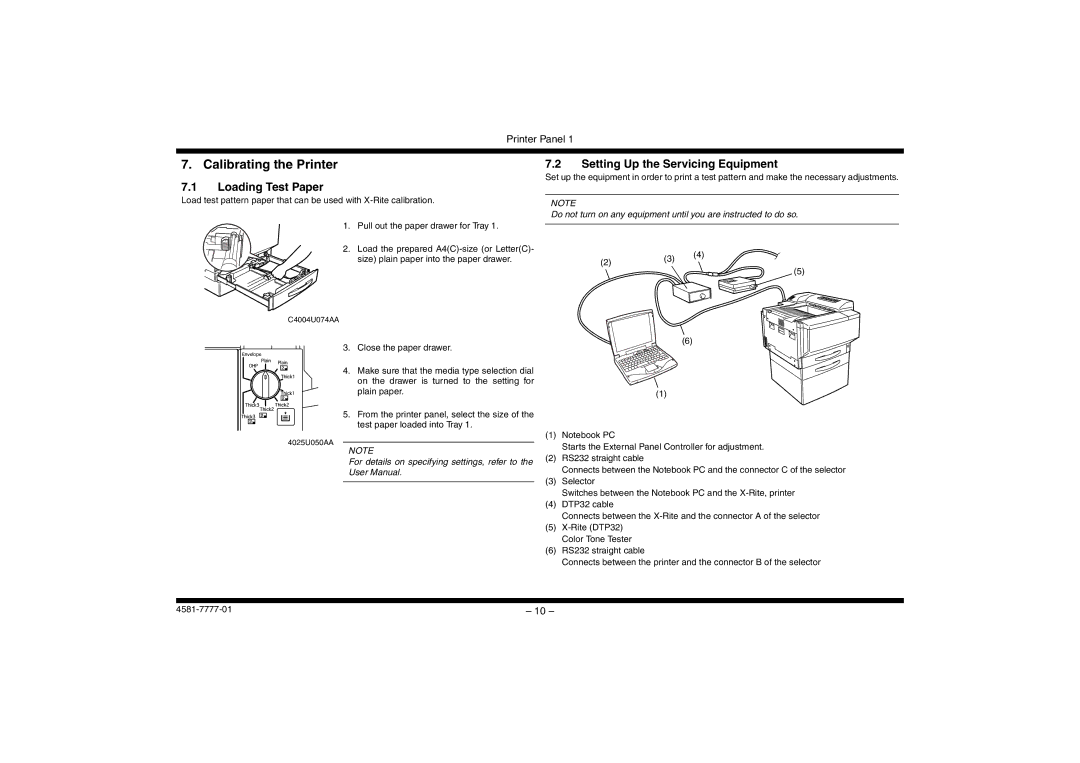
1. Pull out the paper drawer for Tray 1.
2. Load the prepared
C4004U074AA
3. Close the paper drawer.
4. Make sure that the media type selection dial on the drawer is turned to the setting for plain paper.
5. From the printer panel, select the size of the test paper loaded into Tray 1.
4025U050AA
NOTE
For details on specifying settings, refer to the
User Manual.
7.2Setting Up the Servicing Equipment
Set up the equipment in order to print a test pattern and make the necessary adjustments.
NOTE
Do not turn on any equipment until you are instructed to do so.
(2) | (3) | (4) |
| ||
|
|
![]() (5)
(5)
(6)
(1)
(1)Notebook PC
Starts the External Panel Controller for adjustment.
(2)RS232 straight cable
Connects between the Notebook PC and the connector C of the selector
(3)Selector
Switches between the Notebook PC and the
(4)DTP32 cable
Connects between the
(5)
(6)RS232 straight cable
Connects between the printer and the connector B of the selector
– 10 – |
