Printer Panel 1
3.2Installing the Toner Cartridge and the Filter
NOTE
Toner does not come with the printer. Purchase toner cartridges (of different colors) sep- arately available.
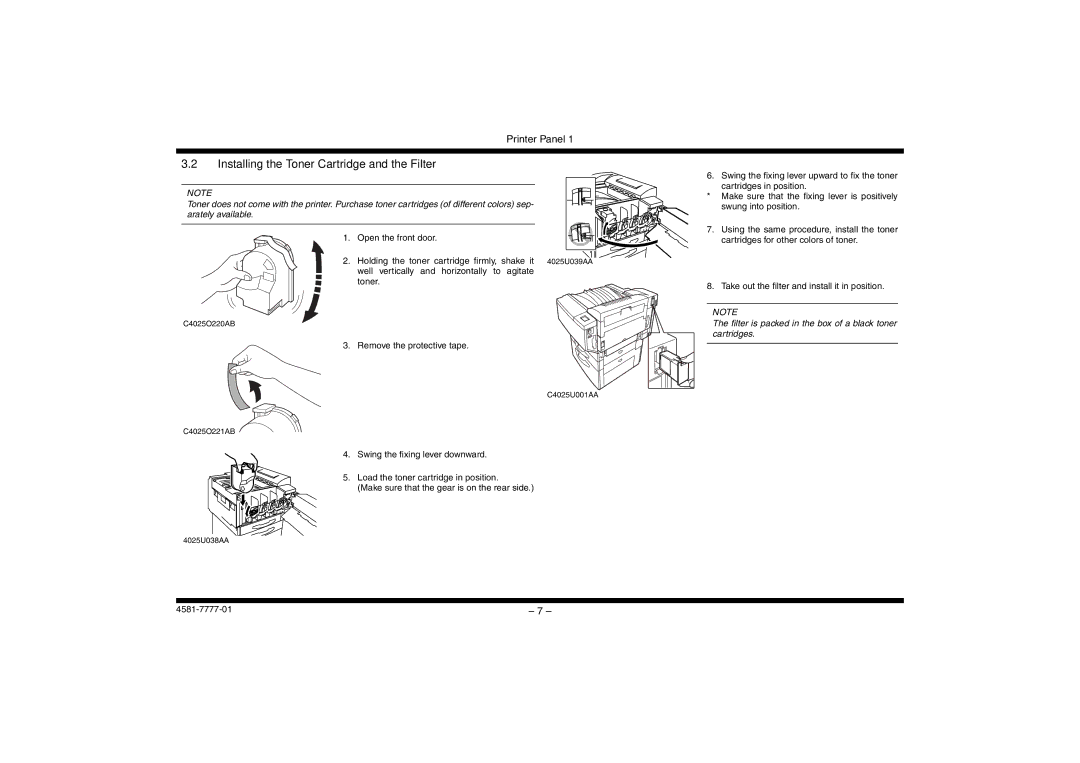
1.Open the front door.
2.Holding the toner cartridge firmly, shake it well vertically and horizontally to agitate
toner.
C4025O220AB
3. Remove the protective tape.
C4025O221AB
4. Swing the fixing lever downward.
5. Load the toner cartridge in position.
(Make sure that the gear is on the rear side.)
4025U039AA
C4025U001AA
6. Swing the fixing lever upward to fix the toner cartridges in position.
*Make sure that the fixing lever is positively swung into position.
7.Using the same procedure, install the toner cartridges for other colors of toner.
8.Take out the filter and install it in position.
NOTE
The filter is packed in the box of a black toner cartridges.
4025U038AA
– 7 – |