Printer Panel 1
C4004P567CA
Test patterns
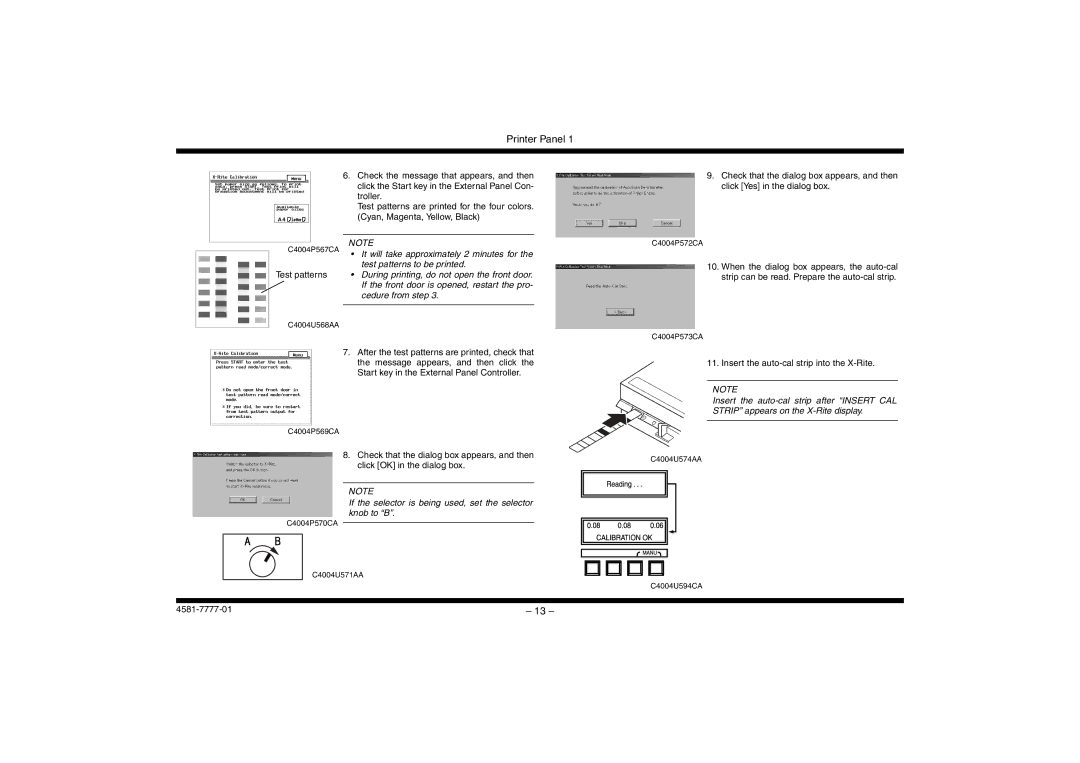
6.Check the message that appears, and then click the Start key in the External Panel Con- troller.
Test patterns are printed for the four colors. (Cyan, Magenta, Yellow, Black)
NOTE
•It will take approximately 2 minutes for the test patterns to be printed.
•During printing, do not open the front door. If the front door is opened, restart the pro- cedure from step 3.
9.Check that the dialog box appears, and then click [Yes] in the dialog box.
C4004P572CA
10.When the dialog box appears, the
C4004U568AA
7.After the test patterns are printed, check that the message appears, and then click the Start key in the External Panel Controller.
C4004P569CA
8.Check that the dialog box appears, and then click [OK] in the dialog box.
NOTE
If the selector is being used, set the selector knob to “B”.
C4004P570CA
C4004U571AA
C4004P573CA
11. Insert the
NOTE
Insert the
STRIP” appears on the
C4004U574AA
C4004U594CA
– 13 – |