2
5.Set port parameters for the selected ports, as described in “Viewing Switch Port Parameters”, earlier in this chapter.
6.Click APPLY to save your changes, or CANCEL to restore previous settings.
Setting Up SNMP Communities
SNMP communities are the SNMP values that an SNMP manager uses to manage the switch. SNMP Version 2c is supported.
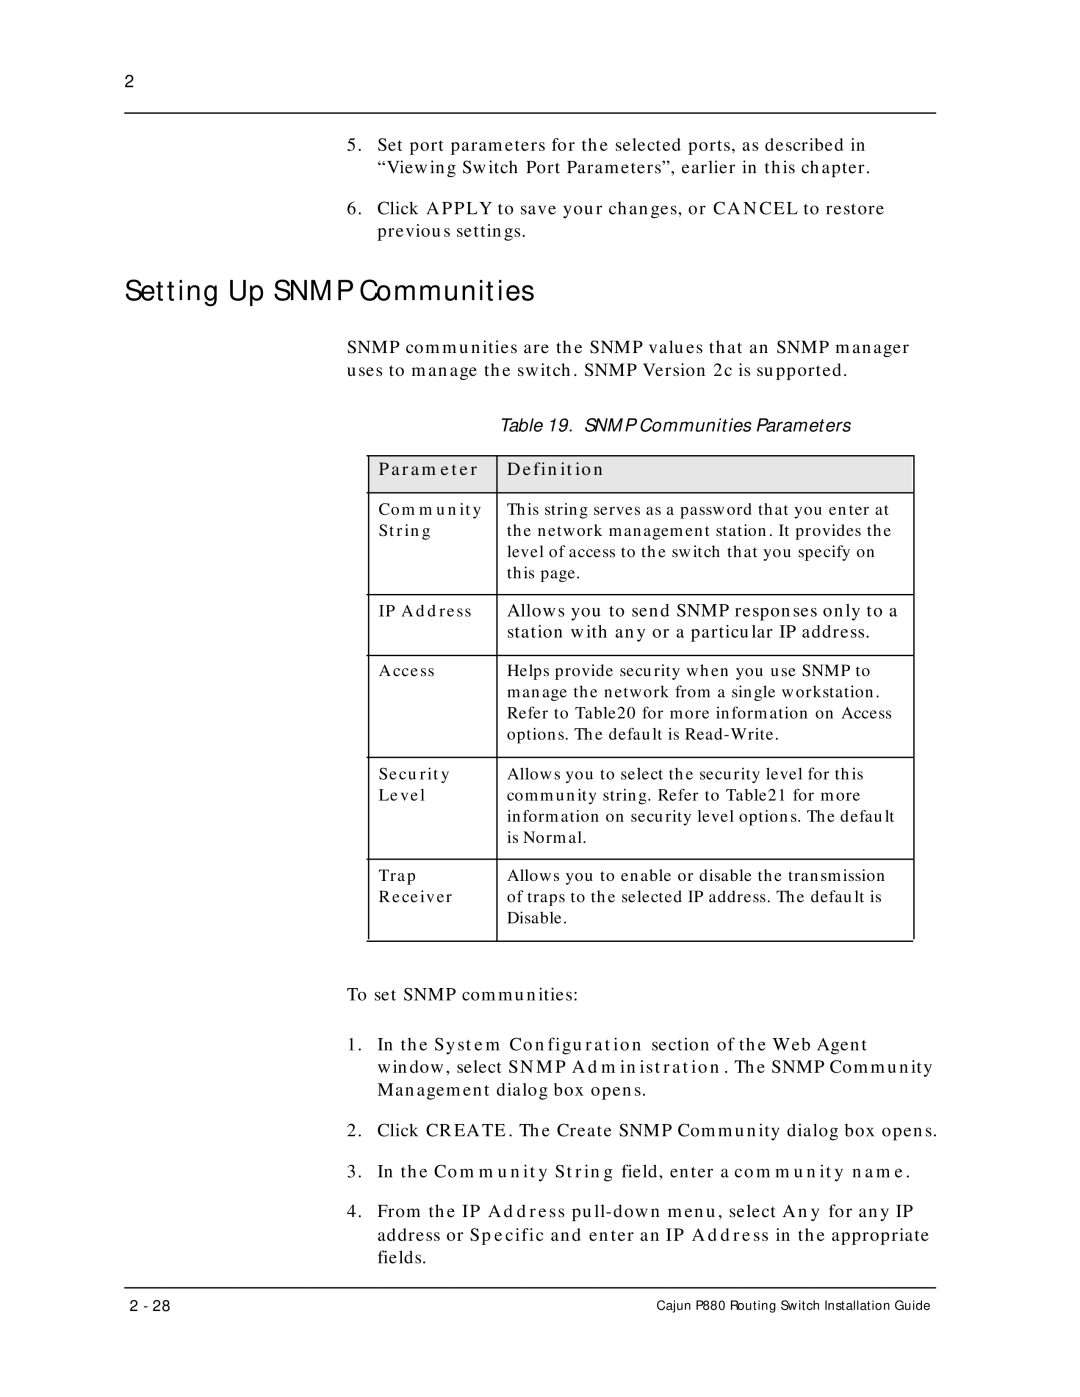
| Table 19. SNMP Communities Parameters |
|
|
Parameter | Definition |
|
|
Community | This string serves as a password that you enter at |
String | the network management station. It provides the |
| level of access to the switch that you specify on |
| this page. |
|
|
IP Address | Allows you to send SNMP responses only to a |
| station with any or a particular IP address. |
|
|
Access | Helps provide security when you use SNMP to |
| manage the network from a single workstation. |
| Refer to Table20 for more information on Access |
| options. The default is |
|
|
Security | Allows you to select the security level for this |
Level | community string. Refer to Table21 for more |
| information on security level options. The default |
| is Normal. |
|
|
Trap | Allows you to enable or disable the transmission |
Receiver | of traps to the selected IP address. The default is |
| Disable. |
|
|
To set SNMP communities:
1.In the System Configuration section of the Web Agent window, select SNMP Administration. The SNMP Community Management dialog box opens.
2.Click CREATE. The Create SNMP Community dialog box opens.
3.In the Community String field, enter a community name.
4.From the IP Address
2 - 28 | Cajun P880 Routing Switch Installation Guide |