Chapter 3: CallFinder Server Installation
7. Setting Administrative Functions
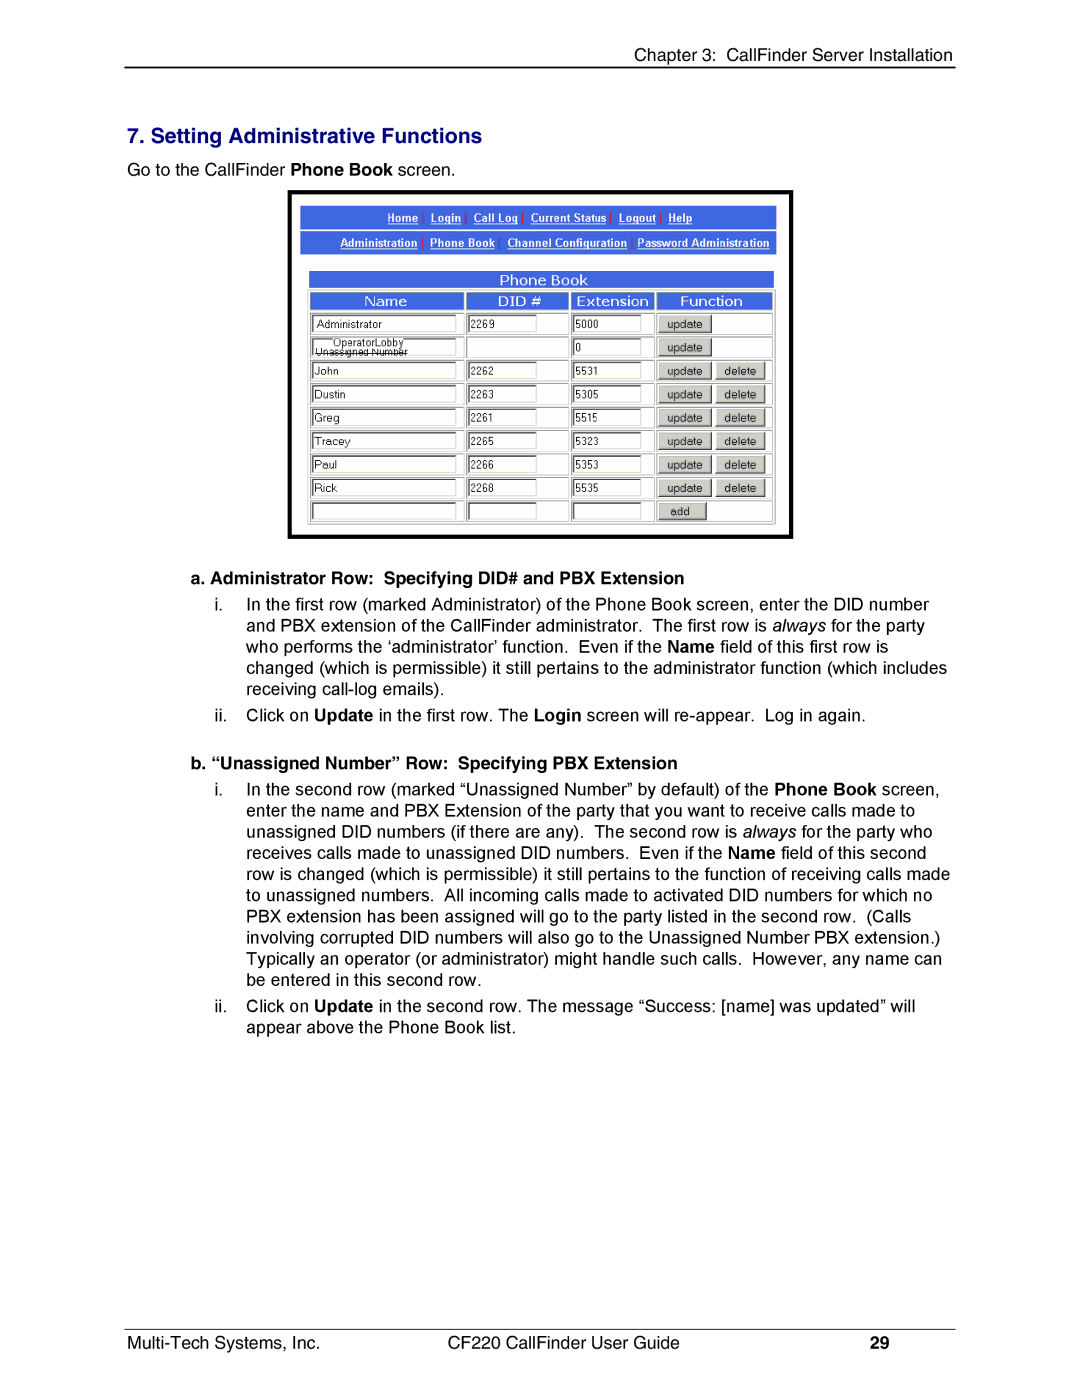
Go to the CallFinder Phone Book screen.
a. Administrator Row: Specifying DID# and PBX Extension
i.In the first row (marked Administrator) of the Phone Book screen, enter the DID number and PBX extension of the CallFinder administrator. The first row is always for the party who performs the ‘administrator’ function. Even if the Name field of this first row is changed (which is permissible) it still pertains to the administrator function (which includes receiving
ii.Click on Update in the first row. The Login screen will
b.“Unassigned Number” Row: Specifying PBX Extension
i.In the second row (marked “Unassigned Number” by default) of the Phone Book screen, enter the name and PBX Extension of the party that you want to receive calls made to unassigned DID numbers (if there are any). The second row is always for the party who receives calls made to unassigned DID numbers. Even if the Name field of this second row is changed (which is permissible) it still pertains to the function of receiving calls made to unassigned numbers. All incoming calls made to activated DID numbers for which no PBX extension has been assigned will go to the party listed in the second row. (Calls involving corrupted DID numbers will also go to the Unassigned Number PBX extension.) Typically an operator (or administrator) might handle such calls. However, any name can be entered in this second row.
ii.Click on Update in the second row. The message “Success: [name] was updated” will appear above the Phone Book list.
CF220 CallFinder User Guide | 29 |