Chapter 7: FFCF Manager Operation

 Firmware Updating Process - Detailed
Over time, new versions of CallFinder firmware will be issued. When these newer versions become available, you will want to secure the firmware files (typically by downloading them from the MultiTech web site) and install them in the CallFinder.
There are three parts to a full firmware update:
(a)updating DID Channel1/Modem firmware (with file name of the form gpqg<x><y>.hex; where x is a number and y is a letter),
(b)updating DID Channel2/Modem firmware (same file name as above), and
(c)updating CallFinder server firmware (with file name of the form
NOTE: You must have the update files on your computer before beginning this procedure. The latest version of these files will be available on the MultiTech web site. Put them in a directory on a computer connected to the network on which the CallFinder unit is running.
NOTE: Updating the CallFinder unit will take it out of operation for a few minutes (allow 10 minutes for each update if you already have the new firmware in a directory on the host computer). Do the update at a time that is not critical to your organization’s usage of DID service.
To update firmware, follow the steps shown below.
CallFinder Channel-Modem Firmware Update
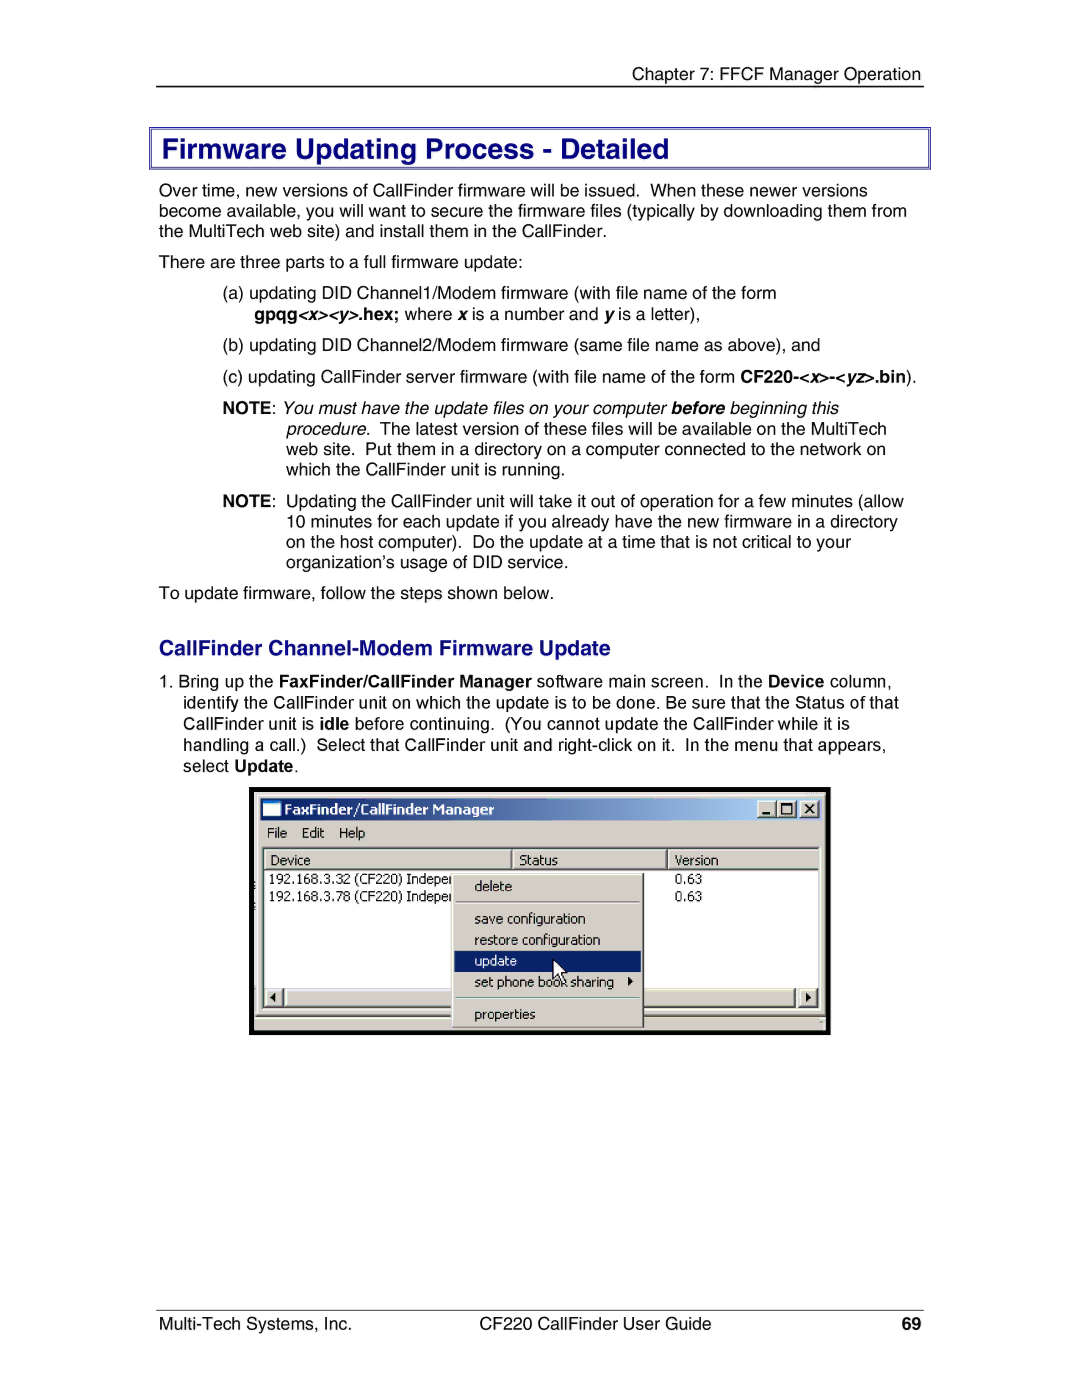
1.Bring up the FaxFinder/CallFinder Manager software main screen. In the Device column, identify the CallFinder unit on which the update is to be done. Be sure that the Status of that CallFinder unit is idle before continuing. (You cannot update the CallFinder while it is handling a call.) Select that CallFinder unit and
CF220 CallFinder User Guide | 69 |
