Multiple Network Address Translation
1.Define the public range of addresses that external computers should use to get to the NAT internal machines. These are the addresses that someone on the Internet would see.
2.Create a List name that will act as a rule or server holder.
3.Create a map or rule that specifies the internal range of NATed addresses and the external range they are to be associated with.
4.Associate the Map or Server List to your WAN interface via a Connection Profile or the Default Profile.
The three NAT features all operate completely independently of each other, although they can be used simultaneously on the same Connection Profile.
You can configure a simple
An example MultiNAT configuration at the end of this chapter describes some applications for these features. See the MultiNAT Configuration Example on page
In order to configure the router to make servers on your LAN visible to the Internet, you use advanced features in the System Configuration screens, described in IP setup.
IP setup
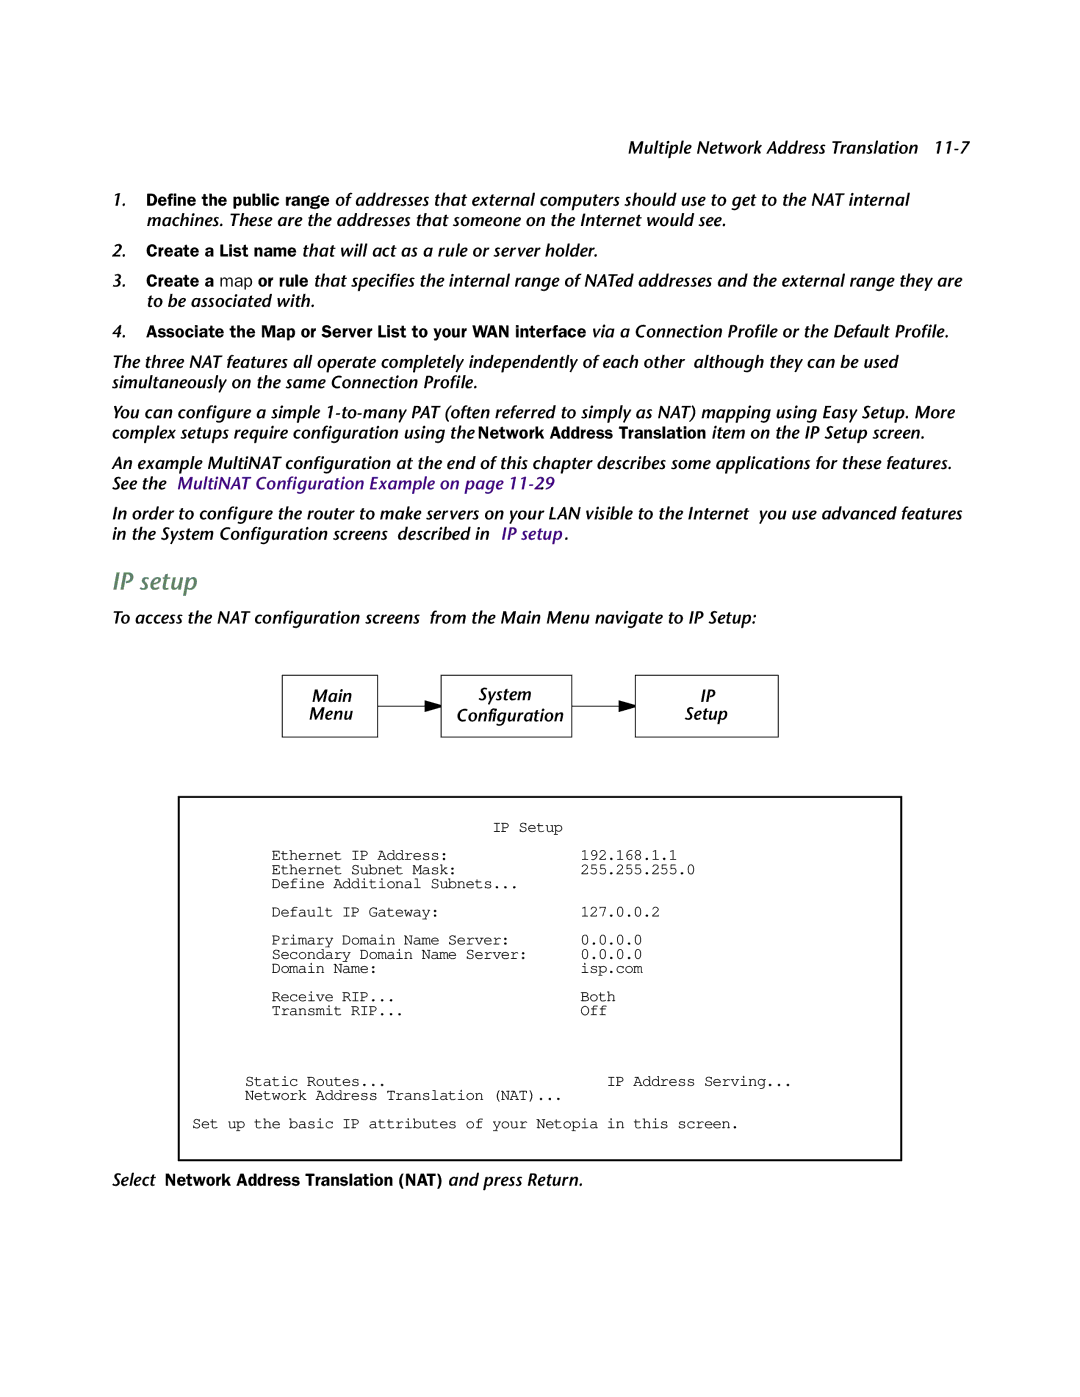
To access the NAT configuration screens, from the Main Menu navigate to IP Setup:
Main
Menu
System
Configuration
IP
Setup
IP Setup |
|
Ethernet IP Address: | 192.168.1.1 |
Ethernet Subnet Mask: | 255.255.255.0 |
Define Additional Subnets... |
|
Default IP Gateway: | 127.0.0.2 |
Primary Domain Name Server: | 0.0.0.0 |
Secondary Domain Name Server: | 0.0.0.0 |
Domain Name: | isp.com |
Receive RIP... | Both |
Transmit RIP... | Off |
Static Routes... | IP Address Serving... |
Network Address Translation (NAT)... |
|
Set up the basic IP attributes of your Netopia in this screen.