1INSTALLATION
1.1UNPACKING PROCEDURE
1.Remove the Profile Controller from its packing. The Controller is supplied with a panel gasket and
2.Examine the delivered items for damage or deficiencies. If any is found, notify the carrier immediately.
1.2PANEL-MOUNTING THE CONTROLLER
The panel on which the Profile Controller is to be mounted must be rigid and may be up to 6.0mm (0.25 inches) thick. The
Several instruments may be installed in a single
(48n - 4) millimetres or (3.78n - 0.16) inches.
+0.5 |
45mm |
45m m +0.5 |
Figure |
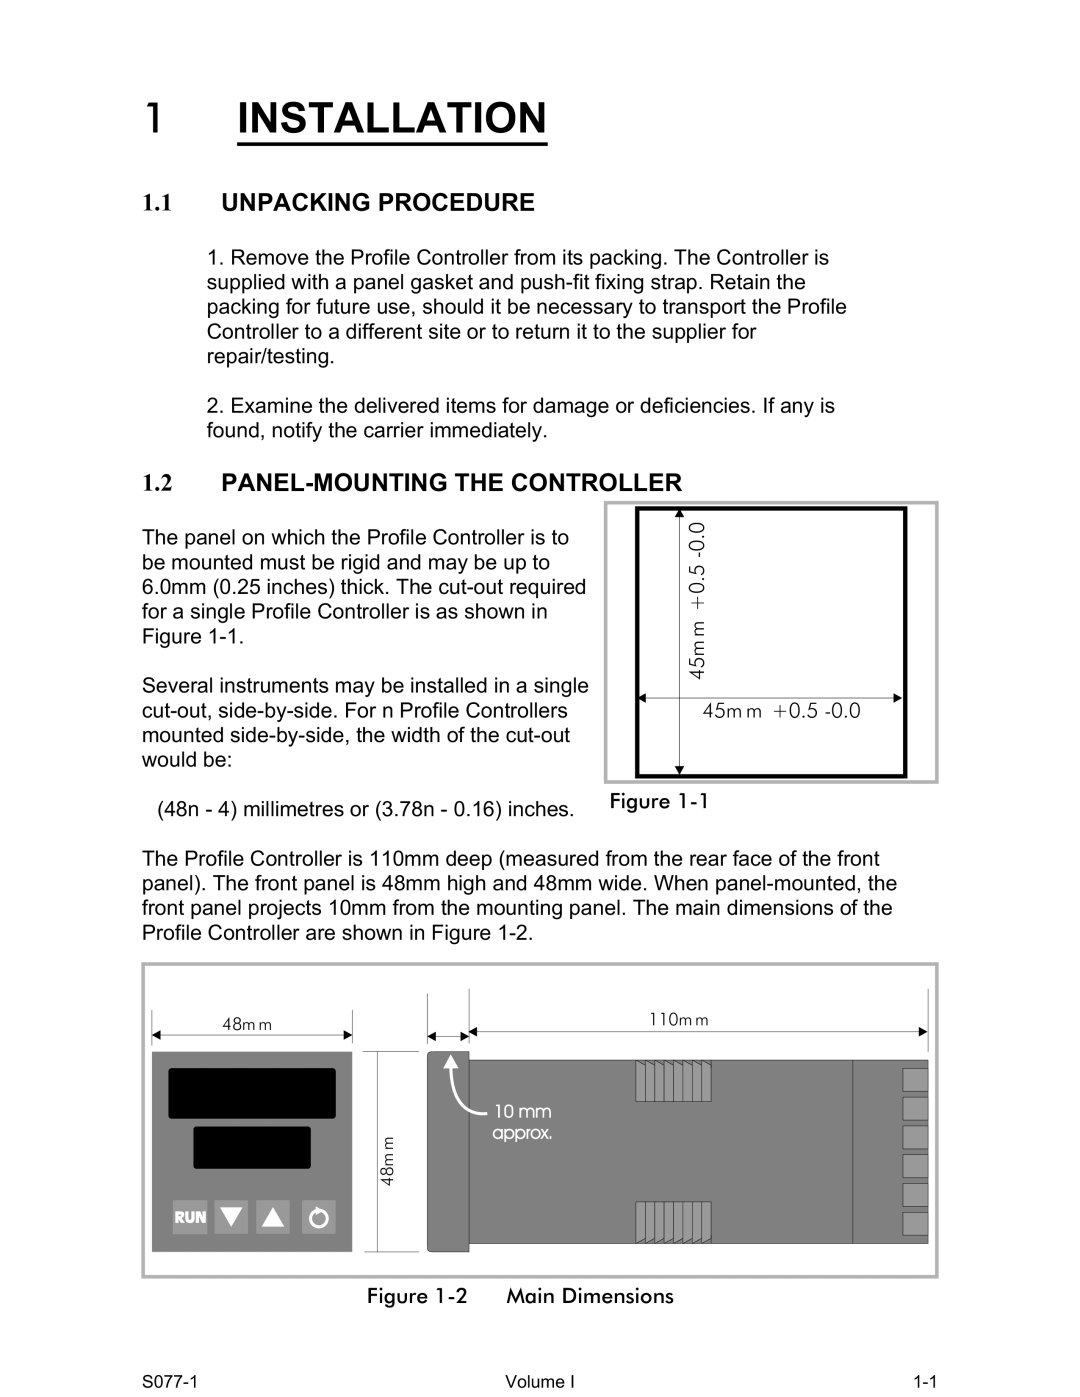
The Profile Controller is 110mm deep (measured from the rear face of the front panel). The front panel is 48mm high and 48mm wide. When
48m m | 110m m |
| |
| 48mm |
Figure 1-2 Main Dimensions
Volume I |