USER SETTING PROCEDURE
This camera is provided with 3 menus: Main, Sub Scena Files 1, 2, 3, User A. User B.
The level in these menus are preset at the factory
An initial setting can be set for all scene files and can be changed from a preset conditlon to a desired one
How to display the Main Menu
1Set the Scene File Selection Switch (10) or (131)/(184) of RCU (RCB) to the position 1, 2 or 3.
The scene file number is displayed in the viewfinder for a few seconds as SCENE1, SCENE2 or SCENE3.
2 Set the User Set Switch (16) in the side cover to the position 1.
The Main Menu is displayed in the viewfinder
Note: By Setting this switch to the position 2, the dis- play to the monitor screen is available
The camera is now in the Main Menu Setting mode.
3.By repeated pressing of the Page Switch (13) of the camera or (136) / (191) of the RCU (RCB), the Main Menu can be displayed in the viewfinder or on the monitor screen.
4.By pressing the Item Switch (14) of the camera or (135)/(190) of RCU (RCB), the cursor is moved to the
various Items in the menu. The item identified by the cursor can have its level set or changed at this point
5Change of the mode or level is made by use of the Up (15) / Down (16) Switch of the camera
How to display the Sub-Menu
To display the
The Sub Menu is displayed in the vlewfinder
By setting the User Set Siwtch to the position 2, this menu is also displayed on the monitor screen
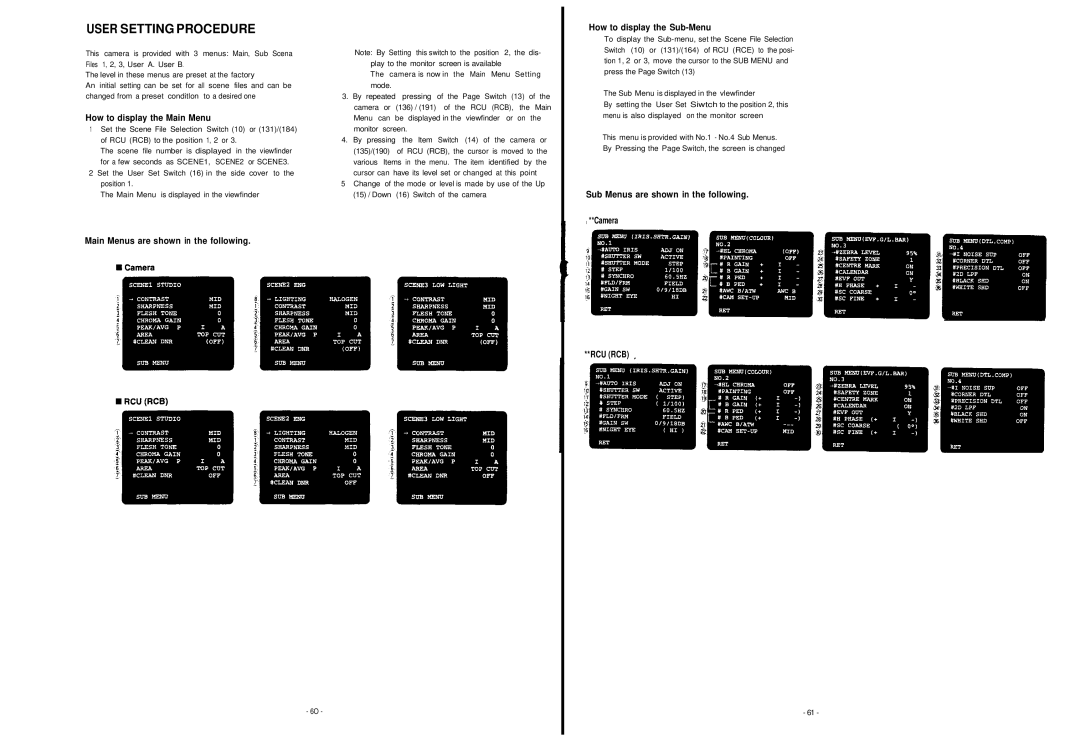
This menu is provided with No.1 - No.4 Sub Menus. By Pressing the Page Switch, the screen is changed
Sub Menus are shown in the following.
**Camera
Main Menus are shown in the following.
- 6O -
**RCU (RCB)
- 61 -
