Finding the Controls / Setup
Overview!
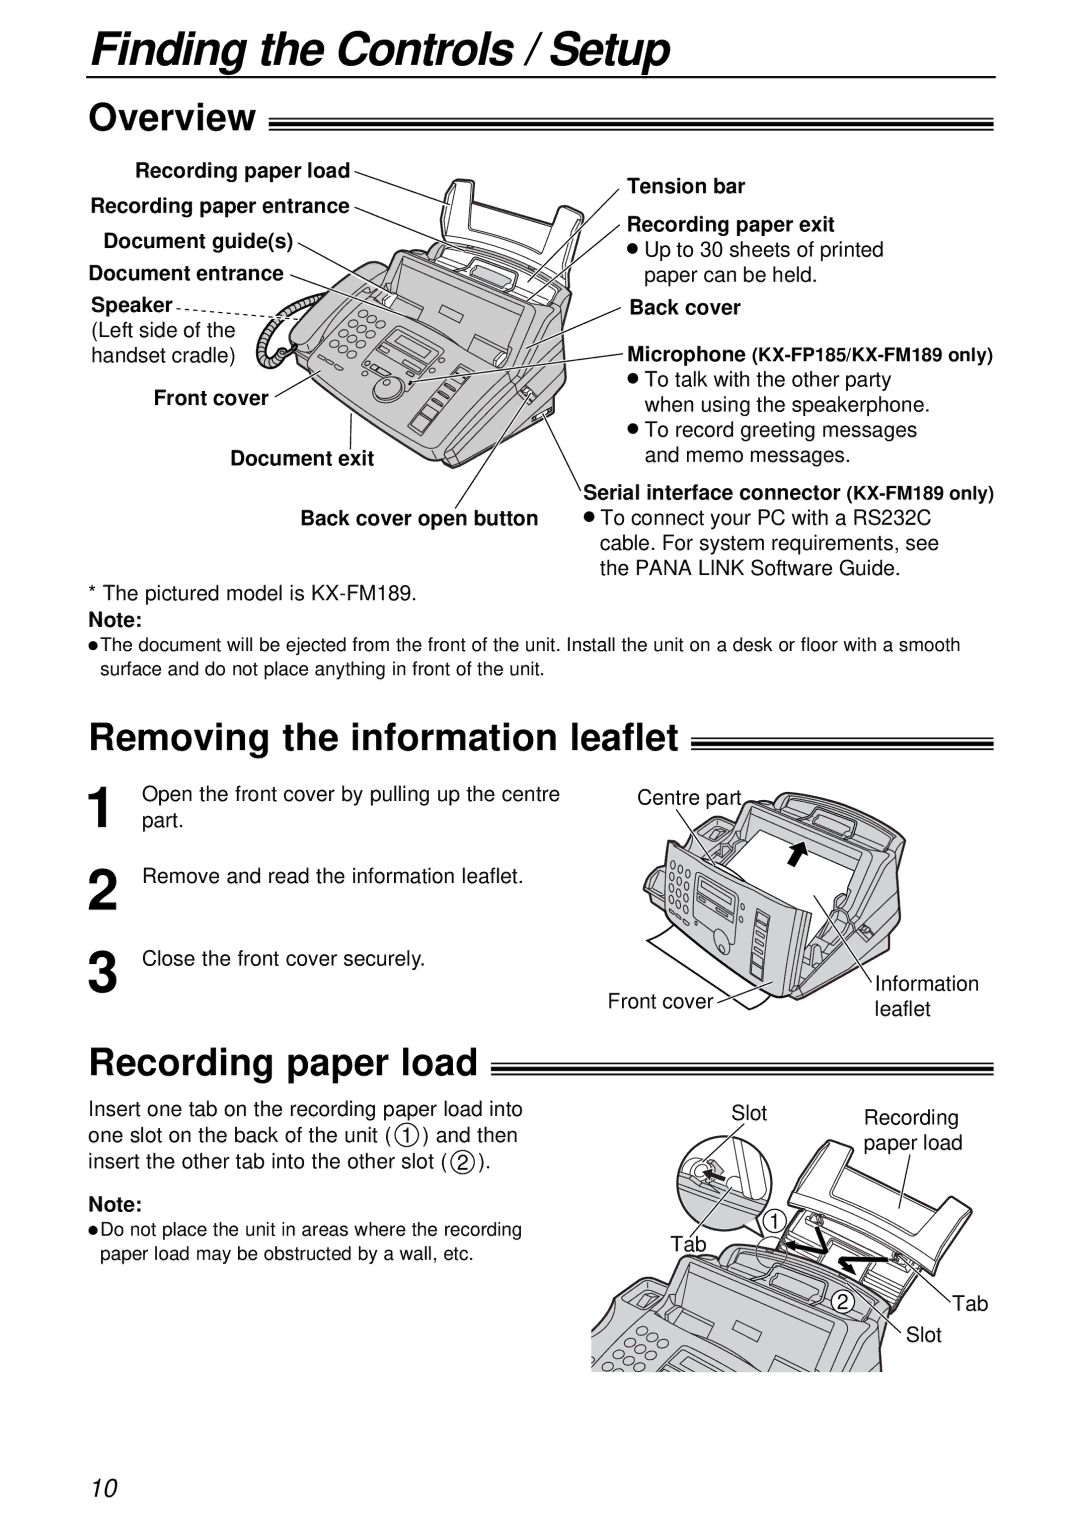
Recording paper load
Recording paper entrance
Document guide(s)
Document entrance
Speaker
(Left side of the handset cradle)
Front cover ![]()
Document exit
Back cover open button
*The pictured model is
Note:
Tension bar
Recording paper exit
●Up to 30 sheets of printed paper can be held.
Back cover
Microphone
●To talk with the other party when using the speakerphone.
●To record greeting messages and memo messages.
Serial interface connector (KX-FM189 only)
●To connect your PC with a RS232C cable. For system requirements, see the PANA LINK Software Guide.
●The document will be ejected from the front of the unit. Install the unit on a desk or floor with a smooth surface and do not place anything in front of the unit.
Removing the information leaflet!
1 | Open the front cover by pulling up the centre |
part. | |
2 | Remove and read the information leaflet. |
3 | Close the front cover securely. |
Recording paper load!
Centre part
Front cover | Information | |
leaflet | ||
|
Insert one tab on the recording paper load into | Slot | Recording |
one slot on the back of the unit ( 1 ) and then |
| paper load |
|
|
insert the other tab into the other slot ( 2 ).
Note: | 1 |
|
● Do not place the unit in areas where the recording | 1 |
|
Tab |
| |
paper load may be obstructed by a wall, etc. |
| |
|
| |
| 2 | Tab |
Slot
10
