Receiving Faxes
Using the unit with an answering machine
(KX-FP181 only)!
Setting up the fax machine and an answering machine
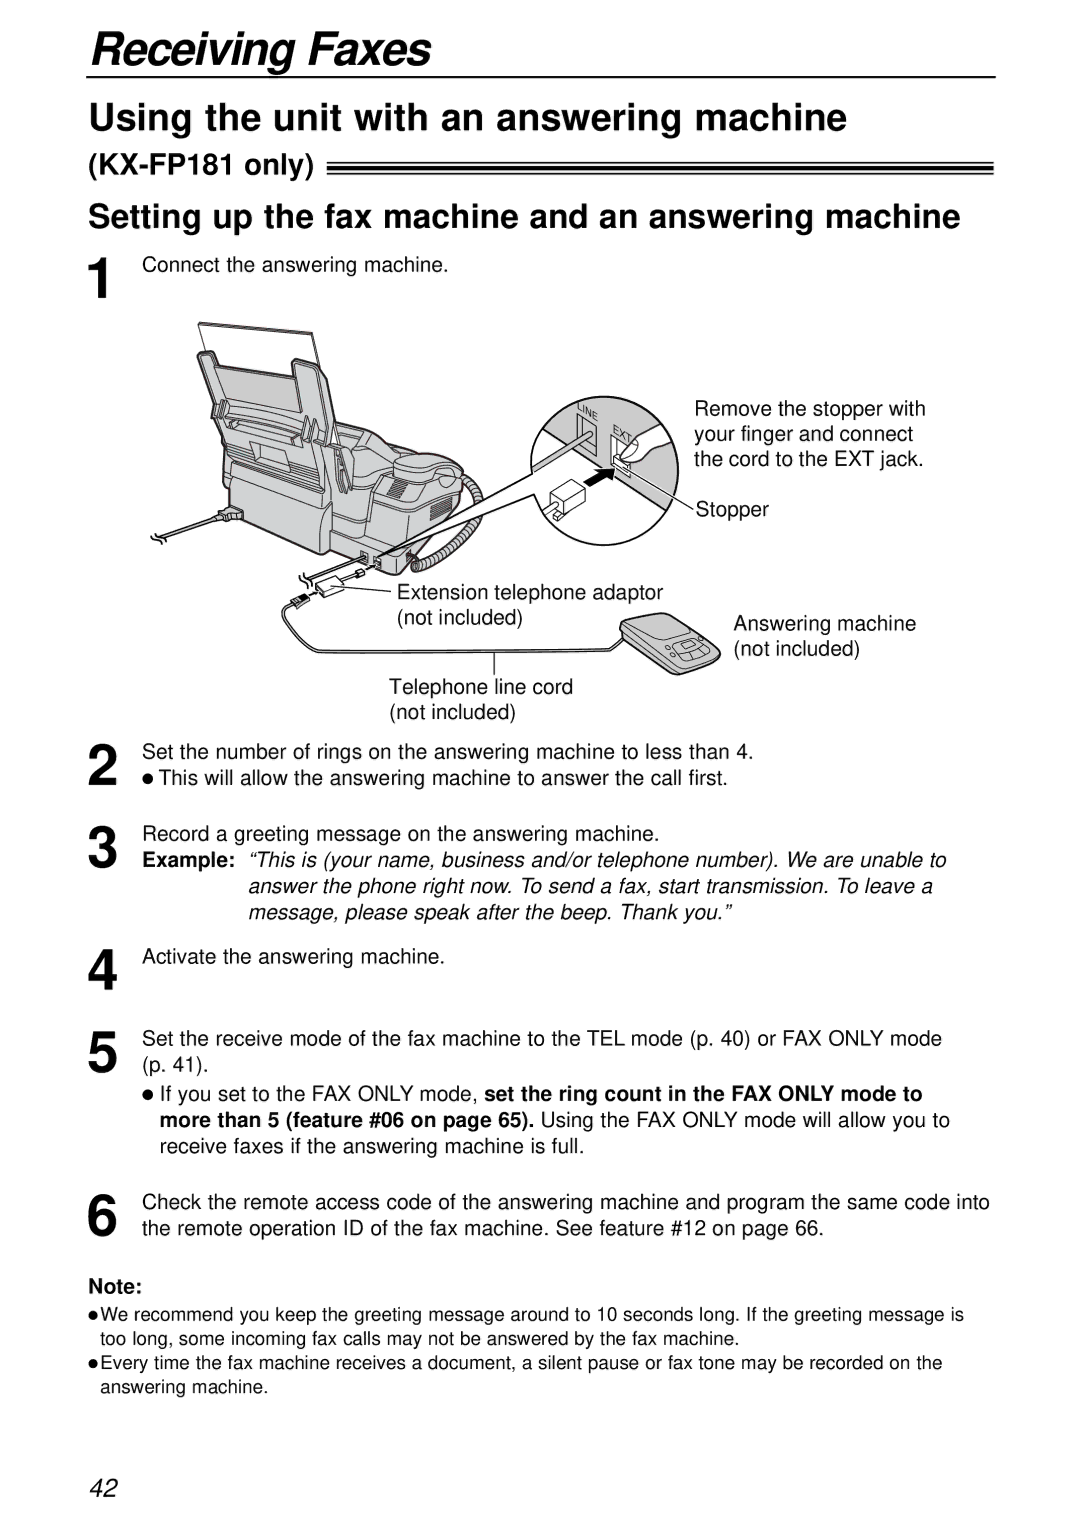
1 Connect the answering machine.
|
| Remove the stopper with |
|
| your finger and connect |
|
| the cord to the EXT jack. |
|
| Stopper |
| Extension telephone adaptor |
|
| (not included) | Answering machine |
|
| (not included) |
| Telephone line cord |
|
| (not included) |
|
2 | Set the number of rings on the answering machine to less than 4. | |
| ● This will allow the answering machine to answer the call first. | |
3 | Record a greeting message on the answering machine. |
|
Example: “This is (your name, business and/or telephone number). We are unable to | ||
| answer the phone right now. To send a fax, start transmission. To leave a | |
| message, please speak after the beep. Thank you.” | |
4 | Activate the answering machine. |
|
5 | Set the receive mode of the fax machine to the TEL mode (p. 40) or FAX ONLY mode | |
(p. 41). |
| |
● If you set to the FAX ONLY mode, set the ring count in the FAX ONLY mode to more than 5 (feature #06 on page 65). Using the FAX ONLY mode will allow you to receive faxes if the answering machine is full.
6 Check the remote access code of the answering machine and program the same code into the remote operation ID of the fax machine. See feature #12 on page 66.
Note:
●We recommend you keep the greeting message around to 10 seconds long. If the greeting message is too long, some incoming fax calls may not be answered by the fax machine.
●Every time the fax machine receives a document, a silent pause or fax tone may be recorded on the answering machine.
42