10.Press ENTER.
•The “BRIGHT ADJUST” screen will be displayed.
BRIGHT ADJUST
BRIGHT INSIDE
BRIGHT OUTSIDE
11.Press ▲▼ to select “BRIGHT INSIDE”.
12.Press ENTER.
•The “BRIGHT INSIDE” adjustment screen will be displayed.
BRIGHT INSIDE
INTERLOCKED | ON |
|
WHITE | 0 |
|
RED | 0 |
|
GREEN | 0 |
|
BLUE | 0 |
|
|
|
|
•When “INTERLOCKED” is set to “OFF”, individual adjustment of “RED”, “GREEN” and “BLUE” will be possible.
13.Press ▲▼ to select an item, and press ◄► to adjust the setting.
•Once adjustment is complete, press MENU to return to “BRIGHT ADJUST”.
14.Press ▲▼ to select the part of “UPPER”, “LOWER”, “RIGHT”, “LEFT”.
15.Use ◄► to adjust the width for correcting the “BRIGHT INSIDE” setting (0 to 255).
16.Press ▲▼ to select “BRIGHT OUTSIDE”.
BRIGHT INSIDE
BRIGHT OUTSIDE
OUTSIDE AREA
17.Press ENTER.
•The “BRIGHT OUTSIDE” adjustment screen will be displayed.
BRIGHT OUTSIDE
INTERLOCKED | ON |
|
WHITE | 0 |
|
RED | 0 |
|
GREEN | 0 |
|
BLUE | 0 |
|
|
|
|
•When “INTERLOCKED” is set to “OFF”, individual adjustment of “RED”, “GREEN” and “BLUE” will be possible.
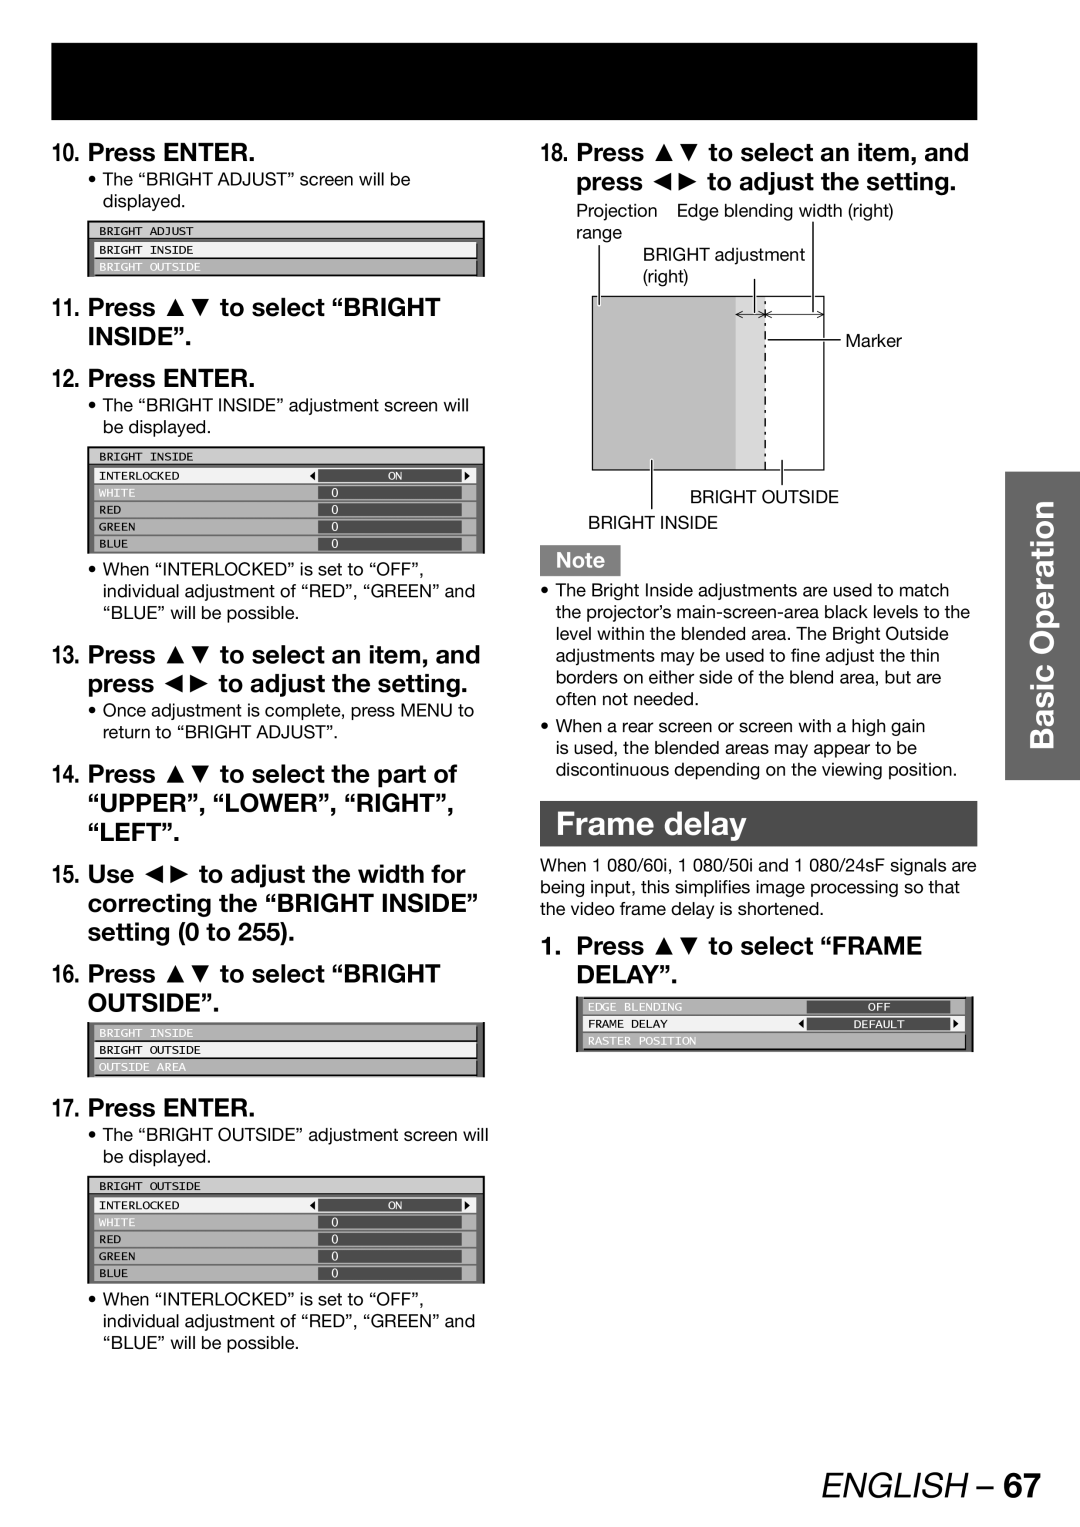
18. Press ▲▼ to select an item, and press ◄► to adjust the setting.
Projection Edge blending width (right) range
BRIGHT adjustment (right)
Marker
BRIGHT OUTSIDE
BRIGHT INSIDE
Note
•The Bright Inside adjustments are used to match the projector’s
•When a rear screen or screen with a high gain is used, the blended areas may appear to be discontinuous depending on the viewing position.
Frame delay
When 1 080/60i, 1 080/50i and 1 080/24sF signals are being input, this simplifies image processing so that the video frame delay is shortened.
1. Press ▲▼ to select “FRAME DELAY”.
| EDGE BLENDING | OFF |
|
| FRAME DELAY | DEFAULT |
|
| RASTER POSITION |
|
|
|
|
|
|
Basic Operation