Projection (continued)
6 3
1 27
5 4, | 9 |
6 |
|
5![]()
![]()
4, k![]()
![]()
![]()
![]()
![]()
![]() 8
8 ![]() j
j
9
Powering up the projector
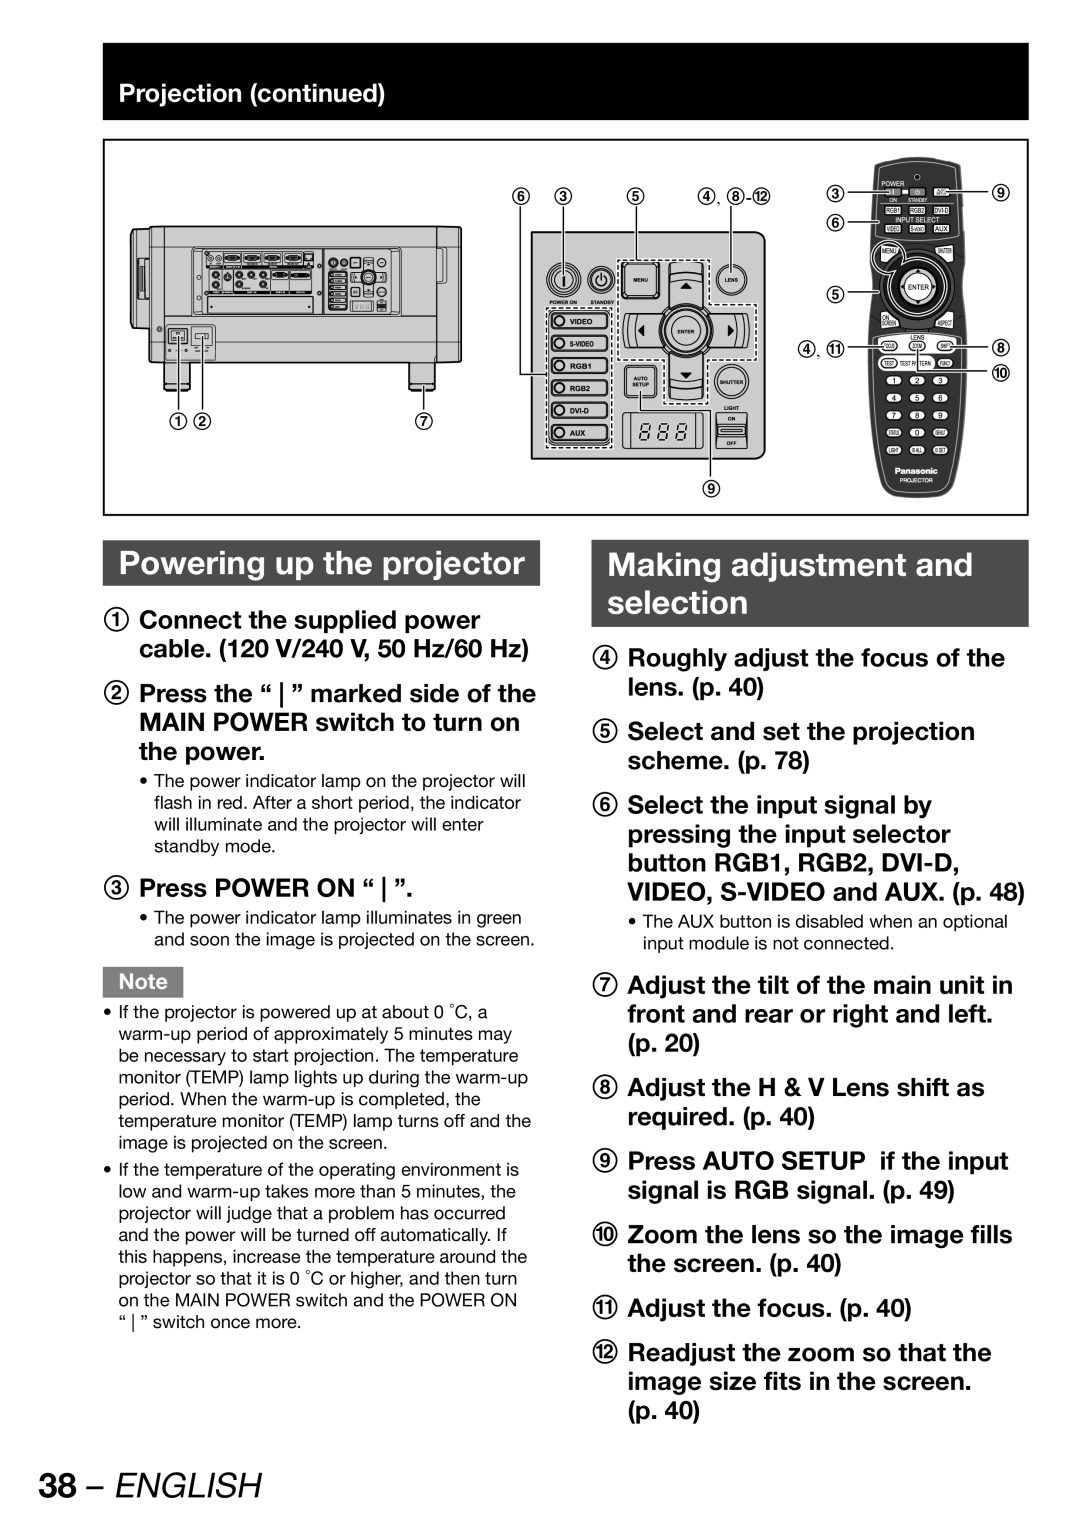
1 Connect the supplied power cable. (120 V/240 V, 50 Hz/60 Hz)
2 Press the “ ” marked side of the MAIN POWER switch to turn on the power.
•The power indicator lamp on the projector will flash in red. After a short period, the indicator will illuminate and the projector will enter standby mode.
3 Press POWER ON “ ”.
•The power indicator lamp illuminates in green and soon the image is projected on the screen.
Making adjustment and
selection
4 Roughly adjust the focus of the lens. (p. 40)
5 Select and set the projection scheme. (p. 78)
6 Select the input signal by pressing the input selector button RGB1, RGB2,
•The AUX button is disabled when an optional input module is not connected.
Note
•If the projector is powered up at about 0 °C, a
•If the temperature of the operating environment is low and
7 Adjust the tilt of the main unit in front and rear or right and left. (p. 20)
8 Adjust the H & V Lens shift as required. (p. 40)
9 Press AUTO SETUP if the input signal is RGB signal. (p. 49)
j Zoom the lens so the image fills the screen. (p. 40)
k Adjust the focus. (p. 40)
l Readjust the zoom so that the image size fits in the screen. (p. 40)