Display Option settings
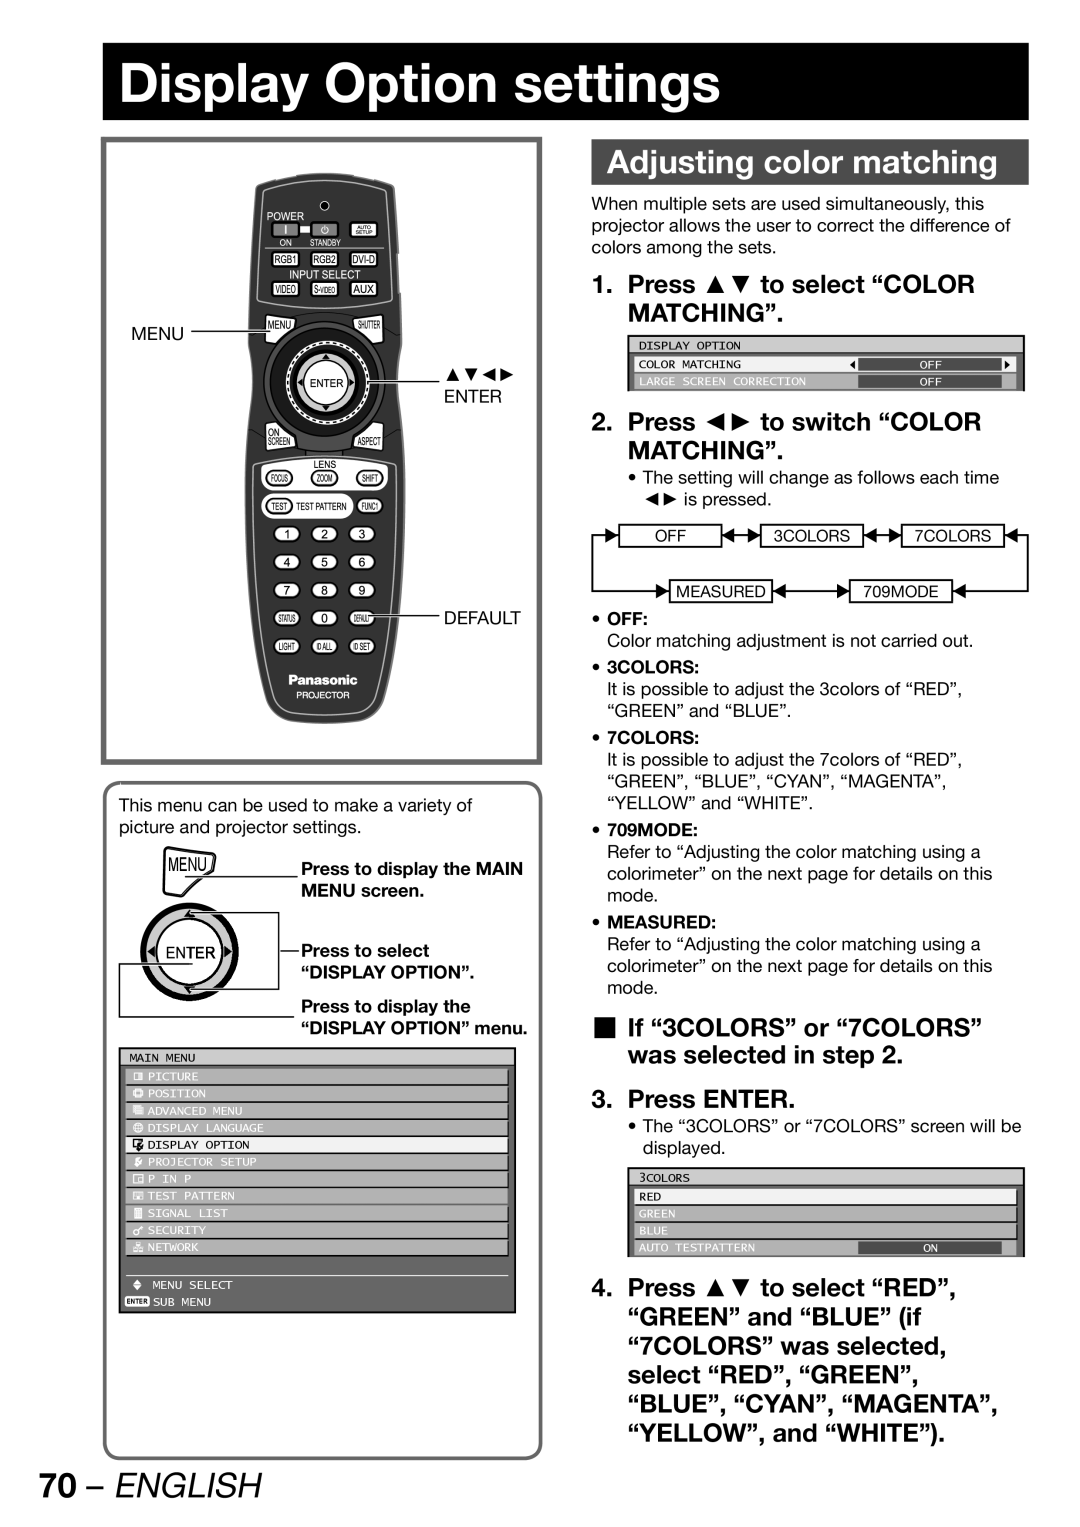
MENU
▲▼◄►
ENTER
![]()
![]()
![]()
![]()
![]()
![]() DEFAULT
DEFAULT
This menu can be used to make a variety of picture and projector settings.
MENU | Press to display the MAIN | |
|
| MENU screen. |
Press to select |
“DISPLAY OPTION”. |
Press to display the “DISPLAY OPTION” menu.
MAIN MENU
![]() PICTURE
PICTURE
![]() POSITION
POSITION
![]() ADVANCED MENU
ADVANCED MENU
![]() DISPLAY LANGUAGE
DISPLAY LANGUAGE
![]() DISPLAY OPTION
DISPLAY OPTION
![]() PROJECTOR SETUP
PROJECTOR SETUP
![]() P IN P
P IN P
![]() TEST PATTERN
TEST PATTERN
![]() SIGNAL LIST
SIGNAL LIST
![]() SECURITY
SECURITY
![]() NETWORK
NETWORK
MENU SELECT
ENTER SUB MENU
Adjusting color matching
When multiple sets are used simultaneously, this projector allows the user to correct the difference of colors among the sets.
1. Press ▲▼ to select “COLOR MATCHING”.
DISPLAY OPTION
COLOR | MATCHING | OFF |
|
LARGE | SCREEN CORRECTION | OFF |
|
|
|
|
|
2.Press ◄► to switch “COLOR MATCHING”.
•The setting will change as follows each time ◄► is pressed.
| OFF |
| 3COLORS |
| 7COLORS |
|
|
|
|
|
![]() MEASURED
MEASURED ![]()
![]() 709MODE
709MODE
•OFF:
Color matching adjustment is not carried out.
•3COLORS:
It is possible to adjust the 3colors of “RED”, “GREEN” and “BLUE”.
•7COLORS:
It is possible to adjust the 7colors of “RED”, “GREEN”, “BLUE”, “CYAN”, “MAGENTA”, “YELLOW” and “WHITE”.
•709MODE:
Refer to “Adjusting the color matching using a colorimeter” on the next page for details on this mode.
•MEASURED:
Refer to “Adjusting the color matching using a colorimeter” on the next page for details on this mode.
If “3COLORS” or “7COLORS” was selected in step 2.
3.Press ENTER.
•The “3COLORS” or “7COLORS” screen will be displayed.
3COLORS
RED |
|
GREEN |
|
BLUE |
|
AUTO TESTPATTERN | ON |
4.Press ▲▼ to select “RED”, “GREEN” and “BLUE” (if “7COLORS” was selected, select “RED”, “GREEN”, “BLUE”, “CYAN”, “MAGENTA”, “YELLOW”, and “WHITE”).
