•OFF:
Geometry correction is not performed.
•KEYSTONE:
This adjusts projected images when they are distorted to a trapezoid.
•CURVED:
This adjusts projected images when they are distorted to a curved surface.
•PC:
This is for performing geometry correction from a PC.
3.Select “KEYSTONE” or “CURVED” in Step 2, and then press ENTER.
•The “GEOMETRY:KEYSTONE” or “GEOMETRY:CURVED” screen will be displayed.
GEOMETRY:KEYSTONE
| VERTICAL KEYSTONE | 0 |
|
|
|
| VERTICAL SUB KEYSTONE | 0 |
|
|
|
|
|
|
|
|
|
| GEOMETRY:CURVED |
|
|
|
|
| LENS THROW RATIO | 0 |
|
|
|
| VERTICAL KEYSTONE | 0 |
|
|
|
|
|
|
|
|
|
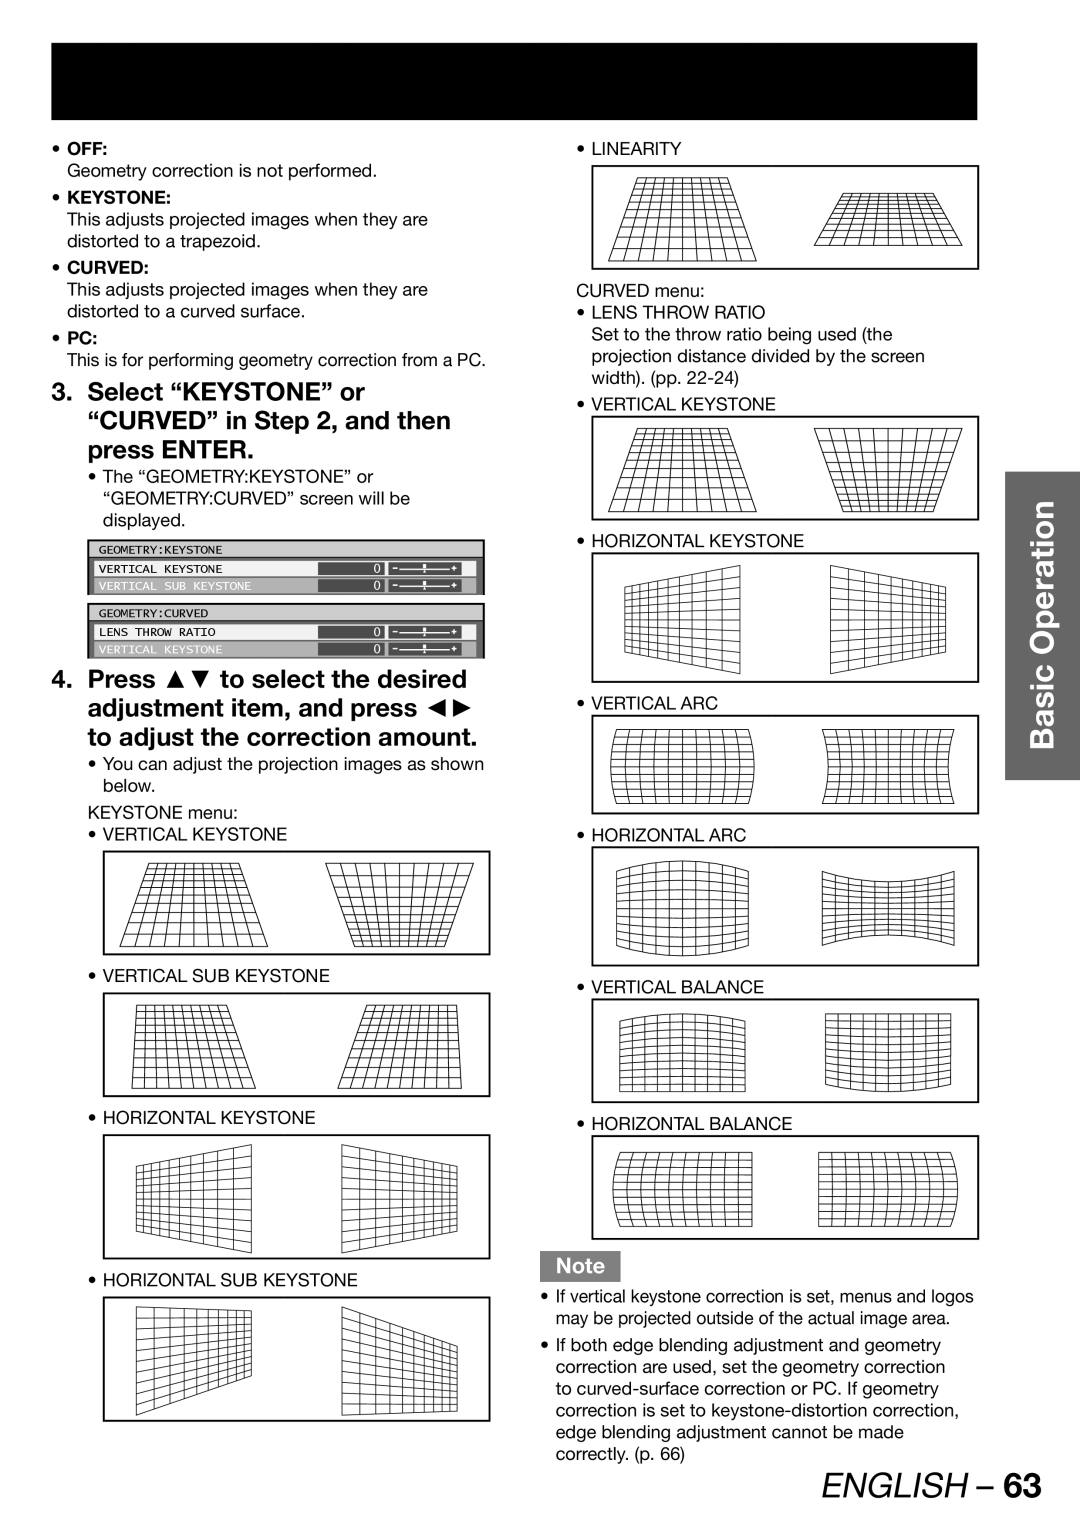
4.Press ▲▼ to select the desired adjustment item, and press ◄► to adjust the correction amount.
•You can adjust the projection images as shown below.
KEYSTONE menu:
•VERTICAL KEYSTONE
•VERTICAL SUB KEYSTONE
•HORIZONTAL KEYSTONE
• HORIZONTAL SUB KEYSTONE
• LINEARITY
CURVED menu:
•LENS THROW RATIO
Set to the throw ratio being used (the projection distance divided by the screen width). (pp.
•VERTICAL KEYSTONE
•HORIZONTAL KEYSTONE
•VERTICAL ARC
•HORIZONTAL ARC
•VERTICAL BALANCE
•HORIZONTAL BALANCE
Note
•If vertical keystone correction is set, menus and logos may be projected outside of the actual image area.
•If both edge blending adjustment and geometry correction are used, set the geometry correction to
Basic Operation