ASSIGNING CAMERA PERMISSIONS
Complete the following steps to assign or change camera permissions for a user:
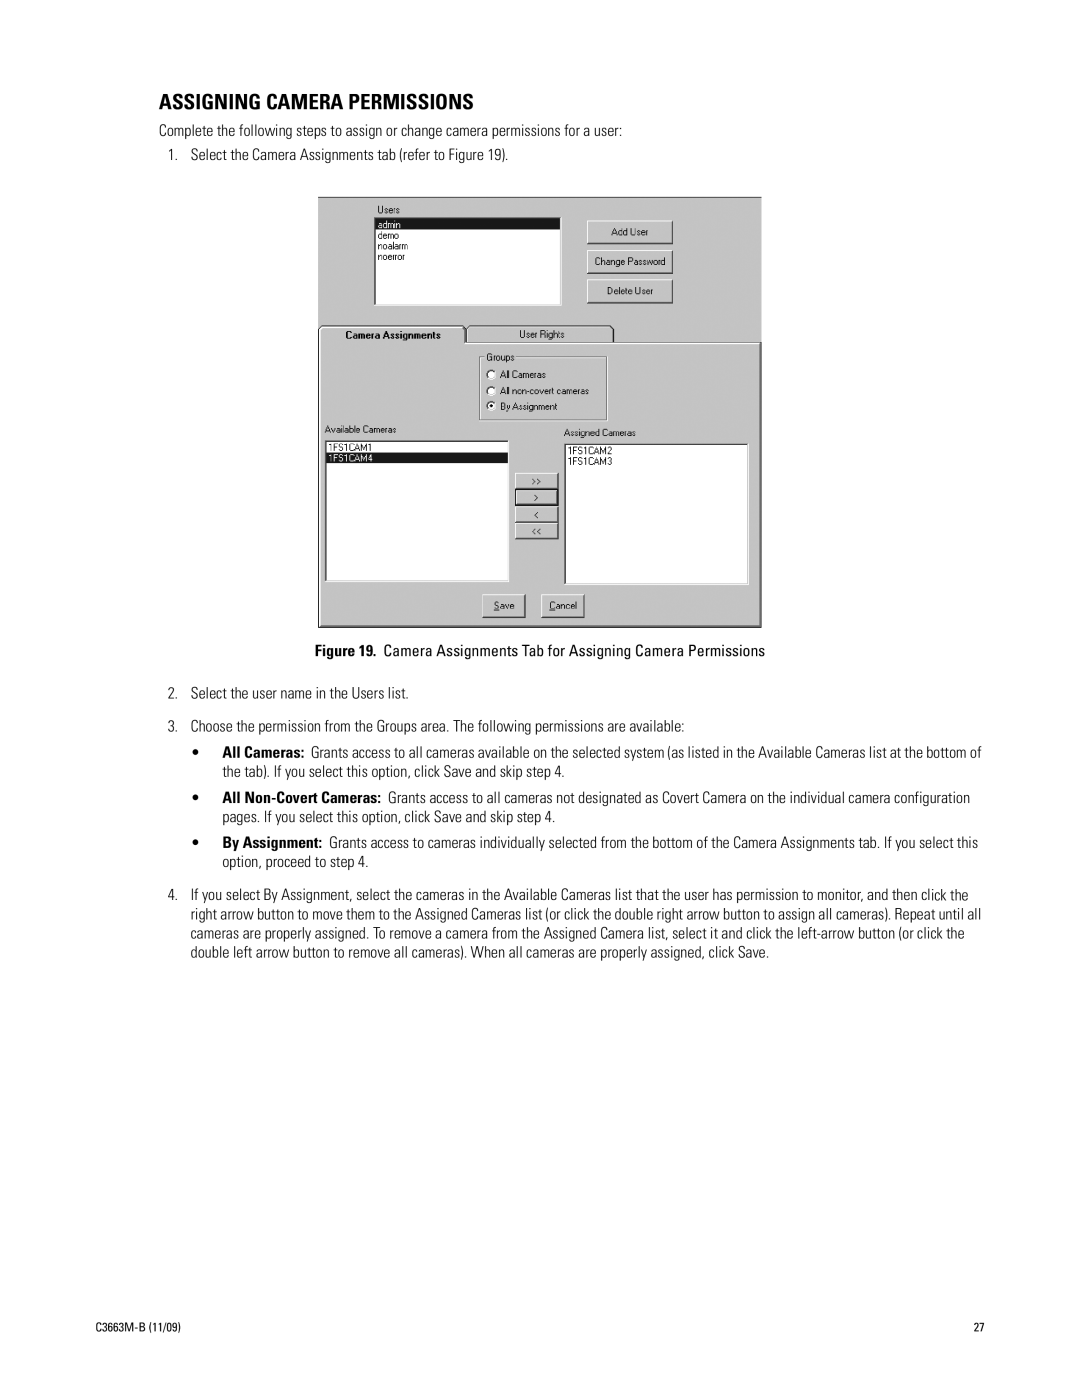
1. Select the Camera Assignments tab (refer to Figure 19).
Figure 19. Camera Assignments Tab for Assigning Camera Permissions
2.Select the user name in the Users list.
3.Choose the permission from the Groups area. The following permissions are available:
•All Cameras: Grants access to all cameras available on the selected system (as listed in the Available Cameras list at the bottom of the tab). If you select this option, click Save and skip step 4.
•All Non-Covert Cameras: Grants access to all cameras not designated as Covert Camera on the individual camera configuration pages. If you select this option, click Save and skip step 4.
•By Assignment: Grants access to cameras individually selected from the bottom of the Camera Assignments tab. If you select this option, proceed to step 4.
4.If you select By Assignment, select the cameras in the Available Cameras list that the user has permission to monitor, and then click the right arrow button to move them to the Assigned Cameras list (or click the double right arrow button to assign all cameras). Repeat until all cameras are properly assigned. To remove a camera from the Assigned Camera list, select it and click the
| 27 |
