ADDING AND CONFIGURING CAMERAS
After you add cameras to a system, you can configure them by clicking the respective name under any of the Cameras directories in which they are shown.
NOTE: If you click a Cameras directory, any configuration changes are applied to all cameras in that directory. After you make the changes, click “Apply To All Cameras in Folder.” This feature is not available on the Motion tab; it is unlikely that a user would want the identical motion mask on multiple cameras.
GENERAL
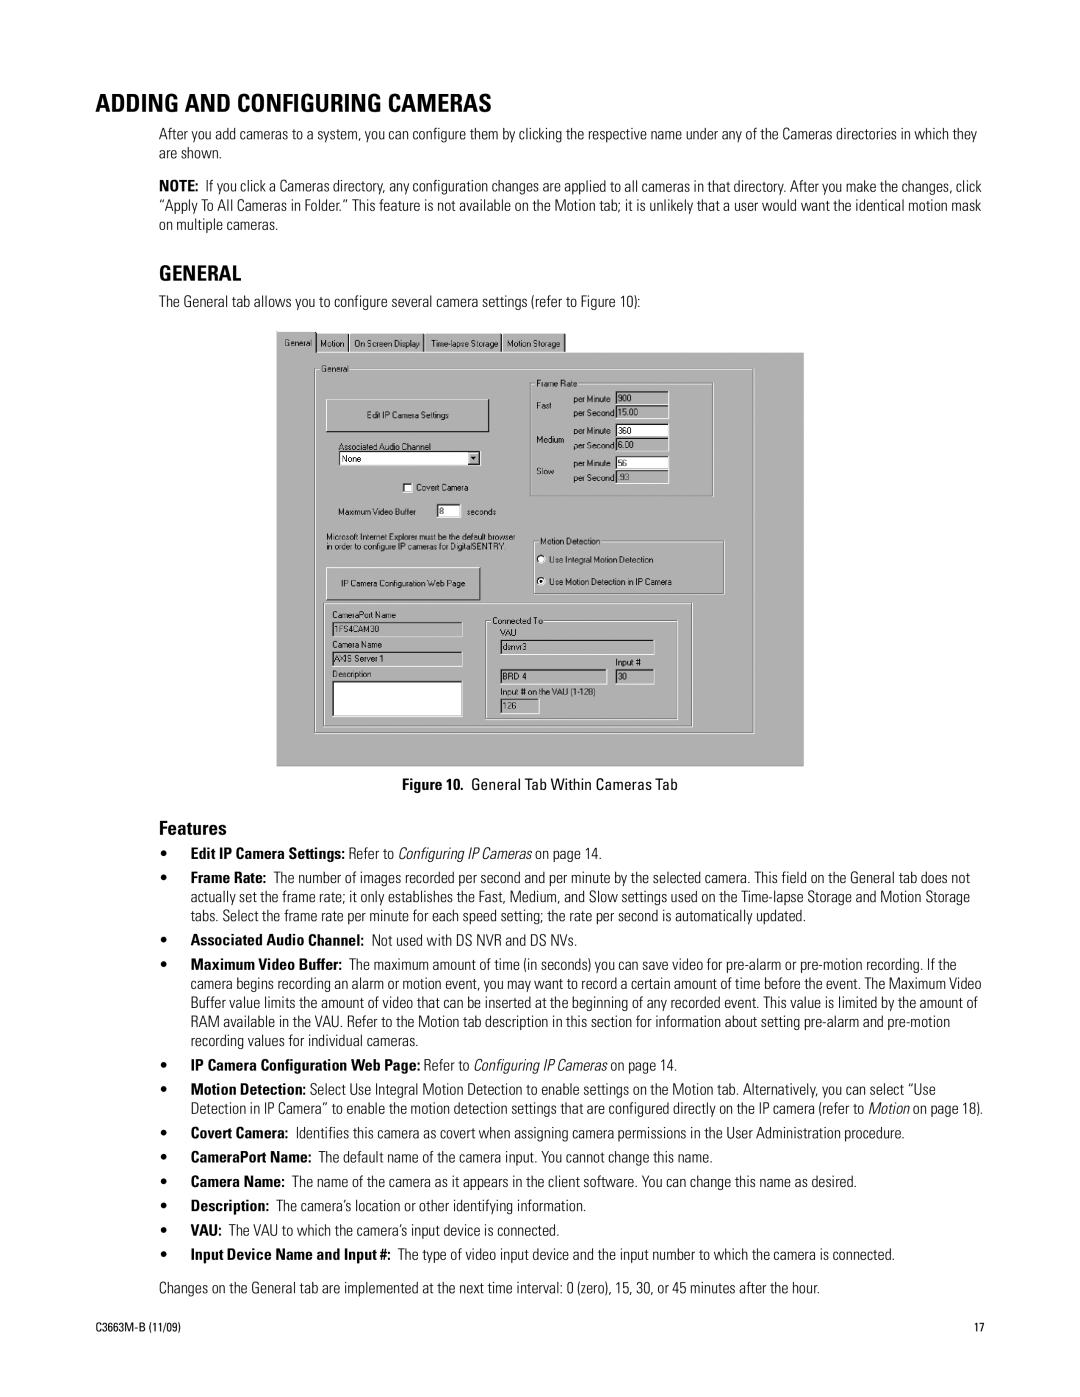
The General tab allows you to configure several camera settings (refer to Figure 10):
Figure 10. General Tab Within Cameras Tab
Features
•Edit IP Camera Settings: Refer to Configuring IP Cameras on page 14.
•Frame Rate: The number of images recorded per second and per minute by the selected camera. This field on the General tab does not actually set the frame rate; it only establishes the Fast, Medium, and Slow settings used on the
•Associated Audio Channel: Not used with DS NVR and DS NVs.
•Maximum Video Buffer: The maximum amount of time (in seconds) you can save video for
•IP Camera Configuration Web Page: Refer to Configuring IP Cameras on page 14.
•Motion Detection: Select Use Integral Motion Detection to enable settings on the Motion tab. Alternatively, you can select “Use Detection in IP Camera” to enable the motion detection settings that are configured directly on the IP camera (refer to Motion on page 18).
•Covert Camera: Identifies this camera as covert when assigning camera permissions in the User Administration procedure.
•CameraPort Name: The default name of the camera input. You cannot change this name.
•Camera Name: The name of the camera as it appears in the client software. You can change this name as desired.
•Description: The camera’s location or other identifying information.
•VAU: The VAU to which the camera’s input device is connected.
•Input Device Name and Input #: The type of video input device and the input number to which the camera is connected.
Changes on the General tab are implemented at the next time interval: 0 (zero), 15, 30, or 45 minutes after the hour.
17 |