The Initial Setup menu | 12 |
Chapter 12
The Initial Setup menu
Using the Initial Setup menu
The Initial Setup menu is where you can set various recorder options for sound, picture, language and so on.
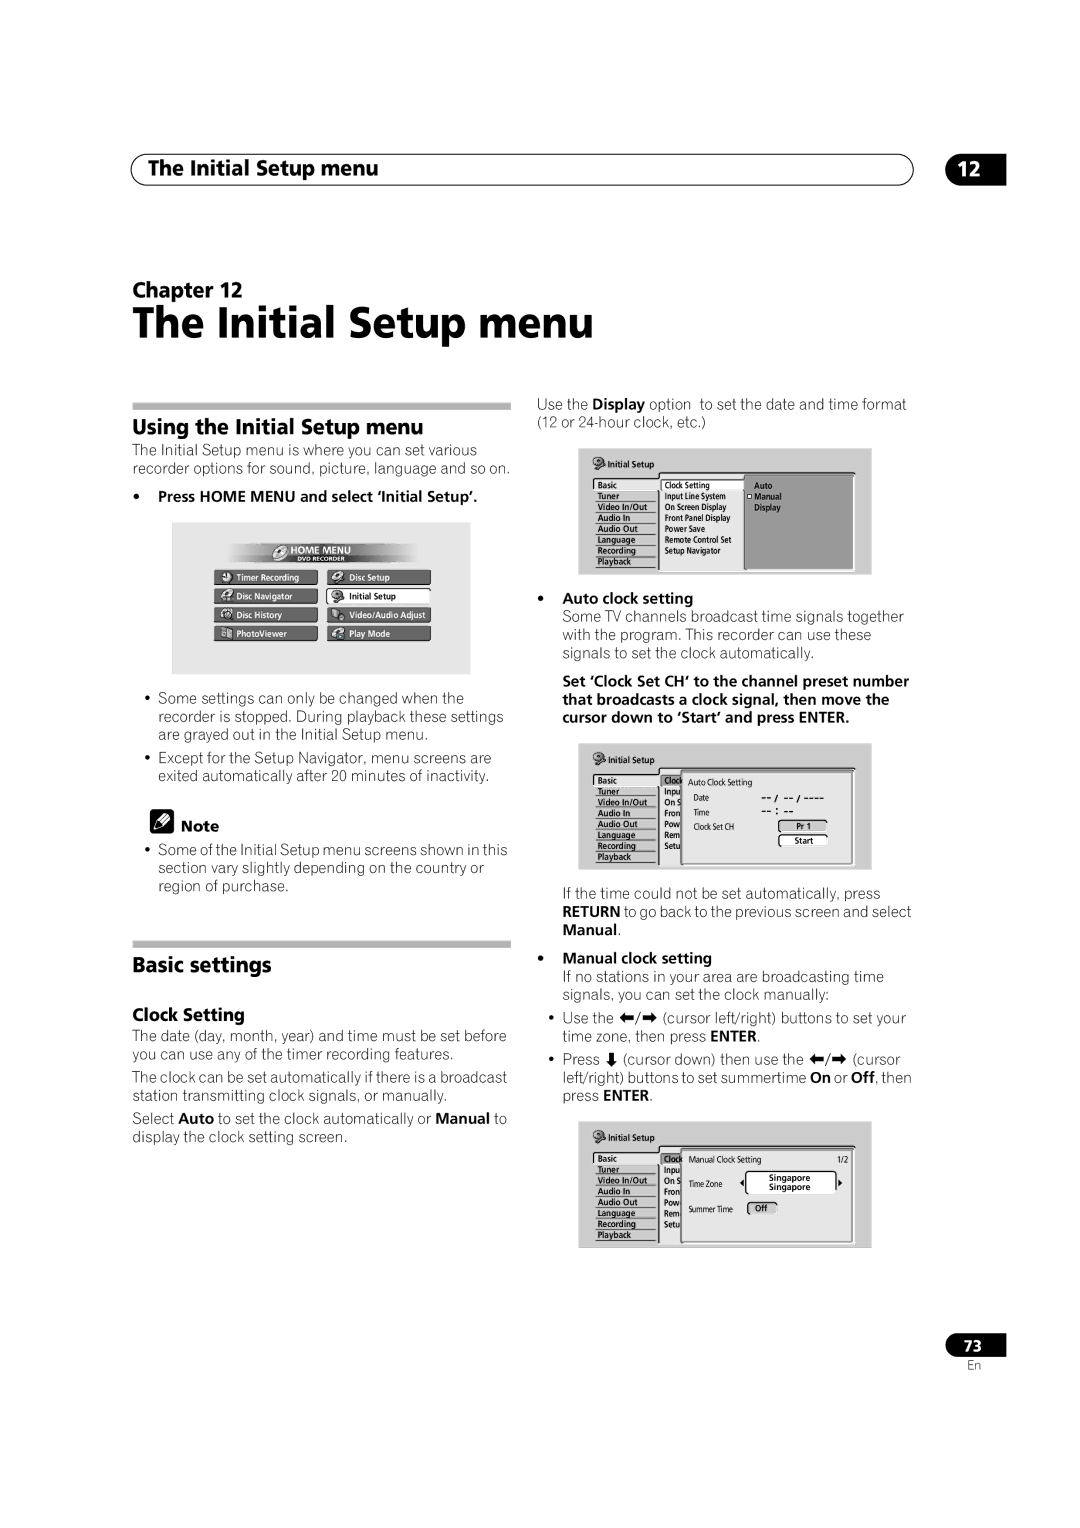
•Press HOME MENU and select ‘Initial Setup’.
Timer Recording | Disc Setup |
Disc Navigator | Initial Setup |
Disc History | Video/Audio Adjust |
PhotoViewer | Play Mode |
•Some settings can only be changed when the recorder is stopped. During playback these settings are grayed out in the Initial Setup menu.
•Except for the Setup Navigator, menu screens are exited automatically after 20 minutes of inactivity.
![]() Note
Note
•Some of the Initial Setup menu screens shown in this section vary slightly depending on the country or region of purchase.
Basic settings
Clock Setting
The date (day, month, year) and time must be set before you can use any of the timer recording features.
The clock can be set automatically if there is a broadcast station transmitting clock signals, or manually.
Select Auto to set the clock automatically or Manual to display the clock setting screen.
Use the Display option to set the date and time format (12 or
Initial Setup |
|
|
Basic | Clock Setting | Auto |
Tuner | Input Line System | Manual |
Video In/Out | On Screen Display | Display |
Audio In | Front Panel Display |
|
Audio Out | Power Save |
|
Language | Remote Control Set |
|
Recording | Setup Navigator |
|
Playback |
|
|
•Auto clock setting
Some TV channels broadcast time signals together with the program. This recorder can use these signals to set the clock automatically.
Set ‘Clock Set CH‘ to the channel preset number that broadcasts a clock signal, then move the cursor down to ‘Start’ and press ENTER.
Initial Setup |
|
|
|
Basic | Clock | Auto Clock Setting |
|
Tuner | Input | Date |
|
Video In/Out | On |
| |
Time |
| ||
Audio In | Front |
| |
Audio Out | Power | Clock Set CH | Pr 1 |
Language | Remote | Start | |
Recording | Setup |
| |
|
| ||
Playback
If the time could not be set automatically, press RETURN to go back to the previous screen and select Manual.
•Manual clock setting
If no stations in your area are broadcasting time signals, you can set the clock manually:
• Use the | (cursor left/right) buttons to set your | |
time zone, then press ENTER. |
| |
• Press | (cursor down) then use the | (cursor |
left/right) buttons to set summertime On or Off, then press ENTER.
Initial Setup |
|
|
|
|
Basic | Clock Manual Clock Setting | 1/2 | ||
Tuner | Input |
|
| Singapore |
Video In/Out | On | Time Zone |
| |
Audio In | Front |
| Singapore | |
|
| |||
Audio Out | Power Summer Time | Off |
| |
Language | Remote |
|
| |
Recording | Setup |
|
|
|
Playback |
|
|
|
|
73
En