Expert System Settings
Acoustic Calibration EQ
This receiver lets you choose between two types of ACOUSTIC CAL EQ equalizer curves: ALL CH ADJUST and FRONT ALIGN, with the former equalizing the speakers individually and the latter equalizing the speakers in accordance with the front speakers. Features here allow you to put in your own equalizer preferences. To do this use the DATA COPY feature to copy the settings in ALL CH ADJUST and FRONT ALIGN modes and paste them into CUSTOM 1 or CUSTOM 2. You then choose between the ALL CH ADJUST and FRONT ALIGN types of curves and increase the amount of a certain frequency in each speaker in accordance with your preferences. When you playback a source you can choose CUSTOM 1 or CUSTOM 2 to apply your preferences to playback. When setting up using the ALL CH ADJUST mode you can adjust each speaker individually. With the FRONT ALIGN mode the front speakers will serve as the reference so you cannot adjust them.
The DATA CHECK feature allows you to see how the settings in ALL CH ADJUST and FRONT ALIGN currently stand. When you use ACOUSTIC CAL EQ function (see page 51) you can toggle between the two basic settings, ALL CH ADJUST and FRONT ALIGN, and the variations you set yourself, CUSTOM 1 and CUSTOM 2.
1
2
3
To use the EQ AUTO SETTING feature follow the step here.
Follow steps
Memo:
If you have already performed AUTO SETTING (page 13), this setting is not necessary.
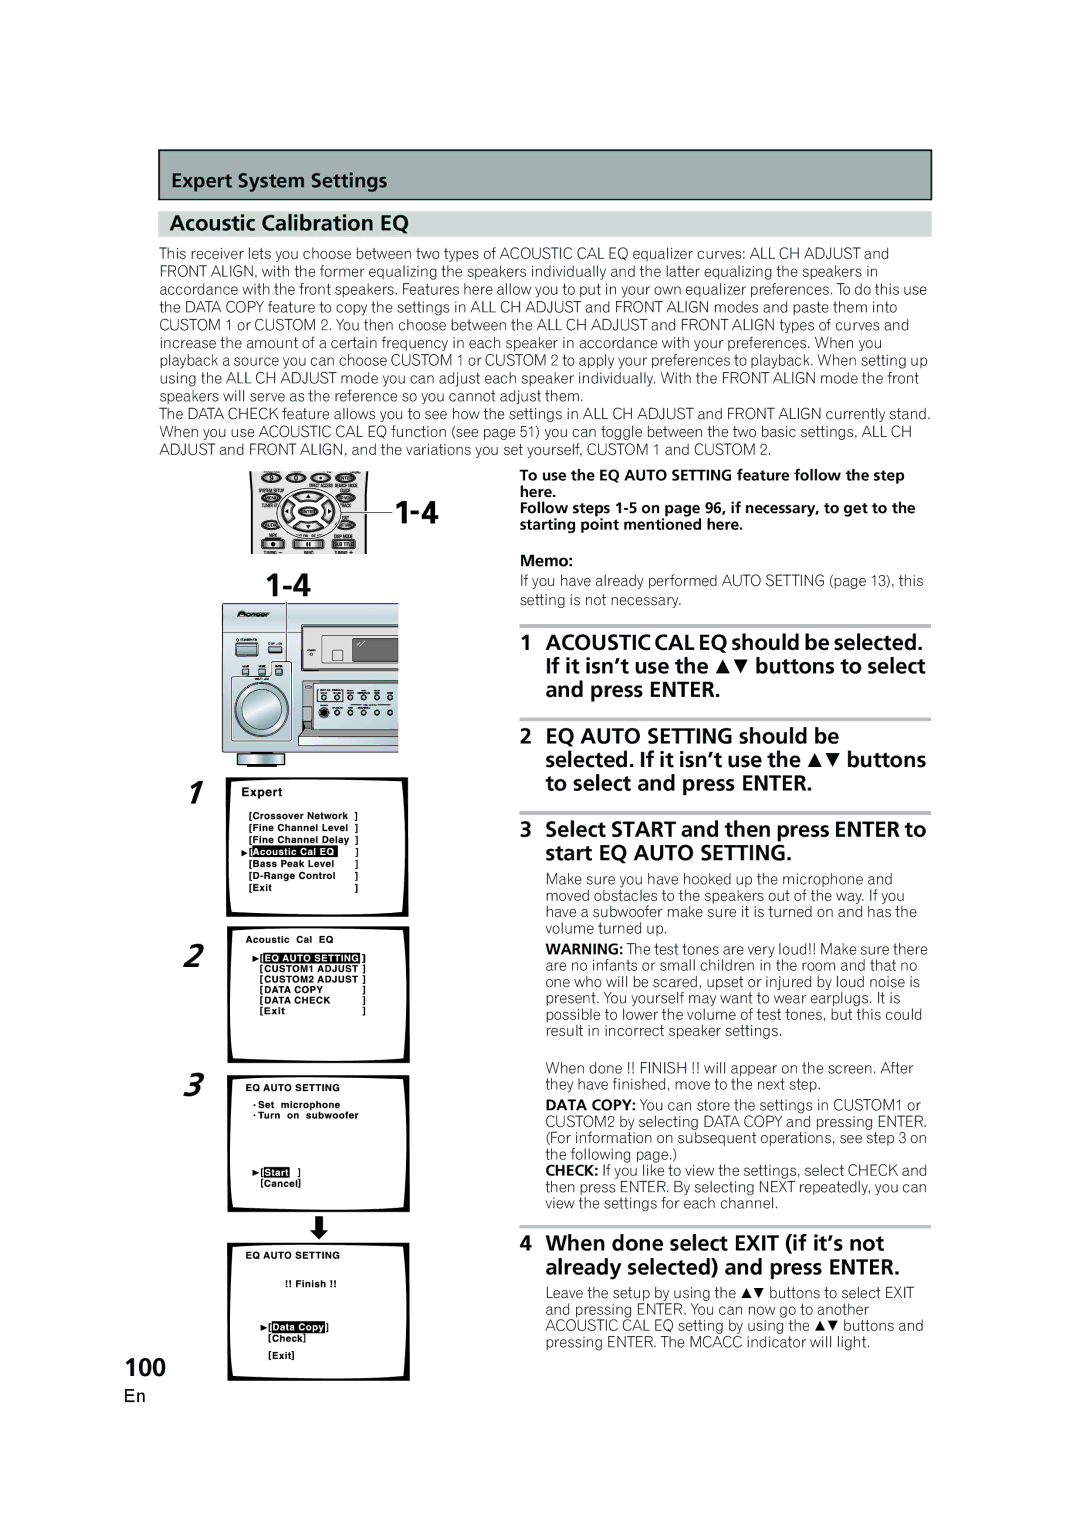
1ACOUSTIC CAL EQ should be selected. If it isn’t use the buttons to select and press ENTER.
2EQ AUTO SETTING should be selected. If it isn’t use the buttons to select and press ENTER.
3Select START and then press ENTER to start EQ AUTO SETTING.
Make sure you have hooked up the microphone and moved obstacles to the speakers out of the way. If you have a subwoofer make sure it is turned on and has the volume turned up.
WARNING: The test tones are very loud!! Make sure there are no infants or small children in the room and that no one who will be scared, upset or injured by loud noise is present. You yourself may want to wear earplugs. It is possible to lower the volume of test tones, but this could result in incorrect speaker settings.
When done !! FINISH !! will appear on the screen. After they have finished, move to the next step.
DATA COPY: You can store the settings in CUSTOM1 or CUSTOM2 by selecting DATA COPY and pressing ENTER. (For information on subsequent operations, see step 3 on the following page.)
CHECK: If you like to view the settings, select CHECK and then press ENTER. By selecting NEXT repeatedly, you can view the settings for each channel.
4 When done select EXIT (if it’s not already selected) and press ENTER.
Leave the setup by using the buttons to select EXIT and pressing ENTER. You can now go to another ACOUSTIC CAL EQ setting by using the buttons and pressing ENTER. The MCACC indicator will light.
100
En