Using i.LINK Interface
i.LINK connectors
Use a
Be sure to insert the i.LINK cable straight into connector. When
properly aligned the
cable can be inserted with little resistance. Forcing the cable into
the connector will
damage the connector
pins.
Memo:
•When properly connected, the i.LINK plug will snap into the connector. If not connected properly the receiver will not be able to recognize any connected components.
•After connecting an
•You can connect several
•There may be cases where the PQLS/ rate control function and/or the i.LINK audio does not work properly even when connected to an
•Do not connect/disconnect i.LINK cables or switch on/off any components connected using i.LINK while the receiver is on.
PREPARATION
Creating an i.LINK Network
Using the i.LINK interface it is possible to chain up to 17 components together so that the digital audio and control signals from each component is available to other components in the network. With the addition of an i.LINK repeater, it’s possible to connect up to 63 components.
i.LINK connectors come in
This receiver is compatible with i.LINK Audio (also called “A & M Protocol”) components, such as DVD players. It may not work properly if connected to i.LINK
Receivers need to be DTCP (Digital Transmission Content Protection) compliant to be able to play
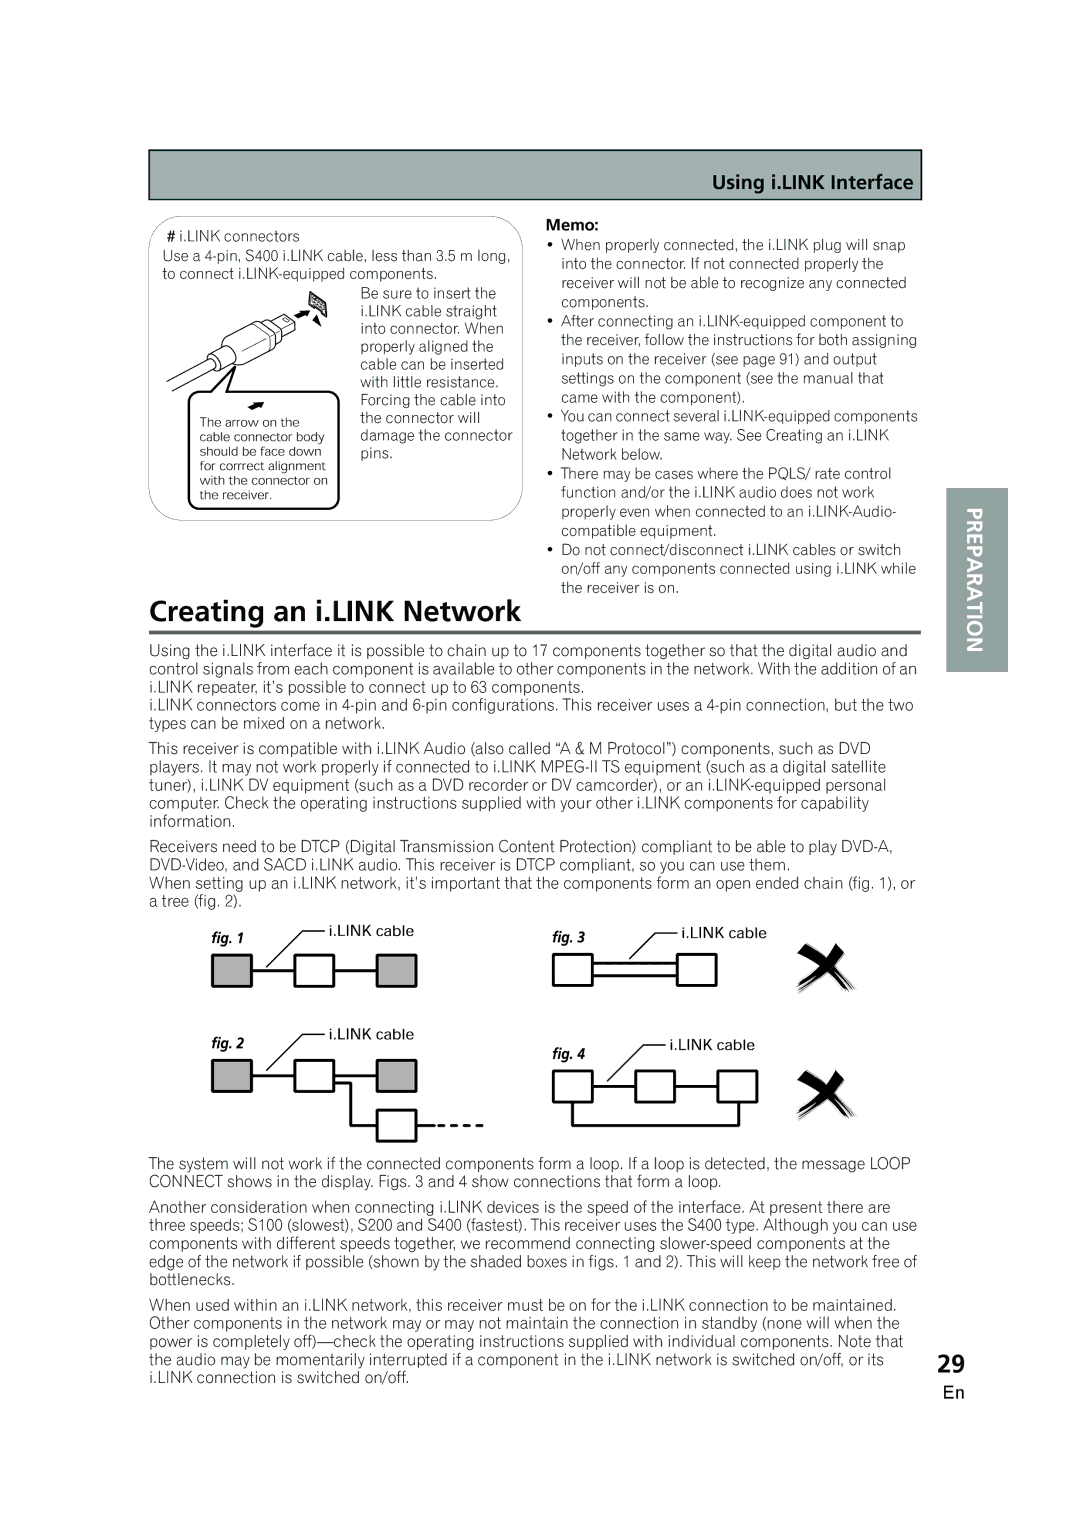
When setting up an i.LINK network, it’s important that the components form an open ended chain (fig. 1), or a tree (fig. 2).
The system will not work if the connected components form a loop. If a loop is detected, the message LOOP CONNECT shows in the display. Figs. 3 and 4 show connections that form a loop.
Another consideration when connecting i.LINK devices is the speed of the interface. At present there are three speeds; S100 (slowest), S200 and S400 (fastest). This receiver uses the S400 type. Although you can use components with different speeds together, we recommend connecting
When used within an i.LINK network, this receiver must be on for the i.LINK connection to be maintained. Other components in the network may or may not maintain the connection in standby (none will when the power is completely
29
En