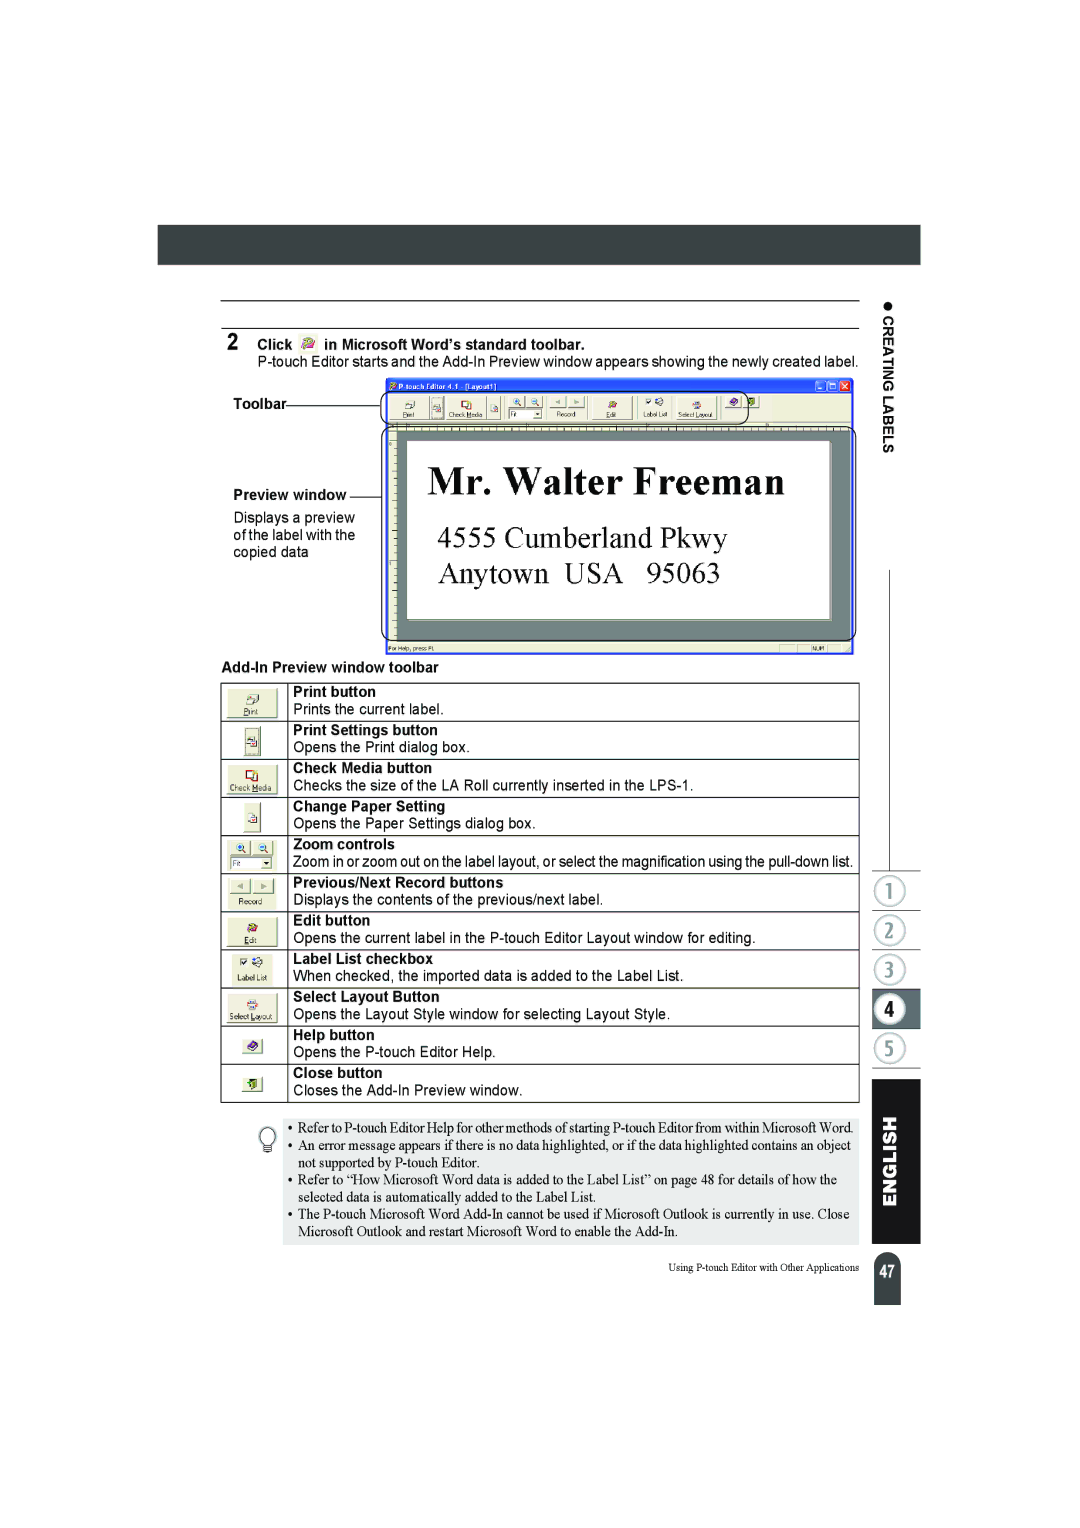
2 Click in Microsoft Word’s standard toolbar.
Toolbar
Preview window
Displays a preview of the label with the copied data
Add-In Preview window toolbar
Print button
Prints the current label.
Print Settings button
Opens the Print dialog box.
Check Media button
Checks the size of the LA Roll currently inserted in the
Change Paper Setting
Opens the Paper Settings dialog box.
Zoom controls
Zoom in or zoom out on the label layout, or select the magnification using the
Previous/Next Record buttons
Displays the contents of the previous/next label.
Edit button
Opens the current label in the
Label List checkbox
When checked, the imported data is added to the Label List.
Select Layout Button
Opens the Layout Style window for selecting Layout Style.
Help button
Opens the
Close button
Closes the Add-In Preview window.
• Refer to
• An error message appears if there is no data highlighted, or if the data highlighted contains an object not supported by
•Refer to “How Microsoft Word data is added to the Label List” on page 48 for details of how the selected data is automatically added to the Label List.
•The
z CREATING LABELS
Using
47 |